 | ||
| Your browser is not supported. | ||
|
Please browse our site using any of the following options:
| ||
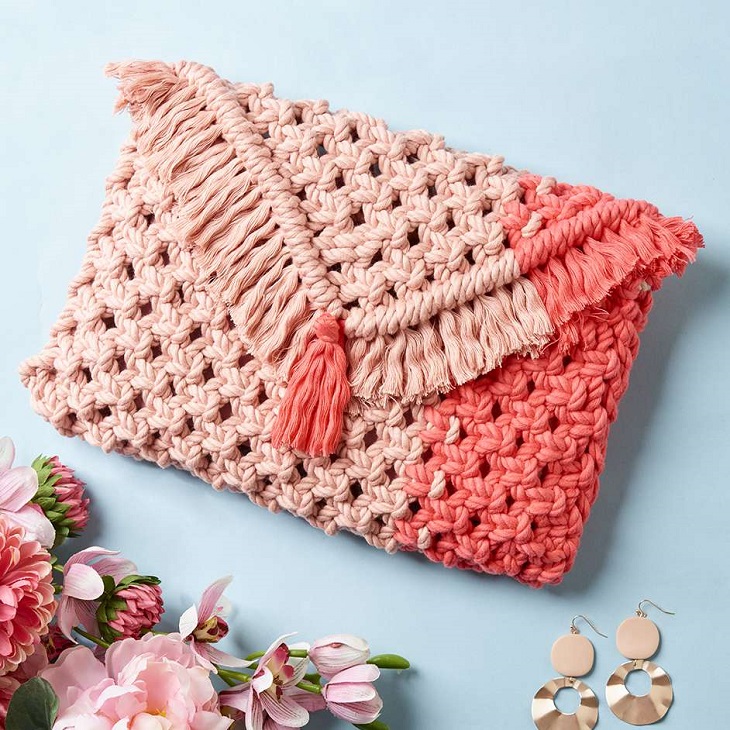
MACRAME TWO-TONE CLUTCH

Level: Easy
WHAT YOU'LL NEED
- 2 x Macrame Twist Cotton, Blush
- 1 x Macrame Twist Cotton, Coral
- Scissors
- Measuring tape
- Darning needle
INSTRUCTIONS
Step 1 - Cut a piece of cord 1m long, this will be your holding cord.
Step 2 - Cut 20 pieces of cord each 3.5m long.
Step 3 - Start by tying the holding cord between 2 secure spots.
Step 4 - Tie the 20 cords onto the holding cord using a Larks Head Knot. To do this fold the working cord in half, place the folded end behind the holding cord and pull the loose ends of the working cord through the folded loop. Pull tight, securing it to the holding cord. Repeat for the rest of the working cords.
Step 5 - Begin tying a square knot with the first 4 cords. Pass the right cord to the left under the 2 middle cords and over the left cord. Then take the left cord and bring it to the right over the 2 middle cords and under the right cord. Pull the right and left cords tight to securely tie the knot. Repeat this same process but starting with the left cord first to complete the square knot.
Step 6 - Repeat this process for the rest of the cords to create a row of 10 square knots.
Step 7 - For the 2nd row you will be creating alternating square knots. Skip the first 2 cords and tie square knots using the 2 right and 2 left cords from the knots above. Continue this across the row until you've tied 9 square knots.
Step 8 - Continue repeating Step 6 and 7 until you have 24 rows of squares knots. As the piece grows continually check how large you want your clutch by folding the piece in half to gage how big you want it.
Step 9 - Once you have reached the size you are happy with you can begin creating the flap of your clutch. Continue tying Square Knots for 8 rows but with each row tie 2 less square knots from the edges this will create a V shape.
Step 10 - Next you will create a row of Diagonal Half Inch knots. Starting on the left-hand side, pull the end cord diagonally across the front of the other cords. Then start tying diagonal half inch knots (see diagram below), working from the left into the centre. Each cord needs to be tied twice. Stop once you reach the centre.
Step 11 - Repeat step 10 on the right side to create the 2nd row on that side and again once you reach the last cord leave it and instead do the knots on the lead cord that was left on the left-hand side.
Step 12 - Trim the ends of the cords to be roughly an inch long and separate the cords to create a fringe finish. Using the hot pink cord create a small tassel and tie it onto the centre front of the flap.
Step 13 - Fold the bag in half so the right side is inside. Take the left-over cord from the holding cord and thread it through the darning needle and place the needle between the Larks Head Knot and the Square Knot pulling the cord through. Then on the other side of the bag, place the needle in the big loop between the square knots in the first 2 rows. Continue threading the cord between each of the 2 big loops between "square knots", pull the cord gently to bring the 2 sides together.
Step 14 - To finish pass the needle through the single loop left at the bottom of the bag and pass the cord through to the other side (inside) of the bag. Weave the remaining cord through some of the knots until secure and cut off any excess.
Step 15 - Repeat steps 10 and 11 on the other side to complete sewing the bag together. Turn the bag right side out and it is now ready to use!


