 | ||
| Your browser is not supported. | ||
|
Please browse our site using any of the following options:
| ||
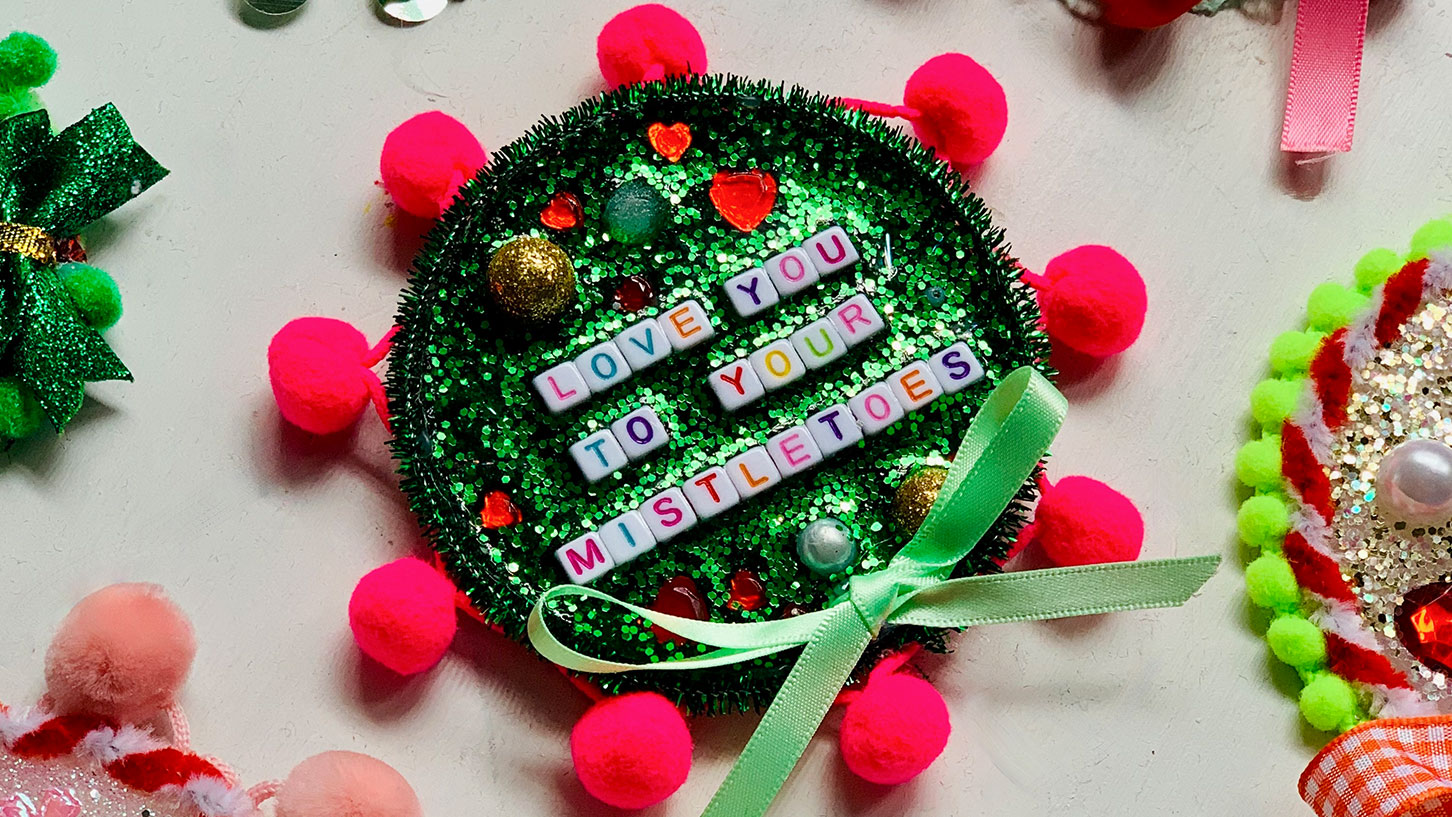
Make Christmas extra special this year with this personalised Christmas ornament

There's nothing more heart-warming than a personalised Christmas ornament that means something special to you! This year we are lucky enough to have Rachel Bourke from @imakestagram share with us her favourite Christmas tradition - handmade resin badges for her family and friends.
This is a versatile Christmas craft project that you can give as a gift, use as a place name for the Christmas table or even as gift tags to give your presents an extra pop! It's a lovely project that could become a Christmas tradition in your home for years to come.
So, if you share a special nickname or sayings with your loved ones that you know you would never find on a store-bought decoration then this is the perfect project for you! Find all the information you need below to create your very own personalised resin badge this Christmas.
What you'll need:
- Pebeo Gede Crystal Resin Pack
- American Crafts Colour Pour Resin Coaster Molds White
- Fine Glitter
- Jolly and Joy Bauble fillers
- Paper cup
- Brooch backs
- Tweezers
- Chenille sticks
- Pom pom trim
- Felt
- Ribbon
- Beads and gems
- Hot glue gun and glue sticks
- Gloves
Instructions:
Step 1 - First make sure you have a clean area to work on, lay down a protective sheet to protect your work surface and put on some gloves.
Step 2 - Then open the resin kit and start mixing the resin in a paper cup following the packet instructions.
Step 3 - Next add some of the glitter into the cup and mix together with the resin.
Step 4 - Now pour the glittery resin into the coaster mould ensuring the mould is nice and full.
Step 5 - While the resin is still wet, use the tweezers to position the alphabet beads into position in the resin, spelling out the name or saying you've chosen.
Step 6 - Next use the tweezers to place the bauble filler balls, beads and gems into the resin to decorate.
Step 7 - Leave to dry for 24 hours.
Step 8 - Once the resin is dry, carefully remove the resin out of the mould.
Step 9 - Now it's time to decorate! Place some hot glue around the outside edge of the resin and position a chenille stick on top, following the curve of the circle.
Step 10 - Next glue on the pom pom trim to the back side of the resin and position in place.
Step 11 - Then cut the piece of felt into a circle the same shape as the coaster mould. Spread hot glue across the back of the resin and stick the felt in place. This will cover the trim and any other imperfections on the back of the brooch.
Step 12 - Next use some more hot glue to glue the brooch back onto the felt and leave to dry.
Step 13 - Then tie a little bow out of the ribbon and glue in place on the front of your brooch to finish!
Add your brooch to a stocking, present or table setting to create a truly unique and personalised Christmas ornament for your friends and family this year!
For more Christmas craft project ideas, check out all our free projects here.


