 | ||
| Your browser is not supported. | ||
|
Please browse our site using any of the following options:
| ||
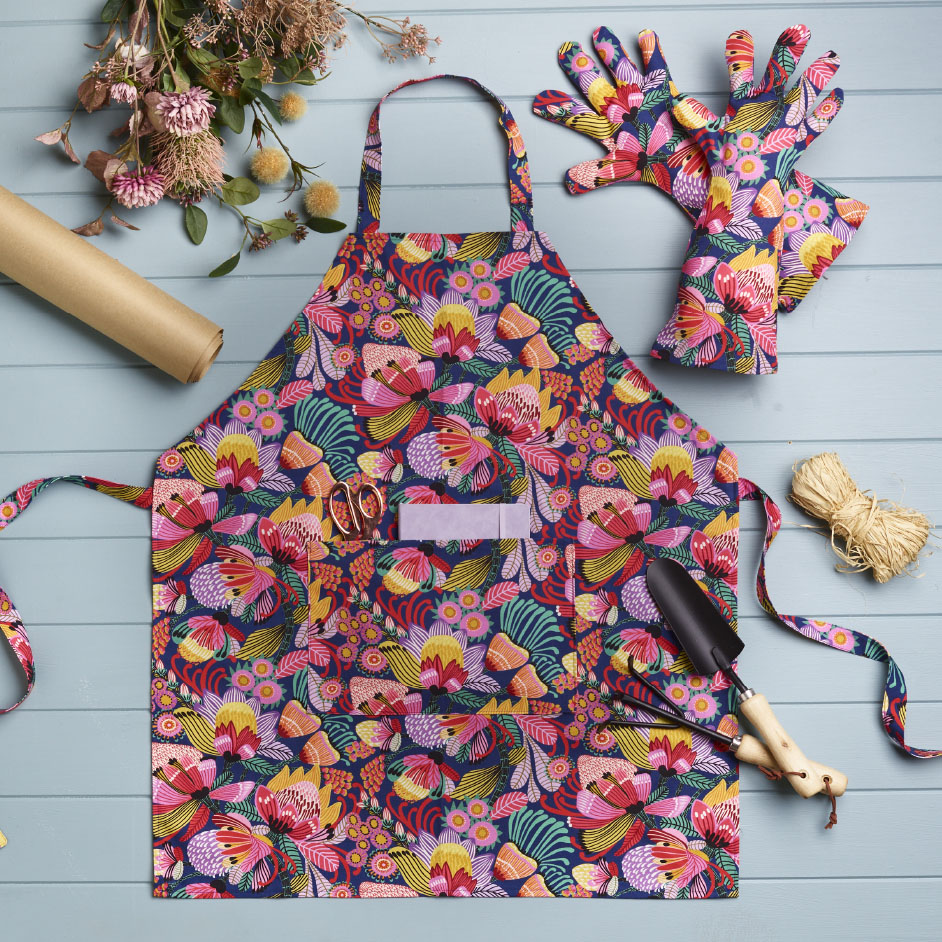
GARDENING APRON & GLOVES

LEVEL: EASY
WHAT YOU'LL NEED:
- 1.2m Kirsten Katz Wild Protea, Navy
- Matching Gutermann thread
- Pins
- Tape measure
- Scissors
- Seam ripper
- Fabric marker
- Sewing machine
- Pencil & paper for gloves pattern
Read all instructions carefully before commencing the project.
INSTRUCTIONS
Gardening Apron
Step 1 - Fold the fabric over lengthways into the centre until one selvedge edge is 40cm from the fold with right sides together and press.
Step 2 - Refer to the diagram and with A being the folded edge, use the following measurements - A = 80cm, B = 12cm, C = 55cm, D = 35cm to draw the pattern on the wrong side of the fabric. Carefully cut out the apron. Fold edges of apron under 1cm and press, then a further 1cm and press well.
Step 3 - Cut out one 32cm (wide) x 22cm rectangle for the pocket. Press side and bottom edges in 1cm. Press top edge over 1cm then a further 1cm and press well. Topstitch along top edge.
Step 4 - For waist straps, cut 2 x 7.5cm wide strips across the width of the fabric and cut off selvedge. Fold each strip in half lengthways with right sides facing and press. Sew together across one end then lengthways using a 1cm seam allowance. Trim corners turn right side out and press with seam along one long edge. Topstitch down each long edge 3mm in from edge.
Step 5 - For neck strap, cut one 58cm long x 7.5cm wide strip across the width of the fabric. Fold strip in half lengthways with right sides facing and press. Sew together lengthways using a 1cm seam allowance. Turn right side out and press with seam along one long edge. Topstitch down each long edge 3mm in from edge.
Step 6 - To attach waist strap, place raw end 1cm down from corner on wrong side of apron and with strap facing inward, tuck under pressed edge. Baste in place. Fold strap back so it faces outward and raw end is underneath. Stitch a square with diagonals for extra strength. Repeat for the other waist strap.
Step 7 - Pin the raw end of each necktie to the top edge of the apron 1cm in from the side edge, on wrong side of apron and with strap facing inward, tuck under pressed edge. Baste in place. Fold strap back so it faces outward and raw end is underneath. Stitch a square with diagonals for extra strength.
Step 8 - With right side of apron right side up and ties facing outwards topstitch around apron 1cm in from the edge. Press well.
Step 9 - Centre pocket on apron front pocket 22cm up from the bottom edge of apron and pin on three sides with topstitched edge at the top. Pin in place then sew to apron across bottom and sides leaving top edge open. Press.
Gardening Gloves
Step 1 - To make paper pattern place your hand on the sheet of paper, spread your fingers wide and trace around your hand. Add a 1cm seam allowance around the edge of the hand shaping the wrist section to be 10cm wide. To make long gloves, mark 5cm point across wrist then measure down 20cm. Draw a 17cm line across (8.5cm each side of the centre) then join ends of wrist section to ends of bottom line. Cut out the paper pattern.
Step 2 - Cut 4 rectangles of fabric 25cm wide x 45cm long. Using the fabric marker trace the pattern onto the wrong side of one fabric rectangle and set aside. Flip the pattern over and trace onto the wrong side of another fabric rectangle. Place each of these rectangles right sides facing with the other two rectangles and pin together through the centre.
Step 3 - Using a straight stitch, sew along the traced lines through both pieces of fabric. Cut out the gloves 5mm from stitched line cutting into the space between the fingers but do not cut through the stitching. Sew over the straight stitch using a short narrow zigzag stitch.
Step 4 - Turn gloves right side out and press. Try on gloves to determine preferred length. Turn edge under 1cm and press, then a further 1cm and press well. Topstitch hem in place.


