 | ||
| Your browser is not supported. | ||
|
Please browse our site using any of the following options:
| ||
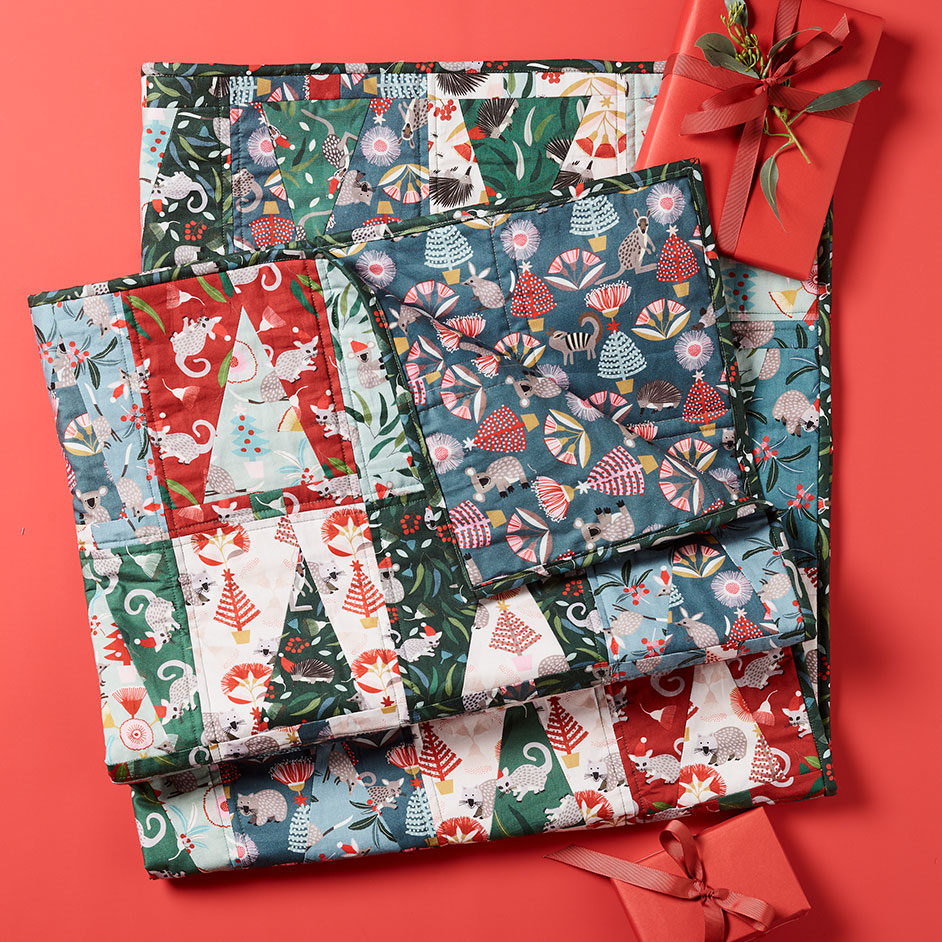
JOCELYN PROUST CHRISTMAS TREE QUILT

Level: Intermediate
WHAT YOU'LL NEED:
Fabrics are from 'Jocelyn Proust Christmas' range
- 30cm Fabric A - All the Animals 2
- 30cm Fabric B - Christmas Tree Echidna, white
- 30cm Fabric C - Christmas Tree Wombat, white
- 30cm Fabric D - Christmas Tree Bilby, light blue
- 30cm Fabric E - Christmas Tree Koala, grey
- 30cm Fabric F - Christmas Echidna, green
- 30cm Fabric G - Christmas Possum, red
- 30cm Fabric H - Christmas Possum, green
- 30cm Fabric I - Christmas Wombat, blue
- 30cm Fabric J - Christmas Bilby, light blue
- 30cm Fabric K - Christmas Koala, light blue
- 30cm Fabric L - Christmas Kangaroo, green
- 60cm Fabric M - Christmas Animals (includes binding)
- 1.3m x 250cm wide Backing fabric of choice
- 1.3m Legacy cotton/bamboo batting
- Matching Gutermann 100% cotton thread
- Rotary cutter, mat & quilters rulers
- Quilting pins, tape measure
- Scissors, seam ripper
- Hand needle
- Sewing machine with 1/4" foot & walking foot
QUILT MEASURES
43 3/4" x 48" (111cm x 122cm)
Note: All fabrics should be 100% cotton, washed & pressed. 1/4" seam allowance used throughout unless otherwise indicated.
Read all instructions carefully before commencing the quilt.
INSTRUCTIONS
Cutting
All strips are cut across the width of fabric unless otherwise stated.
- From each of Fabrics A, B, C, D, E, F, G, H, I, J, K, L & M cut 1 x 8" strip (13 strips in total), crosscut each strip into 4 x 8" squares for a total of 52 x 8" squares, 4 squares in each colour.
- From each of Fabrics A, B, C, D, E, F, G, H, I, J, K, L & M cut 1 x 2" strip (13 strips in total), crosscut each strip into 8" lengths.
- From binding fabric cut 5 x 21/2" strips.
Step 1 - Mix and match 42 of the 8" squares in pairs, light with dark as desired. There will be some squares left over. Place a matching 2" x 8" strip of each of the two fabrics with each pair. Using a mix of the left over 2" x 8" strips cut into 11/2" x 2" pieces for the tree trunk, you will 42, one for each block.
Cutting Tree Block
Step 2 - (a) Take first pair of 8" squares, (b) place one on top of the other with all edges aligned, (c) place a quilting ruler at an angle and make a diagonal cut and pull fabric away from the first cut (d) then make a second diagonal cut the other direction to create a tree shape, not too close to the top, leave space for seam allowance when squaring up the block, (e) swap the 'tree' in each square to create two contrasting blocks. As in photos below.
Sewing Tree Block
Step 3 - Starting with the side of the second cut (d) sew tree piece to background, press seam towards tree. Sew remaining background piece to the other side of the tree, press seam towards background. Square off bottom edge if necessary.
Step 4 - Take the matching background 2" x 8" strip and cut each in half, two 2" x 4" strips and sew on each side of contrasting 1 1/2" x 2" fabric trunk. Centre the trunk under the tree and sew strip to bottom edge. Note - the bottom strip is wider so the trunk can be centred.
Repeat Steps 2-4 to make a total of 42 blocks.
Quilt Top
Step 5 - Square up the sides and top edge of the blocks to the same size, 6 3/4" x 81/2" or a size that works for you as long as they are all the same size.
Step 6 - Lay out the blocks in 6 rows with 7 blocks in each row as desired.
Step 7 - Sew blocks together in rows, matching seams and pressing seams in one direction alternating the direction in each row.
Step 8 - Sew the rows together matching seams. Press seams in one direction.
Step 9 - Layer the backing, batting and quilt top and baste together. Quilt as desired.
Step 10 - Join the 5 x 2 1/2" binding strips together on the bias to make one long strip. Press in half lengthwise and bind mitering corners. Attach a label or sign and date your quilt.


