 | ||
| Your browser is not supported. | ||
|
Please browse our site using any of the following options:
| ||
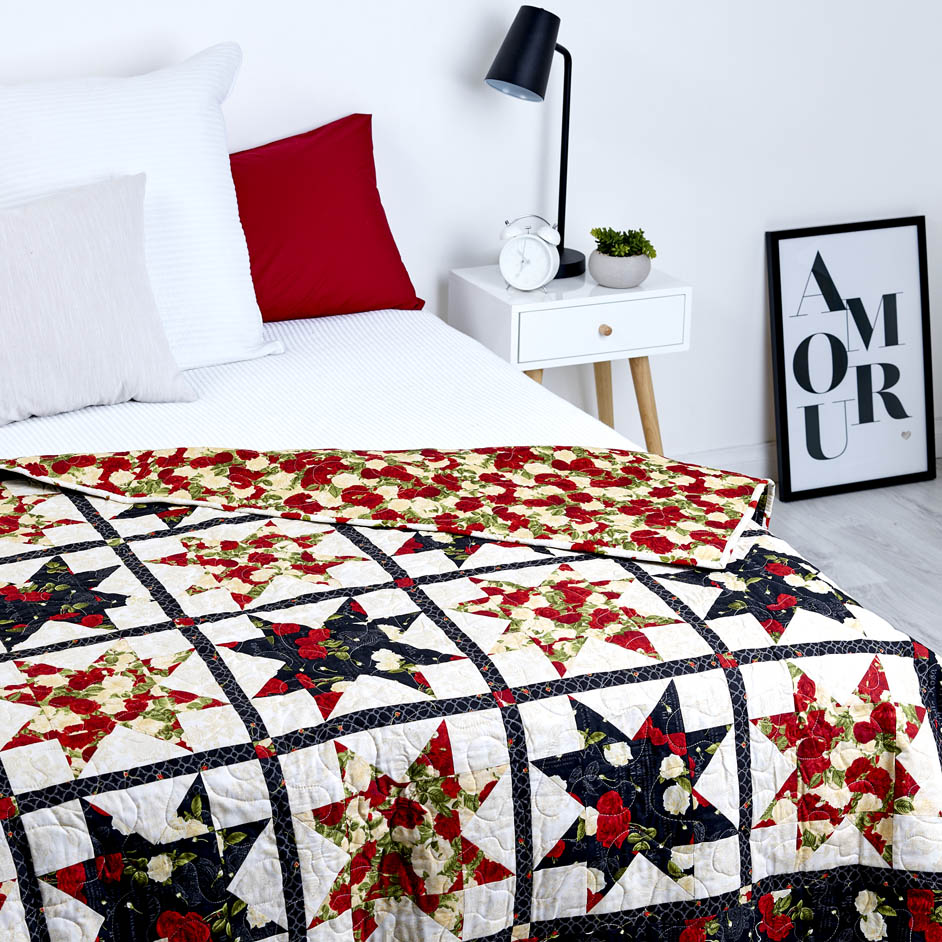
CHANDELIER BELLA QUILT

LEVEL: EASY
WHAT YOU'LL NEED:
- A - AFZ-73146-2 BLACK 2-5/8 yds
- B- AFZ-73147-3 RED 3/4 yd
- C- AFZ-73145-3 RED 1 yd
- D- AFZ-73148-84 CREAM 1-3/4 yds
- Binding - AFZ-73149-84 CREAM 5/8 yd
- 4 yards Backing Fabric
- Sewing Machine
- Scissors
- Thread
Note: Please read through all of the instructions before beginning. All of the seam allowances are 1/4" unless otherwise noted. Width of fabric (WOF) is equal to at least 42" wide. Press all seam allowances open after each seam is sewn, unless otherwise noted. Remember to measure twice and cut once! LOF means length of fabric (perpendicular to selvedge edge). RST means right sides together.
INSTRUCTIONS
CUTTING
Fabric A
Cut three strips 4-1/2" x WOF - set aside for top and bottom outer borders
Cut two strips 4-1/2" x LOF - trim to 74-1/2" and set aside for side outer borders
(remaining WOF is approximately 33" after top and bottom outer borders have been cut)
Cut five strips 3-7/8" x WOF subcut forty 3-7/8" x 3-7/8" squares
Cut two strips 6-1/2" x WOF subcut ten 6-1/2" x 6-1/2" squares
Fabric B
Cut seventeen strips 1-1/2" x WOF subcut forty-nine 1-1/2" x 12-1/2" strips
Fabric C
Cut four strips 3-7/8" x WOF subcut forty 3-7/8" x 3-7/8" squares
Cut two strips 6-1/2" x WOF subcut ten 6-1/2" x 6-1/2" squares
Cut two strips 1-1/2" x WOF subcut thirty 1-1/2" x 1-1/2" squares
Fabric D
Cut eight strips 3-1/2" x WOF subcut eighty 3-1/2" x 3-1/2" squares
Cut four strips 7-1/4" x WOF subcut twenty 7-1/4" x 7-1/4" squares
Binding
Cut seven strips 2-1/2" x WOF
BLOCK CONSTRUCTION
Step 1. Gather together one Fabric D 7-1/4" x 7-1/4" square and four 3-7/8" x 3-7/8" Fabric A squares. Draw a diagonal line on the wrong side of all four Fabric A squares.
Step 2. Take 2 Fabric A squares and place them RST in opposite corners of the Fabric D square (they will overlap a little). Stitch a scant 1/4" away from either side of the line.
Step 3. Cut block apart on drawn line and press towards Fabric A.
Step 4. Place another Fabric A square from Step 1 and place it in the corner of one of the unit from Step 3. Stitch a scant 1/4" away from either side of the line. Cut apart on drawn
line and press towards Fabric A. Trim dog ears and square block up to 3-1/2" x 6-1/2" if necessary. Repeat with remaining Fabric A square from Step 1 and remaining unit from Step 3 to yield a total of 4 flying geese that measure 3-1/2" x 6-1/2".
Step 5. Repeat Steps 1-4 with all remaining Fabric A 3-7/8" squares to make a total of forty AD flying geese.
Step 6. Repeat Steps 1-4 with all Fabric C 3-7/8" x 3-7/8" squares and the remaining Fabric D 7-1/4" x 7-1/4" squares to create a total of 40 CD flying geese.
Step 7. Sew an AD flying geese unit to either side of a 6-1/2" x 6-1/2" Fabric A square noting fabric and unit orientation. Press towards the Fabric A square. Repeat to make ten blocks like this.
Step 8. Repeat Step 7 using the CD flying geese and Fabric C 6-1/2" x 6-1/2" squares. Make ten blocks. Press towards Fabric C.
Step 9. Sew a 3-1/2" x 3-1/2" Fabric D square to either end of a AD flying geese unit. Press seams towards Fabric D. Repeat to make a total of 20 units.
Step 10. Sew a 3-1/2" x 3-1/2" Fabric D square to either end of a CD flying geese unit. Press seams towards Fabric D. Repeat to make a total of 20 units.
Step 11. Sew a Step 9 unit to either side of a Step 7 unit noting orientation. Press seams open. Repeat to make ten blocks. Label as Block A.
Step 12. Sew a Step 10 unit to either side of a Step 8 unit noting orientation. Press seams open. Repeat to make ten blocks. Label as Block B.
Step 13. Gather together five 1-1/2" x 1-1/2" Fabric C squares and four 1-1/2" x 12-1/2" Fabric B Strips. To make a sashing row, sew the strips together, placing a 1-1/2" x 1-1/2" Fabric C square between each pair and one at each end. Press seams towards the Fabric B strips. Repeat to make six sashing rows.
Step 14. Using the diagram below as a guide sew the blocks into rows alternating Block As and Block Bs and placing a sashing strip between blocks and at the beginning and end of each row. Press seams towards Sashing. Sew the block rows together placing a Step 13 sashing strip between each row and at the top and bottom of the quilt top. Press seams
open.
Step 15. Sew three 4-1/2" x WOF Fabric A side outer border strips together end to end to make one long strip. From the resulting strip cut two strips 4-1/2" x 74 -1/2".
Step 16. Sew the two 4-1/2" x 53-1/2" Fabric A top and bottom borders to the top and bottom of the quilt. Press towards borders.
Step 17. Sew the two 4-1/2" x 74-1/2" Fabric A side borders from Step 15 to the left and right sides of the quilt. Press towards borders. Bind using Binding Fabric.
Step 18. Your quilt is now complete. Sandwich, baste and quilt using your favorite method. Bind using Binding Fabric


