 | ||
| Your browser is not supported. | ||
|
Please browse our site using any of the following options:
| ||
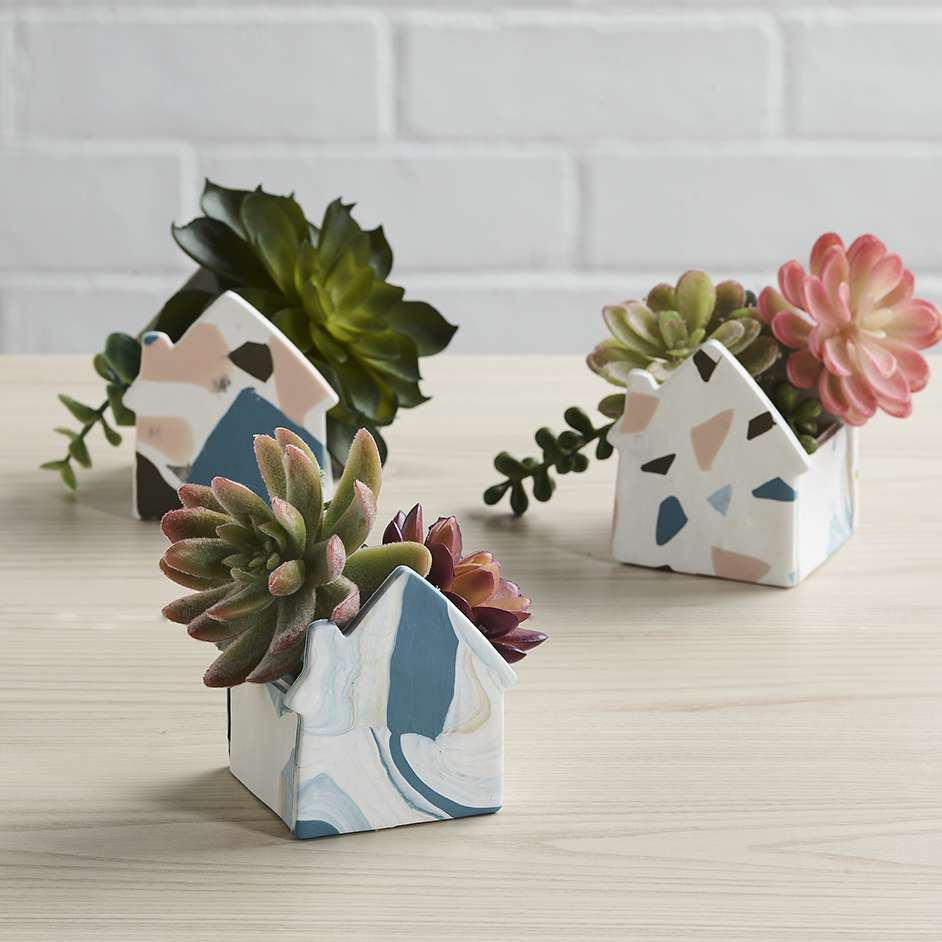
SCULPEY PLANTERS

Level: Easy
WHAT YOU'LL NEED
- 'Sculpey' in various colours
- Rolling pin
- Non-stick baking paper
- Ruler (optional)
- House cookie cutter
- 'Sculpey' tool set
- Oven
INSTRUCTIONS
Step 1 - Choose your colour palette for each planter. Ensure you have a lot of the white if you are using that as your base colour.
Terrazzo - Roll out the white sculpey with the acrylic roller about 0.5 cm thick in front of you. Then use the knife tool and cut off from your colored sculpey blocks many small corners and let them trickle on the white polymer clay. Cut irregular as this will make the terrazzo pattern look more realistic later. Don't be afraid to make the coloured shapes overlap this will all add to the look. Now roll the acrylic rolling pin over the sculpey shapes until all the sclupey has formed into one piece with the terrazzo pattern in it. We used this same technique with larger pieces and smaller pieces to create 2 different patterns.
Marble - Cut a row off each colour of Sculpey. Roll out 3 sausages, 1 of each colour to about 1cm thick. Then twist the 3 colours around each other and then roll them into one long/thin sausage shape. Then using the table, wrap the sausage around itself to create a snail shape. Then roll the whole shape into a ball. Now using the rolling pin, roll out the sculpey to be about 05.cm thick to reveal the marble pattern.
Step 2 - Use the house cookie cutter shape to cut out 2 houses from each type of sculpey (large terrazzo, small terrazzo and marble) then lay the templates you made in step 1 onto the clay and use the knife to carefully cut around the shapes. You will need 2 sides and 1 base per house.
Step 3 - Once you have all your pieces cut out, take the base piece and press both the side pieces onto the ends. To make the pot watertight take a small piece of sculpey and roll it into a fairly thin snake shape. Then place the snake on the inside join of the house, where the side and base pieces meet. Then use the smoothing tool to smooth the snake shape into the base of the house, joining the pieces together. Repeat this for the other side as well.
Step 4 - Once the inside joins are sealed, smooth over the same joins on the underside of the pot again with the smoothing tool. Be very careful when handling the house as it will be easily damaged.
Step 5 - Repeat steps 3 and 4 with each side of the house, attaching it to the base structure using the same technique to seal all the joins. Again be careful not to warp the shape of the house when handling it.
Step 6 - Once you have finished sealing your planter, bake it following the instructions on the packet. Keep an eye on it in the oven to make sure that it's keeping its shape.
Step 7 - Once the pot is cooled, check that it's sealed by filling it with water. Then go ahead and plant a cute little plant into your pot!


