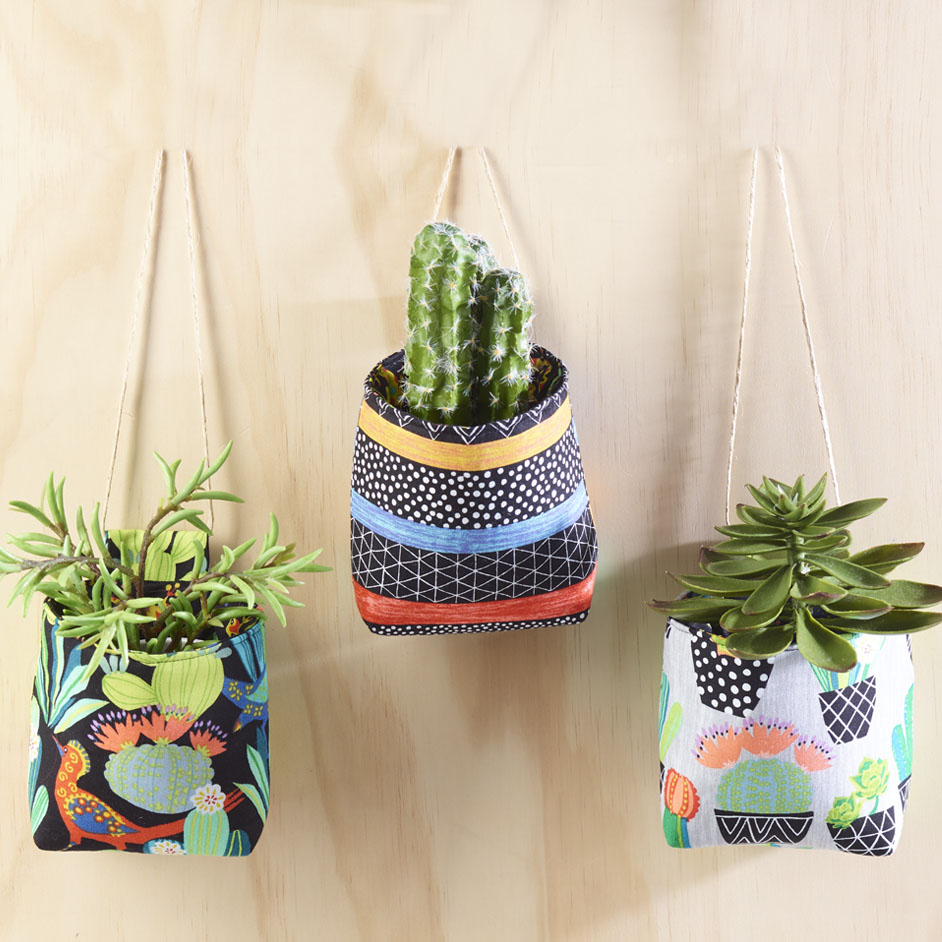
 | ||
| Your browser is not supported. | ||
|
Please browse our site using any of the following options:
| ||
HANGING CACTUS CLUB HOLDERS

LEVEL: EASY
WHAT YOU'LL NEED
- Fabrics are from Cactus Club range
- 20cm Fabric A - Animals, black
- 20cm Fabric B - Pots, grey
- 20cm Fabric C - Stripe, black
- 20cm Fabric D - Ghecko, black for lining
- 30cm x 50cm Legacy Flex Foam Stabilizer
- 1-sided fusible (L-FF78F1)
- 10cm x 20cm Legacy SF101 fusible cotton woven interfacing
- Matching Gutermann 100% cotton thread
- Rotary cutter, mat & quilters rulers
- Quilting pins, tape measure
- Scissors, seam ripper
- Hand needle
- Sewing machine with 1/4 in foot & walking foot
- 1/4 in seam allowance used throughout unless otherwise indicated. Read all instructions carefully before commencing the project.
INSTRUCTIONS
Step 1. From each of Fabrics A, B & C cut two rectangles 6 1/2" wide x 6" high.
Step 2. From Legacy Flex Foam Stabilizer cut 6 rectangles 6" wide x 5 1/2" high. Centre one 6" x 5 1/2" flex foam rectangle on the wrong side of each Fabric A, B and C 6 1/2" x 6" rectangle. Note - Flex Foam should be 1/4" from all edges of fabric. Fuse in place.
Step 3. From Fabric D cut 6 rectangles each 6 1/2" wide x 6" high for lining.
Step 4. Using quilters ruler mark a 1" square in the bottom left and right hand corners of all Fabric A, B and C 6 1/2" x 6" rectangles and all Fabric D 6 1/2" x 6" rectangles. Cut out corners (see diagram).
Step 5. Pin Fabric A rectangles right side facing and sew together along sides and bottom edges, leaving top edge open. Press seams open.Note - Backstitch at each end of seams. Repeat for Fabric B and C rectangles and all Fabric D rectangles.
Step 6. Open out cut corners of Fabric A unit, matching side and bottom seams and raw edges. Pin and sew together. Repeat for Fabric B and C units. Turn right side out and push out corners. Fold top edge 1/4" to the wrong side and press.
Step 7. Repeat step 5 for Fabric D units. Open out cut corners, matching side and bottom seams and raw edges. Pin and sew together but do not turn right side out. Push out corners. Fold top edge 1/4" to the wrong side and press.
Step 8. Insert a lining into each outer and pin matching side seams and top folded edges.
Step 9. For hanging tabs cut one 2 1/2" x 3" rectangle from each of Fabrics A, B and C. From fusible cotton woven interfacing cut three 2 1/2" x 3" rectangles and fuse to the wrong side of Fabric A, B & C rectangles.
Step 10. Fold long sides of each rectangle in 1/4" and press to create 2" x 3" rectangles. Topstitch along folded edges. Fold in half bringing raw edges together to make 2" x 1 1/2" rectangles. Press fold.
Step 11. Insert raw edge of tab between outer fabric and lining centered along top edge with 1" of tab exposed. Pin in place.
Step 12. Topstitch around top edge securing tab within the stitching.Insert dowel or stick through tabs and
hang as desired.


