 | ||
| Your browser is not supported. | ||
|
Please browse our site using any of the following options:
| ||
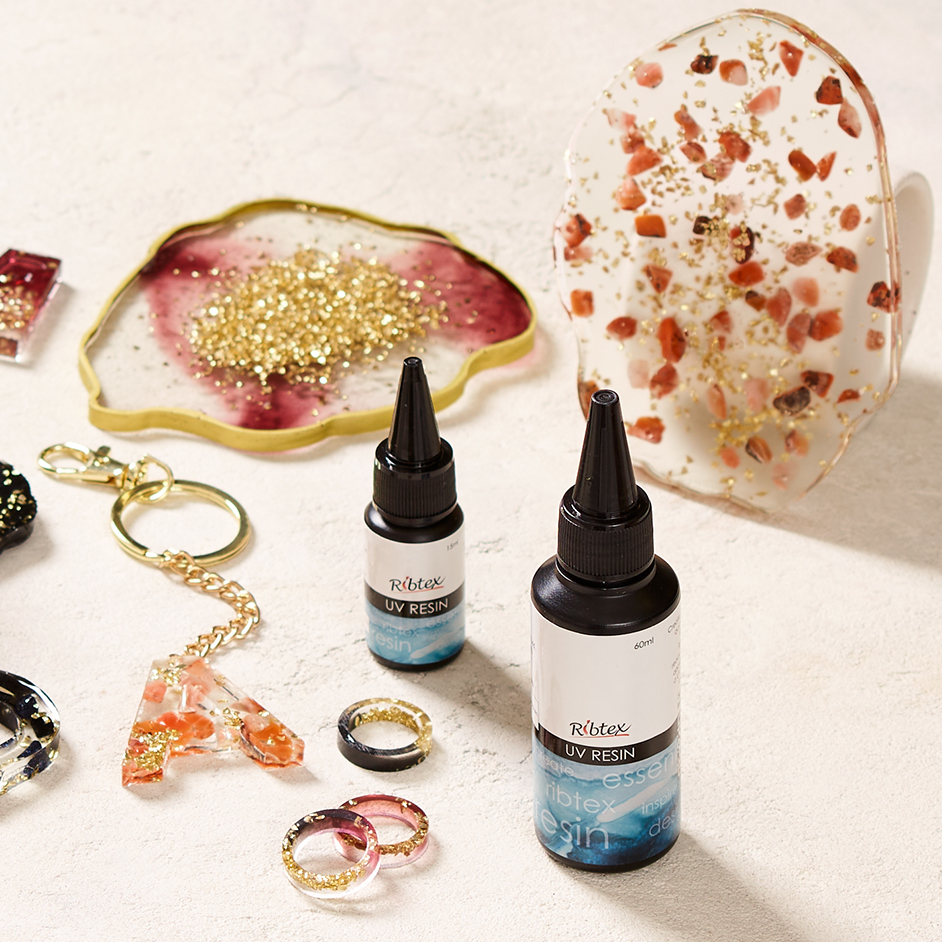
RIBTEX UV RESIN COASTERS AND KEY RING

Level: Easy
What you'll need:
- 200ml clear ribtex UV resin
- 15ml dark red ribtex UV resin
- 15ml dark black ribtex UV resin
- Ribtex UV resin coaster silicone mould
- 15g gold ribtex sensations no hole glass chips
- 6 x 8mm orange and brown ribtex strung chip stone bead strand
- 6 x 8mm navy ribtex strung chip stone navy bead strand
- Gold Paint or marker
Instructions
Step 1 - Place in gold glass chips and stone chips into coaster silicone mould.
Step 2 - Pour in clear and coloured UV Resin.
Tip - a headpin is great for mixing colours and creating patterns as well as popping any bubbles that appear on the surface.
Step 3 - Leave to cure in sunlight. Larger projects like coasters can take a while to cure. It is best to flip your project and cure from both sides particularly when working with opaque colours like black.
Step 4 - Demold your projects once fully cured.
Step 5 - Finish your project with gold paint or gold marker around the edges.
What you'll need:
- 200ml clear ribtex UV resin
- 15ml dark red ribtex UV resin
- 15ml dark black UV resin
- Ribtex UV resin a-z silicone mould
- 15g gold ribtex sensations no hole glass chips
- 6 x 8mm orange and brown ribtex strung chip stone bead strand
- 6 x 8mm navy ribtex strung chip stone navy bead strand
- 4 x 8 mm gold ribtex jewellery findings screw in eye loop 50 pack
- Ribtex gold jewellery accessories keyring chain with clasp
- Ribtex bright gold jewellery stringing medium twisted oval medium chain
- 6mm gold ribtex jewellery basics split rings
Instructions
Step 1 - Place in gold glass chips and stone chips into A-Z silicone mould.
Step 2 - Pour in clear and coloured UV Resin. Handy hint, a headpin is great for mixing colours and creating patterns as well as popping any bubbles that appear on the surface.
Step 3 - Leave to cure in sunlight.
Tip - It is best to flip your project and cure from both sides particularly when working with opaque colours like black.
Step 4 - Demold your projects once fully cured.
Step 5 - Use pliers to screw in a screw in eye to the top of each letter.
Step 6 - Cut lengths of chain to approximately 40mm attach to the screw in eye with a split ring.
Step 7 - At the other end of the chain attach the key ring using another split ring.


