 | ||
| Your browser is not supported. | ||
|
Please browse our site using any of the following options:
| ||
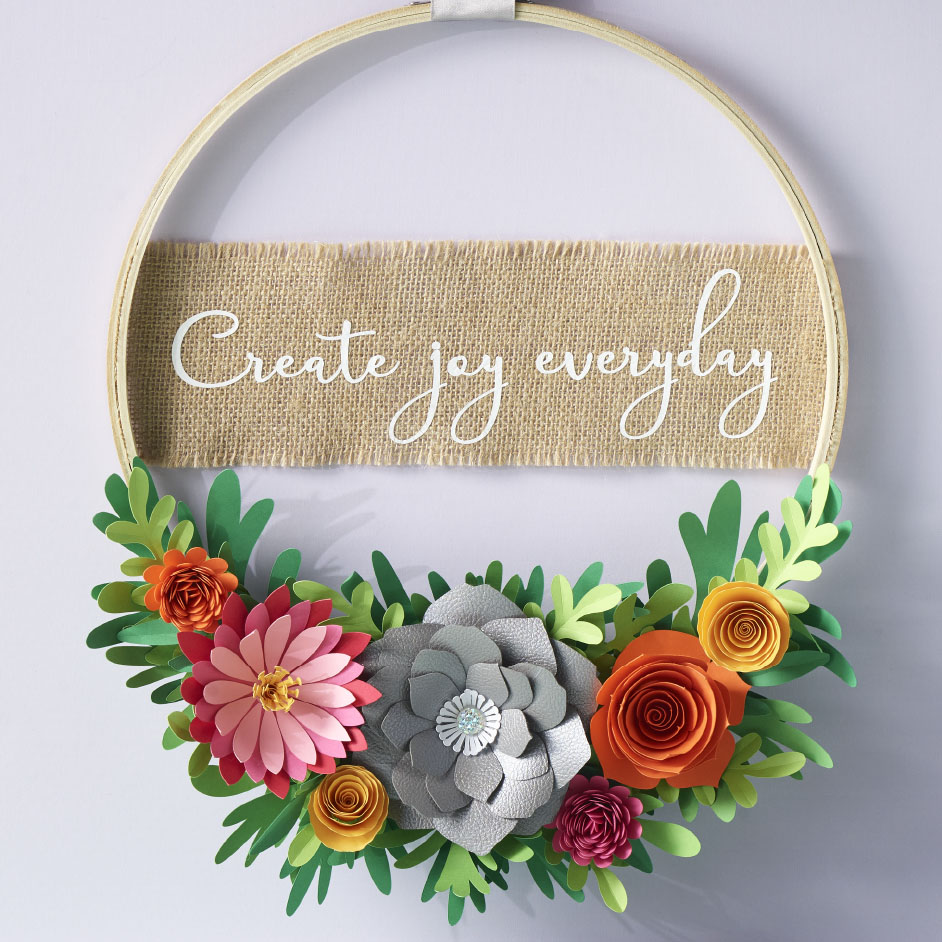
CRICUT JOY EVERYDAY FLOWERS

LEVEL: EASY
What you'll need:
- Cricut explore 3 or maker 3
- Design space application
- 12" x 12" light grip machine mat
- Fine-point blade and housing
- Single scoring wheel and quickswap housing or scoring stylus
- Wavy blade and quickswap housing
- Reverse action tweezers
- Weeder tool
- Hot glue gun and glue sticks
- Cricut white everyday iron-on
- Faux silver leather
- 176 - 216 GSM smooth or textured dark green cardstock
- 176 - 216 GSM smooth or textured green cardstock
- 176 - 216 GSM smooth or textured light green cardstock
- 176 - 216 GSM smooth or textured orange cardstock
- 176 - 216 GSM smooth or textured yellow cardstock
- 176 - 216 GSM smooth or textured dark pink cardstock
- 176 - 216 GSM smooth or textured pink cardstock
- 176 - 216 GSM smooth or textured light pink cardstock
- 176 - 216 GSM smooth or textured white cardstock
- 25cm hoop or wreath
- 10cm x 35cm piece of burlap
- 75cm x 50cm length of silver satin ribbon
- Embellishments of your choice
INSTRUCTIONS
Preparation
Step 1 - Open the create joy everyday project in cricut design space by clicking here.
Fees may apply. To change the size of the project to match your hoop or wreath, click on the Select All option from the Edit Toolbar then type in the appropriate size into the size text boxes.
Cut
Step 1 - When you're ready, select make it and follow design space prompts. When cutting iron-on sentiment make sure to mirror your design.
Assemble
Step 1 - Fold along the score lines of the leaves and curl the leaves to add extra dimension.
Step 2 - For faux leather flower: Hot glue the tab on each flower to the adjoining petal, then hot glue each flower layer on top of each other, biggest to smallest. Hot glue the white cardstock stamen to the centre of the flower and embellish as desired.
Step 3 - For the flowers that cut out as a spiral: hold the very end of the spiral with you tweezer tool and wrap the paper around itself until you get to the end. Apply a dot of hot glue to the bottom flap and press the flower down into it.
Step 4 - For the remaining paper flower: curl the petals inwards and glue the centre of the layers together. Use the Tweezer Tool to spiral the yellow cardstock stamen and hot glue it to the centre of the flower.
Step 5 - For the iron-on sentiment: use a weeder tool to remove unneeded iron-on pieces, leaving design on clear liner. Apply iron-on to burlap piece using cricut easy presstm X and cricut easy press mat. For time and temp settings, visit the online cricut heat guide by clicking on this link.
Step 6 - Wrap burlap piece around hoop or wreath and attach it with hot glue.
Step 7 - Arrange assembled flowers on wreath using the images on the canvas as a guide and attach with hot glue.
Step 8 - Tie the ribbon around the top of the hoop and trim ends as desired. Hang your wreath and enjoy!


