 | ||
| Your browser is not supported. | ||
|
Please browse our site using any of the following options:
| ||
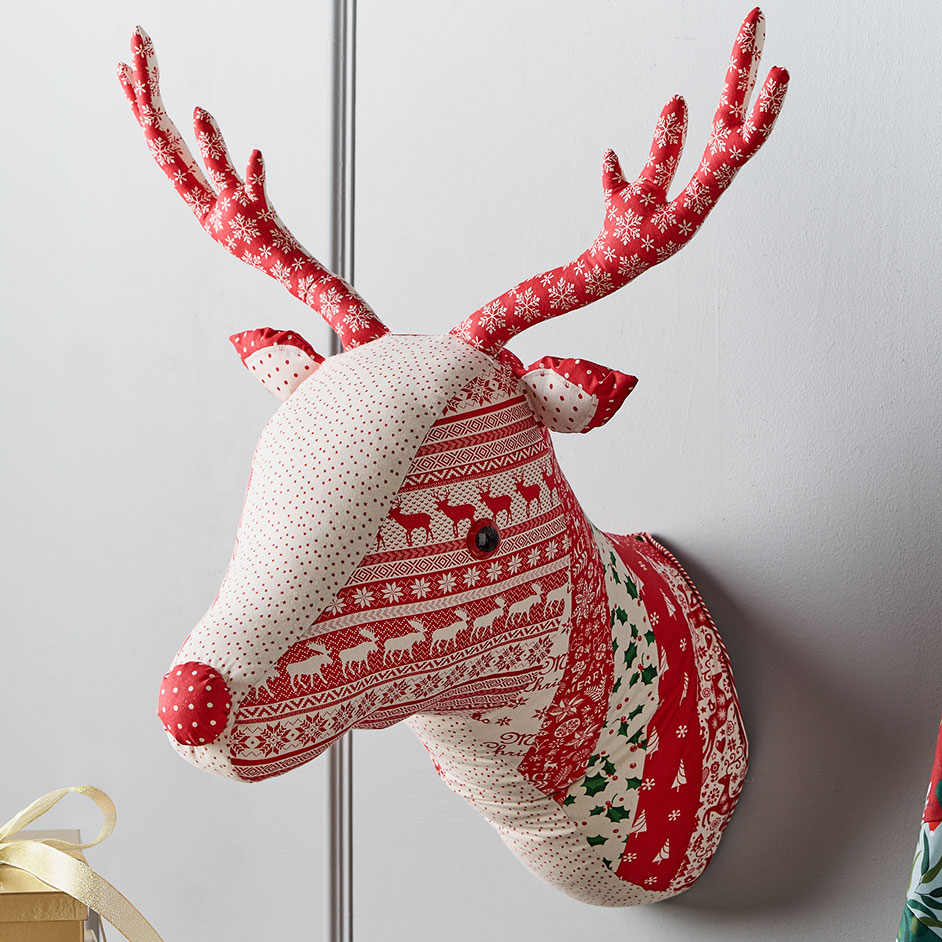
SCANDI REINDEER HEAD

Level: Advanced
WHAT YOU'LL NEED
- X20 Scandi Spot - Red - 15cm - Outer Ear & Nose
- X20 Scandi Spot - Natural - 10cm - Inner Ear
- X20 Scandi Snow - Red - 20cm - Antler Front
- X20 Scandi Snow - Natural - 20cm - Antler Back
- X20 Scandi Mini Star - Red - 20cm - Back Gusset
- X20 Scandi Mini Star - Natural - 20cm - Front Gusset
- X20 Scandi Fairyle - Red - 20cm - Left side of head
- X20 Scandi Fairyle - Natural - 20cm - Right side of head
- X20 Scandi Tree Flk - Natural - 10cm - Left side of neck
- X20 Scandi Stag Tree - Red - 10cm - Left side of neck
- X20 Scandi Lg Holly - Natural - 20cm - Left & Right side of neck
- X20 Scandi Merry - Red - 10cm - Left side of neck
- X20 Scandi Peace - Natural - 10cm - Left side of neck
- X20 Scandi Stag Tree - Natural - 10cm - Right side of neck
- X20 Scandi Tree Flk - Red - 10cm - Right side of neck
- X20 Scandi Peace - Red - 10cm - Right side of neck
- X20 Scandi Merry - Natural - 10cm - Right side of neck
- X20 Scandi Stripe - Red - 30cm - Mount
- 1 kg hobbyfill
- 2 x 30mm crystal safety eyes
- 2 x 45cm florist wire - 18 gauge
- 30cm stiff iron-on interfacing
- 30cm x 30cm stiff card
- Hot glue gun
- Reindeer stencils
INSTRUCTIONS
- ANTLERS: Using Snow Red and Snow Natural fabrics, fold each fabric in half (right sides together) and trace around antler stencil on each piece of fabric. This is your sewing line. Cut fabric 5mm away from sewing line.
Place 1 red antler and 1 natural antler right sides together and stitch around sewing line, leaving base open. Clip inside curves, turn right side out and press.
Stuff smaller branches first, then the tip of the tallest branch. Bend florist wire slightly and insert into antler up into tallest branch. Leave excess sticking out, DO NOT CUT WIRE. Finish stuffing the rest of the antler, packing the stuffing around the florist wire.
- On wrong side of fabrics, trace around front and back gusset stencils. This is your sewing line. Cut fabric 5mm away from sewing line. Attach the antlers to the back gusset at the top of the head. Sew front gusset to back gusset at the top of the head, being careful near the florist wire.
- EARS: Using Spot Red, fold fabric in half (right sides together) and trace around outer ear stencil twice. This is your sewing line. Cut fabric 5mm away from sewing line. Using Spot Natural, fold fabric in half (right sides together) and trace around inner ear stencil once. Cut this piece out ON THE LINE. Satin stitch 1 inner ear to 1 outer ear, right sides visible. Make 2 of these. Place remaining outer ears on top of sewn ear, right sides together, stitch on sewing line leaving base open. Clip the point, turn right side out and press. Stuff lightly.
- On wrong side of Fairyle fabrics, trace around side of head stencils, making sure you trace a right and a left side. This is your sewing line. Cut fabric 5mm away from sewing line. Cut 2 x 3cm squares of iron-on interfacing and attach on wrong sides of head where the eyes will go.
- Attach ears to the sides of head.
- MAKE NECK SIDES: Cut 1 x 60cmx7cm strips from each of the fabrics indicated for right and left neck, cut 2 from the Holly fabric. Sew these strips together, side by side in the following order:
LEFT SIDE - Tree Flk nat, Stag Tree red, Holly nat, Merry red, Peace nat. Press after each strip.
RIGHT SIDE - Stag Tree nat, Tree Flk red, Holly nat, Peace red, Merry nat. Press after each strip.
- Making sure the stencil is turned the right way for a right and left side, trace around stencil on the wrong side of the fabric for each side. This is your sewing line. Cut fabric 5mm away from sewing line.
- Attach gusset to one neck side, starting at the top of the head and sewing towards the end, then sew from the top of the head towards the other end, being careful of the antlers, florist wire and ears. Repeat for the other neck side.
- Turn right side out and attach the safety eyes.
- Stuff the head well to support the ends of florist wire so that the antlers stand up. When fully stuffed, cut out a piece of stiff card 1cm larger than 'mount' stencil and insert into the base of the neck to keep stuffing in place. Using a hot glue gun, glue the edges of the fabric over the edges of the card.
- Cut a piece of stiff interfacing 1cm larger than 'mount' stencil. Attach interfacing to wrong side of Scandi Stripe red fabric and cut fabric 1cm wider than interfacing. Fold fabric edge over interfacing and hot glue in place. Hot glue the wrong side of this piece to the cardboard mount.
- NOSE: Using Spot red fabric, trace around nose stencil. Cut out on the line. Hand sew a double gathering thread 5mm from the edge and pull thread to make a 3D nose shape. Stuff, pull gathering thread tight and secure. Hand stitch nose in place on the gusset.


