 | ||
| Your browser is not supported. | ||
|
Please browse our site using any of the following options:
| ||
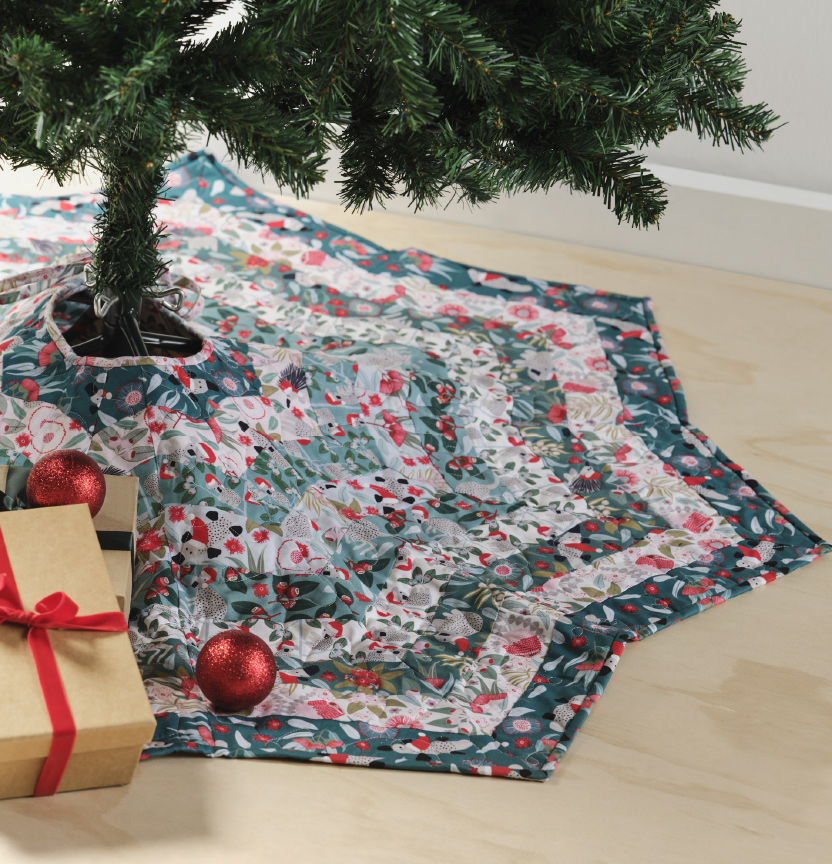
JOCELYN PROUST CHRISTMAS TREE SKIRT

Level: Intermediate
What you'll need:
- Photocopy paper
- 30cm each of a selection of Jocelyn Proust Christmas Fabric 3 darker and 4 lighter fabrics
- 60cm of a darker Jocelyn Proust Christmas Fabric
- Binding Fabric: Add an additional 60cm of your choice of fabric for the binding
Instructions
Step 1- Cut 4x 2.5" strips from each of the fabrics.
You will need an additional 4 strips of the darker to make up the length of the template.
Separate into 4 piles, evenly split.
Step 2- Lay the pattern of the fabric out in order of 1 dark strip, 1 light strip, and so on.
Step 3- Sew one set of 10 strips together at a time, very gently pressing as each strip is joined.
You will end up with 4 panels of 10 joined strips, ensure these are all laid out in the same way.
Step 4- Lay your template out onto the fabric ensuring the pattern aligns before cutting out the pieces. You will have 4 pieces cut from each panel, totalling 8 pieces from each template.
Step 5- Carefully sew the cut pieces together forming the circle of the tree skirt. Sew all sides together, except the last join. This join needs to be left open so that you can tie the tree skirt on and off the tree.
Step 6- Once the tree skirt has been assembled. Flatten out and sandwich the tree skirt as you would a quilt and quilt the skirt how you would like. Remember that there is a join for the tree skirt, so this section will need to be laid carefully so that there is no overlapping and can have a clean cut once the quilting has been completed.
Step 7- Once quilting is complete cut the excess batting away. In the centre of the tree skirt even out to make a smooth circle shape rather than the angled joints. This will make it easier to connect the binding to the tree skirt.
Step 8- With the binding fabric, cut 2" strips along the bias. This will allow for binding to be more pliable as you sew around the tree skirt. Connect all bias pieces together and roughly lay it around the tree skirt to check you have enough to complete the binding all the way around.
There are two stages to the binding.
Step 9- The main binding begins at the top inner edge of the tree skirt where the circle opening begins. Bind all the way down and around the tree skirt until you reach the other side of the circle opening.
Step 10- The last piece of binding will secure and neatly finish of the tree skirt. Allow excess binding of 30cm on each side to use as a tie to secure the tree skirt to the tree. Sew the binding around the inner circle and then topstitch the remaining binding that is unattached to the tree skirt. This will give a neat finish and make a nice tie off for the tree skirt.


