 | ||
| Your browser is not supported. | ||
|
Please browse our site using any of the following options:
| ||
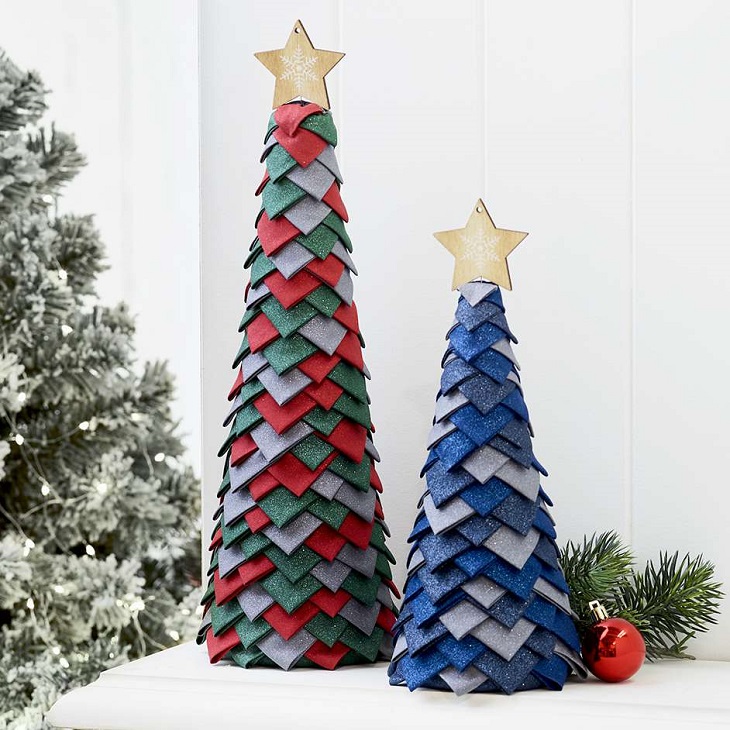
GLITTER TREES

Level: Easy
WHAT YOU'LL NEED
- 5m of each: Navy, Royal & Silver (250mm cone).
- Red, Green & Silver (350mm) of 112cm wide glitter cotton fabric.
- Dressmaker pins.
- Decofoam Cone: 250mm & 350mm.
- Scissors, Tape measure/ruler.
- Iron
INSTRUCTIONS
Step 1 - 250mm deco foam cone -
Cut 35-40 squares from each of the three colours of fabric with each square measuring 6.5cm.
A circle measuring 5cm larger than the base of the cone from one of the coloured fabrics.
350mm deco foam cone -
Cut 60-70 squares from each of the three colours of fabric with each square measuring 6.5cm.
A circle measuring 5cm larger than the base of the cone from one of the coloured fabrics.
Step 2 - With the wrong side of the fabric facing up, place the cone in the centre of the circle. Pull up the fabric around the sides of the cone tightly, folding and pleating where necessary, using the pins to secure the fabric to the cone.
Step 3 - With wrong sides together, fold a cut square in half on the diagonal to create a triangle. Press flat with iron. Fold in half again to create an even small triangle, press flat.
Repeat folding and pressing process on all cut squares.
Step 4 - With the folded point of one of the triangles facing downwards, pin the top corners of the triangle to the cone along the base of the cone with the folded point hanging 5mm over the base edge of the cone. Pin the next triangle in the same way, to the right of the first triangle overlapping the top corners by 5mm. Repeat pinning more triangles around the base of the cone, alternating colours as per desired, until the triangles meet up. You may have to adjust triangles accordingly to make it visually even.
Repeat method to complete the first row, by pinning more triangles in the middle of each of the first triangles in the row.
Step 5 - Start the next row approximately 1-1.5cm higher than the top of the first row. Adjust height of the row so that the top raw edges of the below squares are not seen.
Repeat same method all the way up to cover the cone.
Step 6 - To neatly finish the top of the cone, the each of the triangles can be slightly folded under at the sides or cut in half to reduce the size of the triangles at the top. Ensure when securing the last few triangles at the top that the pins are not seen.


