 | ||
| Your browser is not supported. | ||
|
Please browse our site using any of the following options:
| ||
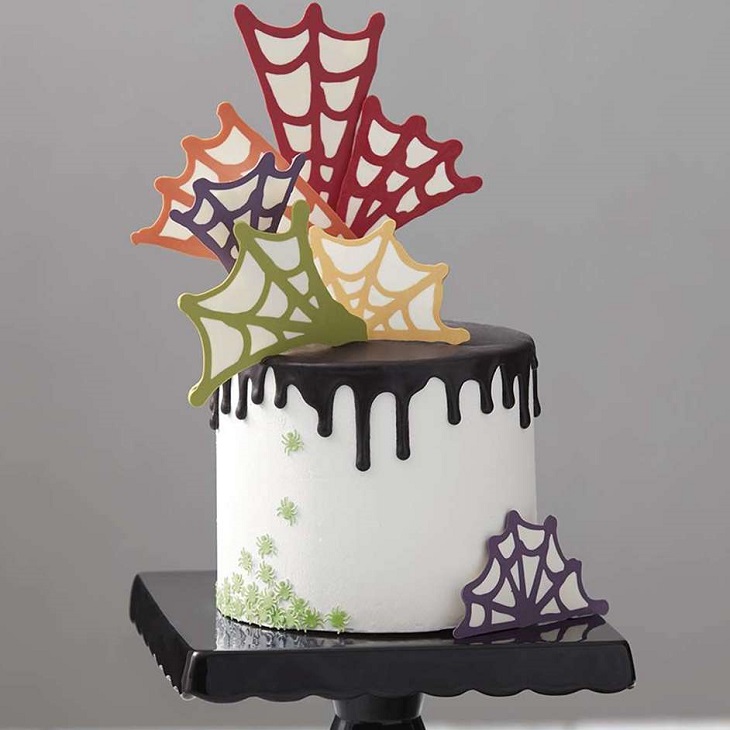
SPINFULLY DELICIOUS SPIDER WEB CAKE

Level: Easy
WHAT YOU'LL NEED
- Candy Decorating Primary Colors Set, 1 oz.
- Garden Candy Color Set
- 2 Bright White Candy Melts Candy (24 oz. needed)
- 1 Light Cocoa Candy Melts (3 oz. needed)
- 1 Black Candy Melts Candy (10 oz. needed)
- White Decorator Icing - 4.5 lb. (5 cups needed)
- Basic Chocolate Ganache and Truffles
- Favorite Cake Mix or Recipe (3 cups batter needed)
- 1/4 cup heavy cream
INSTRUCTIONS
Step 1 - Bake and cool 3 cakes according to directions. Trim one layer to 1 in. high. Stack, level and fill for a 3-layer, 5 in. high cake. Spatula ice, then smooth.
Step 2 - Start spider webs. Place melted colored candy in decorator bag, cut tip. On cookie pan, pipe the colored outlines of the web, 3 to 4 four lines, 3 in. to 6 in. high. Create the horizontal semi-circle web branches, pipe lines 2 in., 3 in., or 4 in., long attaching each vertical line to each other with arcs of candy. Only 1 to 2 webs of each color needed, but make a few in case of breakage. Set out at room temp to set for 35 to 40 minutes. Do NOT chill.
Step 3 - Colours Tinted:
- Red: 3 oz. white candy + pink + black candy colors
- Purple: 3 oz. white candy + purple + red + pink candy colors
- Green: 3 oz. white candy + 15-20 chocolate candy melts + green + red candy colors
- Orange: 3 oz. white candy + orange + red + yellow candy colors
- Yellow: 3 oz. white candy + 15-20 chocolate candy melts+ yellow + black
Step 4 - Finish spider webs. Once colored candy is set, pour white candy into decorating bag, cut small tip. Fill cavities between web lines with white candy. Chill for 15 minutes until set. For taller skinner pieces, attach a lollipop stick to back using melted white candy. Chill 30 to 35 minutes until set.
Step 5 - Make ganache. Using black candy and cream, prepare ganache according to recipe. Slowly pour over top of cake, allowing drizzle over the side.
Step 6 - Decorate cake. Attach wafer spiders on one side, heavier at the base of the cake, more sparse going up.
Step 7 - Insert and position candy webs as desired.


