 | ||
| Your browser is not supported. | ||
|
Please browse our site using any of the following options:
| ||
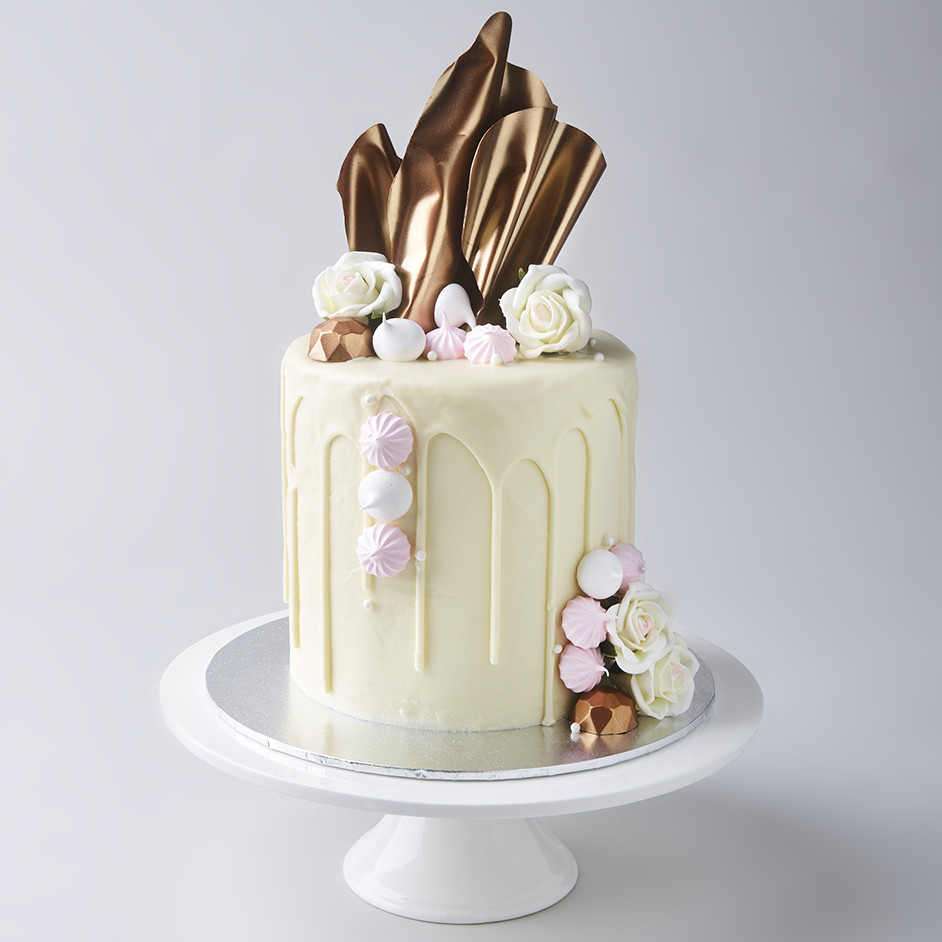
METALLIC CHOCOLATE SAIL CAKE

LEVEL: INTERMEDIATE
WHAT YOU'LL NEED
- 'Roberts' Meringue Mix
- 'Roberts' Melting Buttons - Dark
- 'Roberts' Rose Gold Crafting Dust
- 'Roberts' Toffee D'Or Caramel
- 1kg 'Roberts' Vanilla Mud Cake Mix
- White Chocolate Ganache
- 'Roberts' Pearlised Pearls - White
Equipment
- 'Roberts' Plain Round Nozzle Set
- 'Roberts' 14 point Piping Nozzle Set
- 'Roberts' Clear Acetate Sheets
- 'Roberts' Sculpting Tools
- Small Pegs
- Bamboo Skewers - Optional
- Cake Decorators Brush - Soft
- 'Roberts' Diamond Mould #83
- Three 6 Inch Cake Tins - Lined
- 'Roberts' Icing Smoother
- Flowers - White Roses
- 'Roberts' Cake Topper
INSTRUCTIONS
Step 1 - Mini Meringues - Prepare and bake Meringues according to the instructions on the back of the packet.
Step 2 - Chocolate Sail - Lay a clear Acetate Sheet on top of a large piece of baking paper. Melt the buttons according to the instructions on the back of the packet. Spoon 2 - 3 tablespoons of melted chocolate in the centre of the Acetate Sheet. Spread in a fan like shape using Roberts Sculpting Tools. Gather the Acetate Sheet to create folds and peg to secure. Transfer the sail onto a flat tray and place in the fridge to set. Depending on the size of your cake you may need more than one Chocolate Sail.
Step 3 - Remove the pegs, and carefully peel the Acetate Sheet away from the chocolate sail. Lay the sail (shiny side facing down) on top of the Acetate Sheet. Attach a skewer to the back of the sail using melted buttons. When the chocolate has completely set, carefully turn the sail over (Shiny side facing up). Use a soft decorators brush to lightly dry dust the sail with Roberts Lustre Polish or Crafting Dust. We've used Roberts Rose Gold Crafting Dust for this project. Attaching the sail to a skewer gives extra support, makes it easier to handle and avoids finger prints on the chocolate. This method also helps when attaching the sail to the cake.
Step 4 - Rose Gold Chocolates - For this project we've lightly dusted the inside of the mould cavity with Rose Gold Crafting Dust before filling with melted buttons. Create chocolate shells by filling each cavity with melted buttons. When the chocolate begins to set around the outside edge (approximately 2 - 3 mm thickness) tip the excess chocolate from the mould onto a sheet of baking paper. Scrape the excess chocolate off the mould, then refrigerate until set. Pipe a small amount of Toffee D'Or into each shell, then fill to the top with melted buttons. Refrigerate until set.
Refer to the back of the mould card for more detailed instructions.
Step 5 - Vanilla Cake - Prepare the 1kg cake batter recipe according to the packaging instructions. Evenly divide the batter between the three 6 inch cake tins. Bake in a pre-heated oven 140'c Fan forced for approximately 1 hour or until a skewer inserted into the centre comes out clean. Cool completely before decorating.
Step 6 - Ice and Decorate - Don't forget to reserve a bowl of White Chocolate Ganache for the Drip. Attach the first cake layer to a cake board using small amount of Ganache. This will prevent the cake from moving. Spread each cake with a thin layer of Ganache, then stack on top of each other. Cover the entire cake with Ganache. Create smooth edges using the Icing Smoother. Refrigerate until set. When the bowl of Ganache reserved for the drip is almost room temperature, spoon around the top edge of the cake allowing the ganache to run down the sides. Use the remaining Ganache to cover the top of the cake. Allow icing to fully set before decorating. Check with your local Florist for suitability and preparation of flowers.


