 | ||
| Your browser is not supported. | ||
|
Please browse our site using any of the following options:
| ||
CHRISTMAS BAKING CHOC

LEVEL: EASY
WHAT YOU'LL NEED:
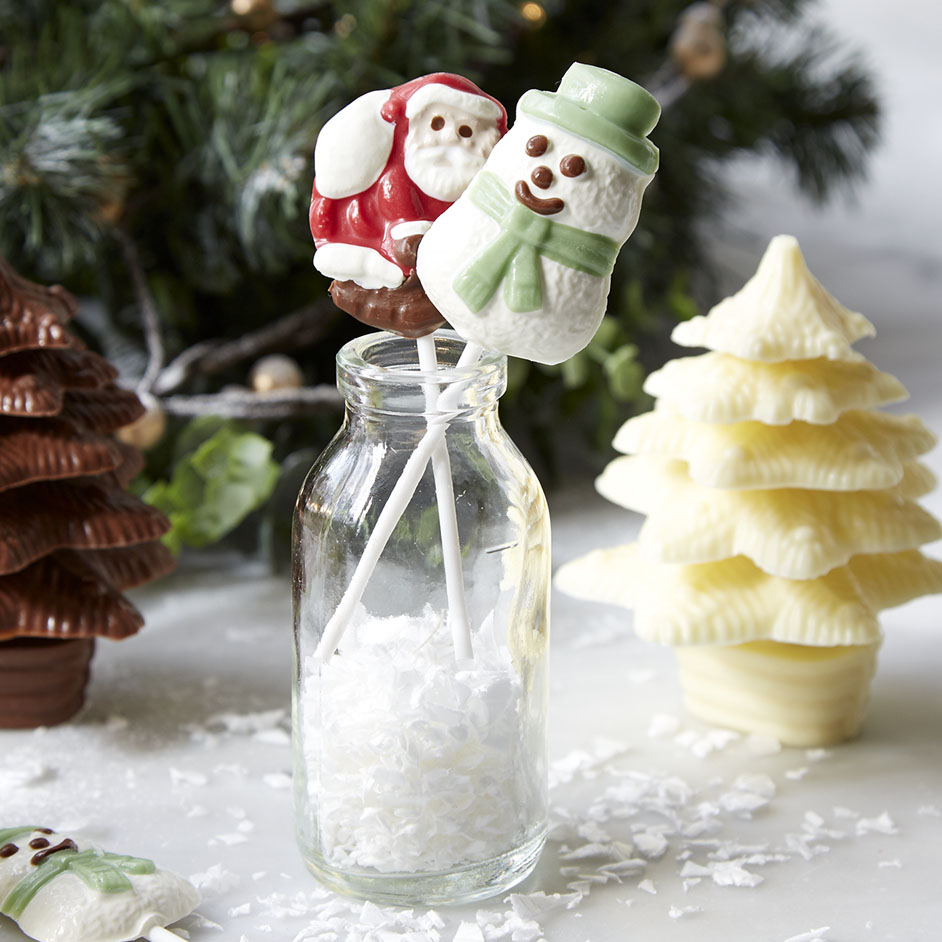
CHOCOLATE CHRISTMAS TREE
- 'Roberts Confectionery' White, Milk or Dark Melting Buttons
- 'Roberts Confectionery' Orange, Peppermint or Strawberry Flavour Oil
- 'Roberts Confectionery' Eye Droppers
- 'Roberts Confectionery' Christmas Tree Mould #302
- Disposable Piping Bag (optional)
Note: You will need approximately 150g of Melting Buttons per Christmas Tree.
CHRISTMAS LOLLIPOPS
- 300g 'Roberts Confectionery' White Melting Buttons
- 300g 'Roberts Confectionery' Milk Melting Buttons
- 'Roberts Confectionery' White, Green and Red Oil Based Powder Dye
- 'Roberts Confectionery' Christmas Lollipop Mould #96
- 'Roberts Confectionery' 100mm White Lollipop Sticks
- 'Roberts Confectionery' Cello Bags or Acetate Boxes
- Toothpicks
INSTRUCTIONS
CHOCOLATE CHRISTMAS TREE
Step 1. Melt buttons according to the instructions on the back of the packet. Flavour with drops of Oil. Pour melted buttons into a disposable piping bag. Cut a small hole in the end.
Step 2. Pipe or spoon melted buttons into each cavity of the mould. Tap on the bench to remove any air bubbles. Place in the fridge for approximately 50 minutes or until set.
Step 3. Turn the mould over onto paper towel. Chocolate Pieces should easily release from the mould.
Step 4. Assemble. Rub chocolate pieces on a warmed tray then stick together. Place Chocolate Tree onto a piece of baking paper. Leave to set.
VARIATIONS
- Attach colourful Sugar Pearls and Silver Cashous using tweezers and melted buttons
- Colour White Melting Buttons using Roberts Confectionery Oil Based Powder Dyes
- Dust each Chocolate Tree with sifted Icing Sugar
CHRISTMAS LOLLIPOPS
Step 1. Melt and colour White Buttons using the Power Dyes. For best results, take out a spoonful of the melted White Buttons, and mix with a small amount of Powder Dye until it forms a smooth paste. Mix the paste back into the remaining melted white buttons. Add a small amount of paste at a time, until the desired colour is reached.
Tip: Mix up to 1/4 tsp Powder Dye per 100g White Melted Buttons.
Step 2. Fill an electric fry-pan with water to a depth of 3cm. Bring to the boil. Turn the fry-pan off and let the water settle. There should be no steam rising from the water. Place ramekins filled with melting buttons into the warm water. This method is great for keeping chocolate warm when working with small quantities of coloured buttons. If the water cools, turn the water bath onto the lowest setting for short periods. Do not allow the water to boil.
Step 3. Colour mould details using toothpicks. Leave each colour to set before adding another. Be generous. If colours are too thin they will look transparent. Look at the underside of the mould. Use a toothpick to remove any air bubbles.
Step 4. Fill the remainder of each chocolate with melted buttons. While the chocolate is still wet, insert lollipop sticks.
Step 5. Place the mould into the fridge to set for approximately 20 minutes. The Chocolate Lollipops should easily release from the mould.
TIPS
Chocolates make great cake and cupcake toppers. They also make great gifts. Place into Cello Bags or Acetate Boxes and tie with colourful ribbon


