 | ||
| Your browser is not supported. | ||
|
Please browse our site using any of the following options:
| ||
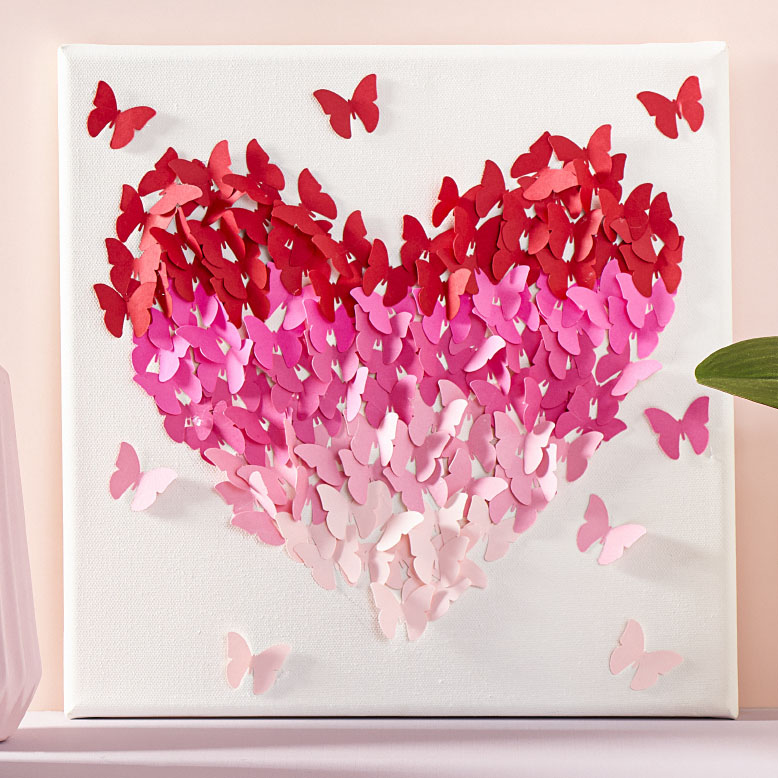
PAPER HEART CANVAS

What you'll need:
- Silhouette cutting machine
- Machine mat
- Cardstock in range of pinks and reds to create an ombre effect
- Hot glue gun & glue sticks
- 30cm x 30cm white canvas
- Pencil
Instructions:
Cutting the Butterflies
Step 1 - Open Silhouette Design Store Application and create a new project. Select a Butterfly shape from the available designs or upload your own design. The butterfly shape needs to be simple without too many detailed lines, because we will be cutting these out at a very small scale.
Step 2 - Scale down your butterfly shape so that it is approximately 3cm wide and 2.5cm tall. Arrange the butterfly shape on your project page, repeating it out so you can cut a large quantity of butterflies at the same time. Depending on how many butterflies you layer on the canvas, you may like to cut out approximately 45 butterflies in each colour. This quantity will be enough to create the design on a 30cm x 30cm canvas.
Step 3 - Select one of the cardstock papers from your collection, begin with cutting out the lightest colour, in this example we cut out the light pink first.
Step 4 - Place your paper on the machine cutting mat securely and follow the prompts on your machine for cutting cardstock paper.
Step 5 - Once cut, remove the butterflies and set aside. Repeat steps 3 to 5, until you have cut out all the colours.
Gluing the Butterflies
Step 1 - Now you will have a few piles of butterflies in varied colours, so you can plan your design on the Canvas. Draw the outline of a large heart onto the canvas using a pencil.
Step 2 - Starting from the bottom of the heart, layout the lightest coloured butterflies at the bottom. Gently fold each butterfly in half before placing it on the canvas, this gives them a 3D appearance and allows you to layer the shapes and fill in any white spaces.
Step 3 - Continue placing your coloured butterflies on the canvas, working from bottom to top and lightest colours to darkest, you can vary how much of each colour you place on the canvas.
Step 4 - Once you have laid out all the butterflies and are happy with the overall shape, you can begin gluing down the butterflies. Working in the same direction as you did for laying out your shapes, work from the bottom up when gluing. Heat your glue gun and place a small dot on the back of a butterfly and glue down. Try to overlap the butterflies so that any gaps are filled with colour.
Tip - Gluing your butterflies with the Glue Gun can be messy work, it's okay if you start to see lots of strands of glue to appear across the canvas. These can easily be removed once your work is dry.
Step 5 - Once you have filled the heart completely you can place a few butterflies around the outside of the shape, almost like they are flying away from heart. Finish by removing any glue strands.


