 | ||
| Your browser is not supported. | ||
|
Please browse our site using any of the following options:
| ||
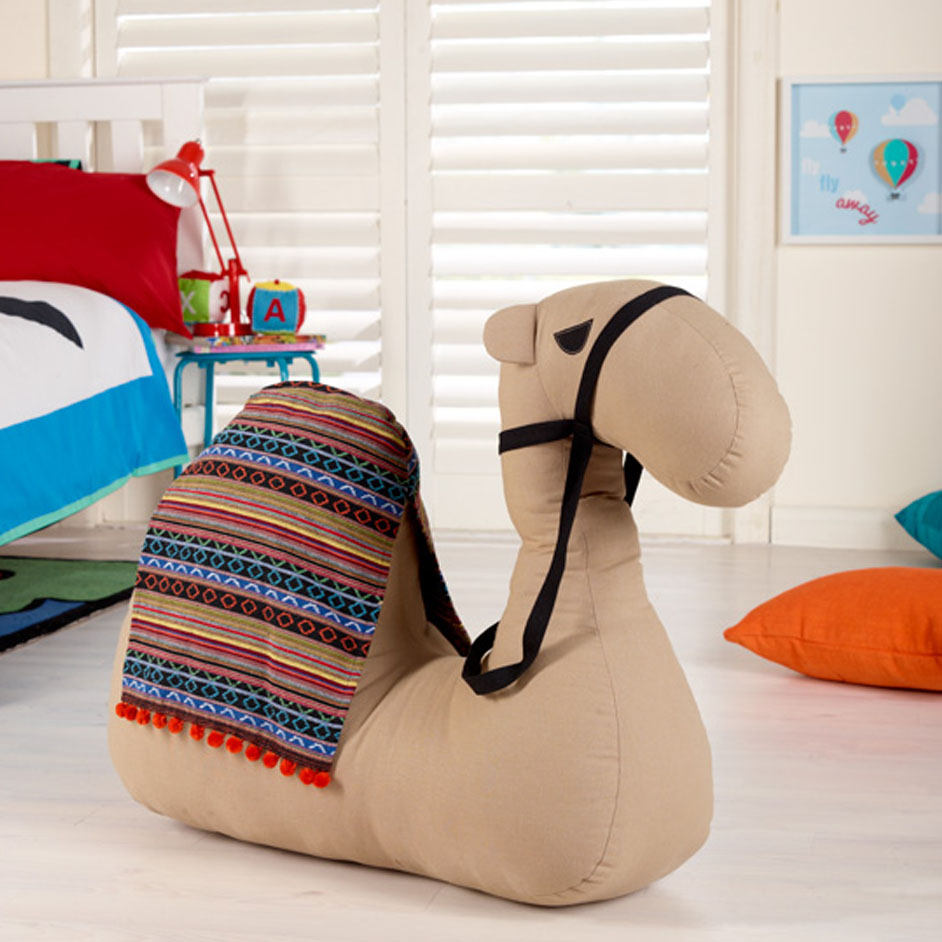
TOY CAMEL

WHAT YOU'LL NEED
- 2m furnishings plain cotton canvas (body) - camel colour
- 50cm Hasina fabric (blanket)
- 70cm Pompom trim
- Scraps of plain black cotton fabric (eyes)
- Vliesofix
- Scraps of thick fusible wadding (pellon) for ears
- Black cotton tape or ribbon for reins
- 2 x 1kg bags Hobby fill
- Matching Gutermann sewing thread
- Tape measure
- Hand sewing needle
- Scissors
- Pins
- Iron
- Sewing machine
INSTRUCTIONS
CUTTING
Using pattern provided cut out the following:
- from camel canvas 2 x body pieces, 1 each of the underbody strips, 2 x side face pieces and 4 x ear pieces
- from fusible wadding 2 x ear pieces
- from black cotton 2 x eyes
- from Hasina fabric 2 x blanket pieces, 36cm wide x 46cm long
EARS
1. Fuse wadding to wrong side of two of the ear pieces then pin to the other two ear pieces with right sides facing.
2. Sew together around curved edge, leaving straight bottom edges open. Trim wadding back to stitching, clip and trim curved seam and turn right side out. Press flat.
3. Baste bottom straight edges together 5mm in from edge.
BLANKET
1. Double hem the sides of each blanket piece by pressing under 1cm then another 1cm and topstitching in place.
2. Press under 1cm then another 1cm along the bottom edge of each blanket piece and pin in place. Pin pompom trim to the underside of the pressed hem, then topstitch hem and trim in place with one line of stitching.
3. With body pieces right side up, place blanket pieces right side up on top of the body pieces, aligning blankets at the top. Trim any excess blanket fabric to be in line with the curve of the top of the body pieces.
BODY
1. Pin the straight edge of ears to the short straight edge of each body piece 2.5cm in from the top raw edge. Baste to body.
2. With right sides facing, pin and sew each of the side face pieces to the body pieces, aligning straight short edge, enclosing the ear within the seam.
EYES
1. Fuse Vliesofix to the back of the black cotton scraps. Trace 2 eye shapes on paper side and cut out.
2. Peel off backing paper and place on the right side of each face piece as shown on pattern. Fuse eyes to face and topstitch around each eye in a contrasting thread 2-3mm in from outer eye edges.
BODY
1. Join the two underside strips at the two short straight edges, leaving an 8-10cm opening in the middle of the seam. Press open.
2. Starting at the back of one of the camel side body pieces, at the right edge of the blanket, and with right sides facing, start pinning the back pointed end of the underbody strip. Continue pinning the strip down and all the way around the edge of the camel right body piece, ending at the back of the camels head. Sew together.
3. Pin the other side of the camel body to the other side of the strip, matching the start and end points.
4. Pin the two body pieces together along the back of the neck and back, from point to point and sew together.
5. Clip and trim all seams. Turn right side out through opening in base of underbelly strip and press.
6. Stuff camels head, neck and body to desired fullness. Hand stitch opening closed.
BRIDLE
1. To make bridle, wrap tape from under chin around neck and back to under chin and pin together. Then wrap tape
up over the top of the head back to tape on the other side and pin together.
2. Trim tape allowing extra for raw edges of tape to be folded under neatly. Folding under raw edges, pin desired length of tape from one side of the head to the other to make strap. Trim off excess tape and pin raw edges under.
3. Carefully remove tape and stitch together where pins have joined it all together.
Note - Please beware of the length of strap with smaller children, it can be a choking hazard.


