 | ||
| Your browser is not supported. | ||
|
Please browse our site using any of the following options:
| ||
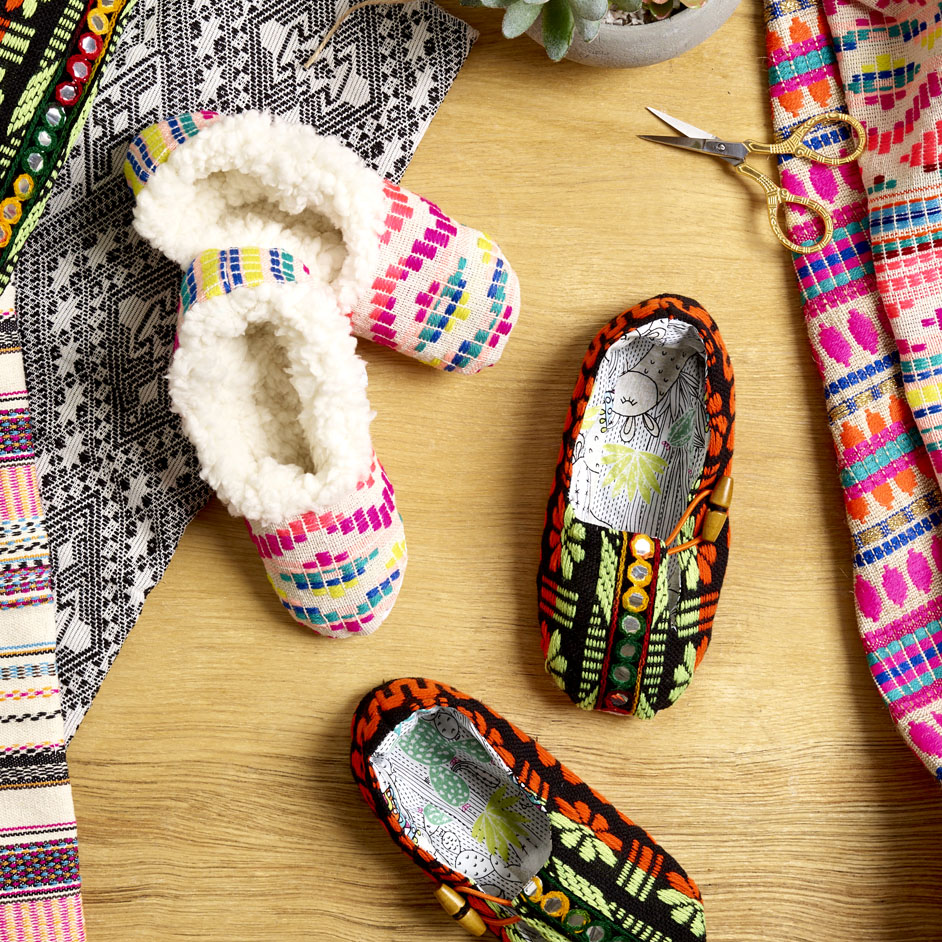
MEXICAN PONCHO SHOES

LEVEL: INTERMEDIATE
WHAT YOU'LL NEED:
Fur LinedMaterials
- 30 centimetres, 110cm wide Mexican Poncho (Main fabric)
- 30 centimetres, 148cm wide Softy Cuddle Fleece (Lining)
- 1 packet of Birch Non Slip Fabric (precut)
Cotton Lined
- 30 centimetres, 110cm wide Mexican Poncho (Main fabric)
- 30 centimetres, 112cm wide Printed Poplin (Lining)
- 30 centimetres Cosy Cotton wadding
- 1 pkt of Birch Non Slip Fabric (Precut)
- 2 Toggles
- Birch round elastic cord
Additional Supplies
- Matching sewing thread
- Scissors, tape measure
- Sewing machine
- Sewing needle, iron
SIZE
- 3-4yo 17cms
- 5-6yo 19cms
- 7-8yo 21cms
INSTRUCTIONS
Step 1.
Using pattern below draft pieces separately to scale for required size (tracing around child's foot will help with drafting to their foot shape). Pin each pattern piece to doubled material as follows:
Sole:Cut 2 of all fabrics
Inner/Upper Shoe: Cut 2 of lining (Inner), 2 of Wadding & 2 of main of main fabric (Upper) - ensuring pattern piece placed to suit pattern, cut out separately if necessary to ensure matching.
Step 2.
Fleece Lined:With right sides facing, pin Inner and Upper together around curved shape. Sew using a 1cm seam allowance.
Cotton Lined:Cut 2 pieces of Elastic 6cms long. Fold in half and pin to opening as per diagram, tack with machine to hold in place.
Baste wadding layers to wrong side of (inner) lining layers around all edges. These can now be treated as one lining (Inner) piece going forward.
With right sides facing, pin Inner and Upper together around curved shape, pin opening and mark out stitch line.
Sew with a 1cm seam allowance, and taper stitch line for opening as per diagram.
Step 3.
Both:With right sides facing, pin upper & inner backs together, matching seam of both. Sew using a 1cm seam allowance. Snip curves and corners, and turn to right side. Tack seam with wrong sides together, cotton lined can be pressed to hold. (Tacking is to be removed when slipper complete).
Step 4.
With both right side up, lay non slip sole over main fabric sole, tack to hold in place (Tacking is to be removed when slipper complete).
With right sides facing, pin prepared sole to main fabric upper, matching centre back heel to seam, and ease any curves. Sew using a 1cm seam allowance.
With right sides facing, pin lining sole to lining inner, matching centre back heel to seam, and ease any curves. Mark off a 5cm opening on one side. Starting with a back tack, sew from one side of the opening around seam using a 1cm seam allowance, and finish with a back tack at the other side of the opening.
Step 5.
Turn to right side and hand-sew opening closed using an invisible stitch (fur lined: ensure base fabric stitch and not just fur. Tuck lining inside slipper and remove any tacking.


