 | ||
| Your browser is not supported. | ||
|
Please browse our site using any of the following options:
| ||
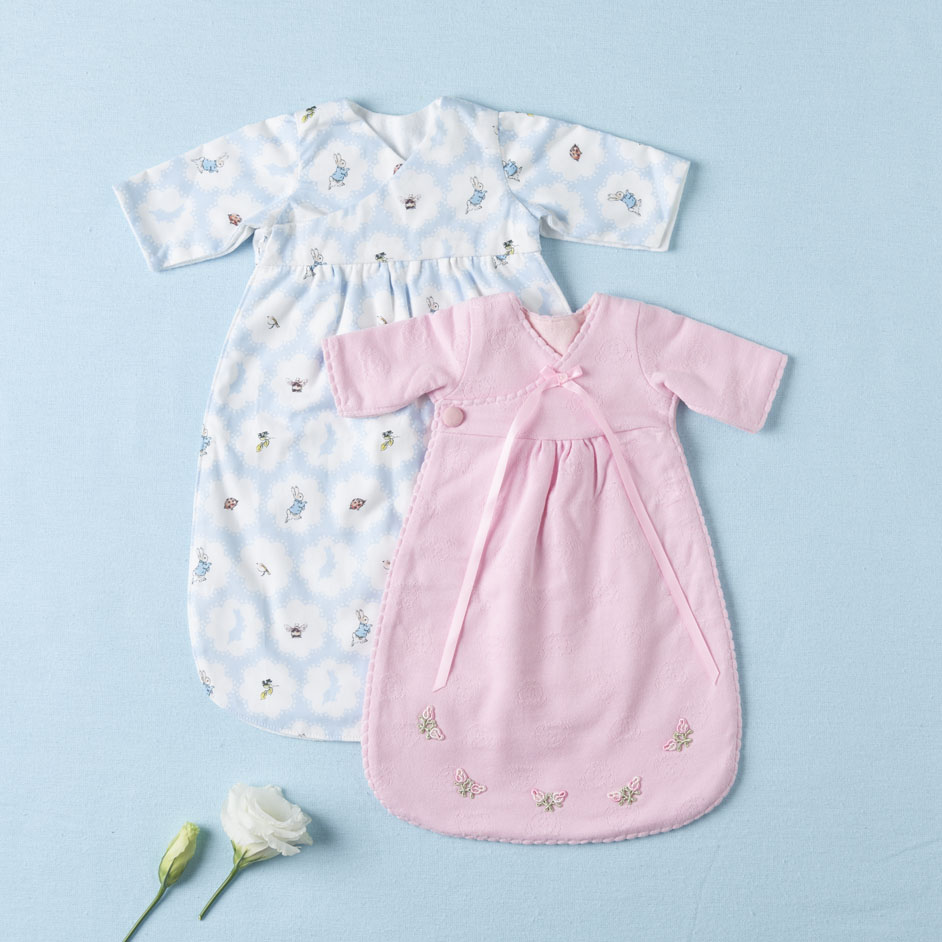
SLEEPING BAG

LEVEL: EASY
WHAT YOU'LL NEED:
Sleeping Bag - Opens out flat
Please note that the patterns are exclusively for the Treasured Babies' Program and we would appreciate them not being copied for other purposes:
- All seam allowances are 6mm unless stated otherwise.
- Trace paper patterns onto interfacing/other. Where possible make bodice back and 'bag' as entire pattern pieces, (i.e. cut interfacing on the fold as this saves time cutting out, especially when multiple garments are being made).
- It is very important to press where indicated, as this will result in a well finished garment. The same results are not possible if pressing is left till the end. Making multiples of garments at one time will streamline this process.
- It is also important to machine neaten, (overlock or zig-zag all raw edges), to create quality, well finished garments.
- Please use only 6mm metal snap fasteners, preferably 'Hemline' brand if available.
INSTRUCTIONS
Step 1. All sizes of this garment can be made from interlock fabric, (plain or with an appropriate small print*), lined with fine stretch knit/batiste/voile. Alternatively, it can be made from very fine pinwale cord, lined with batiste/voile. Use only Bebe cord, which is available from Spotlight - in pale colours: white, cream, pale pink or pale blue), or other warm fabric. Larger sizes can also be made from appropriate cotton fabric, lined with flannelette.
*Spotlight sometimes have interlock bunny rug packs with gorgeous prints that can be purchased when they're on special. You will be able to make a few sleeping bags from each rug (usual size is 100cm x 75cm).
Step 2. Cut out fabric and lining as per pattern instructions.
HINT: It doesn't matter which is the right side of the lining for poplin/voile/batiste.
Step 3. With right sides facing, join bodice fronts and back together at shoulders. Repeat for lining, ensuring that you have the pieces put together the correct way. Trial this by putting the pinned pieces together before sewing. Press seams open.
HINT:For the left & right fronts, place on the reverse side of what is done for the fabric).
Step 4. With right sides together, place bodice and bodice lining together and pin, matching shoulder seams. Stitch across the lower side of the left bodice, continuing up to the diagonal left bodice, across the back bodice neckline, down the right bodice diagonal and the small seam on the LHS of the right bodice. Stitch all side seams.
HINT: If a trim such as lace or ric-rac is to be added, this should be done by stitching the back neckline and diagonal seams ONLY, pressing the seam towards the lining, carefully applying the trim and completing the stitching as above. This step is not necessary if using a daisy/other trim which will not fray at the cut ends.
Step 5. Clip all curved edges closely, especially around the neck. Trim neckline to 4mm. Clip corners.
Step 6. Turn bodice out and use a skewer or similar to gently ease out corners. Press well.
Step 7. Sleeves: with right sides of fabric and lining facing, stitch side and bottom seams. Ensure that the curved armhole edge of the sleeves match up well. Clip corners, turn out using a fine bamboo skewer to create neat corners. Press well.
Step 8. If using a non-stretch fabric, a gathering stitch around the top of the sleeve between the marked dots will make easing the sleeve in easier. Pin sleeves into the bodice armhole edges and stitch. Nick armhole seam well if overlocking. Overlock/machine-neaten seam. Press seam towards sleeve.
Step 9. 'Bag' section: With right sides together, join fabric to lining. Repeat for second piece. Clip rounded edges & trim to 4mm. Turn out and press well.
Step 10. Gather the upper edge of each bag section.
HINT: Using 2 rows of gathering gives the best result.
Step 11. Pull up threads so that bag front fits right bodice front and repeat for the back bodice. Pin and stitch. (See figure 17). Overlock/machine-neaten to finish.
Step 12. Press this seam with overlocked edge to the bodice side. On the outside stitch approximately 3 mm from the seam line on the bodice side to secure.
HINT: If you have an open embroidery foot this makes top-stitching easy and neat.
Simply line up the inside of the foot with the edge of the fabric, adjust the needle position if necessary and sew!)
Step 13. Top-stitch, (or decorative stitch), 3-4mm in from the stitched seams for the entire edge of the garment, (6mm for larger sizes). Stitch using matching/contrasting thread as desired. Commence stitching on the lower edge of the left hand side bodice, so that reinforcing stitches are concealed.
Step 14. Apply small (6mm) snap fasteners/metal press studs, sewing the male parts to the inside fronts and the female parts to the inside backs:
- The lower corner of each sleeve cuff.
- The top bag seam on each side.
- Half way down each side of the bag section.
- One to join the insider of the tapered right bodice to the lower left corner of the left bodice (behind the button).
Step 15. Press the garment well.
Step 16. If desired, attach a small matching button/bow to the corner of the tapered left corner of the right bodice.


