 | ||
| Your browser is not supported. | ||
|
Please browse our site using any of the following options:
| ||
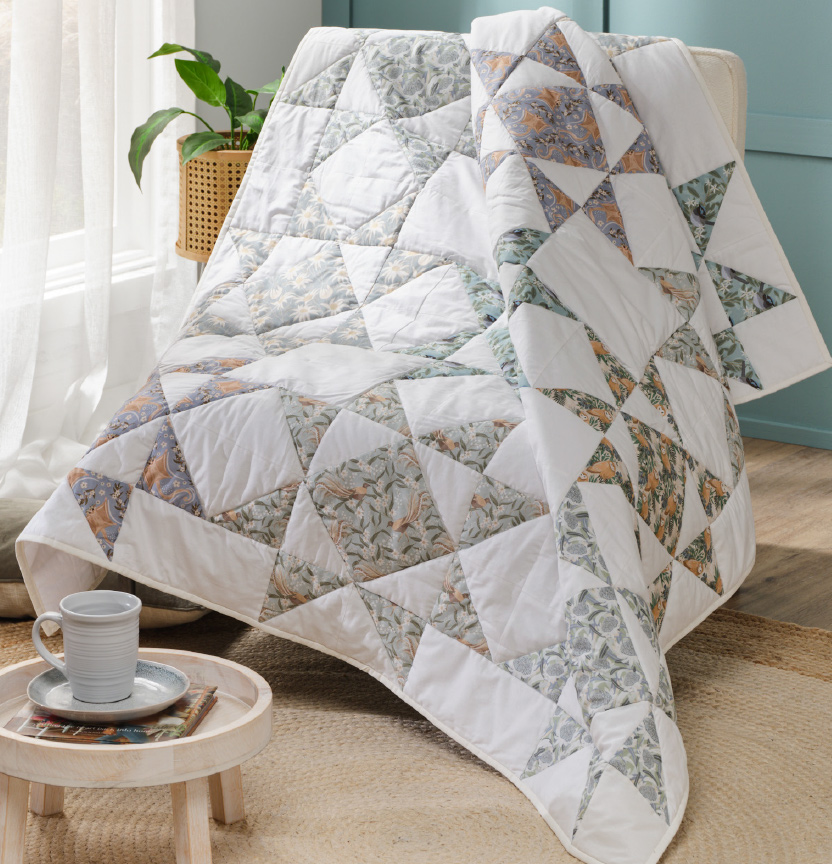
CHRISTIE WILLIAMS HERITAGE QUILT

Level: Intermediate
What you'll need:
- Fabrics are from 'Christie Williams Heritage' range
- 40cm Fabric A - Barn Owl, vanilla bean
- 40cm Fabric B - Flannel Flower, blue
- 40cm Fabric C - Fairy Wren, blue
- 40cm Fabric D - Waratah, blue
- 40cm Fabric E - Sugar Glider, blue
- 40cm Fabric F - Lyrebird, blue
- 8m Fabric G - Prima Homespun, natural unseeded
- 5m x 250cm wide Backing fabric, natural unseeded or colour of choice
- 2m Prima Poly Wadding or batting of choice
- Matching Gutermann 100% cotton thread
- Rotary cutter, mat & quilters rulers
- Quilting pins, tape measure
- Scissors, seam ripper
- Hand needle
- Sewing machine with ¼" foot & walking foot
All fabrics should be 100% cotton, washed & pressed.
¼" seam allowance used throughout unless otherwise indicated.
Read all instructions carefully before commencing the quilt.
Cutting
All strips are cut across the width of fabric unless otherwise stated.
- From each of Fabrics A, B, C, D, E & F cut 1 x 7" strip, crosscut strips into 2 x 7" squares for a total of 12 x 7" squares, 12 squares in each colour.
- From each of Fabrics A, B, C, D, E & F cut 1 x 5¼" strip, crosscut strips into 8 x 5¼" squares then cut each square once on the diagonal to make 16 half-square triangles in each colour.
- From Fabric G - cut 2 x 5" strips, crosscut strips into 16 x 5" squares. Cut 4 x 5" strips, crosscut strips into 16 rectangles 5" x 9½".Cut 9 x 5¼" strips, crosscut strips into 72 x 5¼" squares then cut each square once on the diagonal to make 144 half-square triangles.
- From Fabric G cut 7 x 2¾" strips for binding.
Note: binding is cut ¼"wider to accommodate the poly wadding. Rather than trim wadding from seam allowance cutting binding larger gives a more robust binding. If using cotton or bamboo cut binding as usual.
Instructions:
Step 1 - Take a 7" Fabric A square and sew a Fabric G half-square triangle to opposite sides, press seam outwards. Sew a Fabric G half-square triangle to remaining sides, press seam outwards. Repeat to make second Fabric A square.
Step 2 - Repeat Step 1 with 7" squares of Fabrics B, C, D, E & F.
Step 3 - Take the 16 Fabric A half-square triangles and 16 Fabric G half-square triangles and sew together to make 16 half-square triangle units. Press seams open. Sew half-square triangle units together in pairs with seam along Fabric G. Press seams open.
Step 4 - Repeat Step 3 with half-square triangles of Fabrics B, C, D, E, & F and remaining Fabric G half-square triangles.
Step 5 - Take Fabric A square from Step 1 and sew a unit from Step 3 to each side as shown in diagram. Repeat to make a second Fabric A unit.
Step 6 - Repeat Step 5 with Fabrics B, C, D, E, & F to make a total of 12 units.
Step 7 - Arrange the 12 units into 4 rows with 3 units in each row as desired or refer to photo for colour placement.
Step 8 - Sew units together in each row matching seams. Set rows aside.
Step 9 - Layout the top row as in diagram and sew together.
Step 10 - Layout the 3rd row as in the diagram and sew together.
Step 11 - Layout top row (Step 9), first row from Step 8 and 3rd row (Step 10) and sew together matching seams.
Step 12 - Repeat Steps 9 to 11 for the remaining rows from Step 8 to create a total of 4 sections.
Step 13 - Sew the 4 sections together to complete the quilt top.
Step 14 - Layer the backing, wadding and quilt top and baste together. Quilt in the ditch around all Fabric A, B, C, D, E & F squares and triangles.
Step 15 - Join the 7 x 2½" binding strips on the bias to make one long strip. Press in half lengthwise and bind mitring corners. Attach a label or sign and date your quilt.


