 | ||
| Your browser is not supported. | ||
|
Please browse our site using any of the following options:
| ||
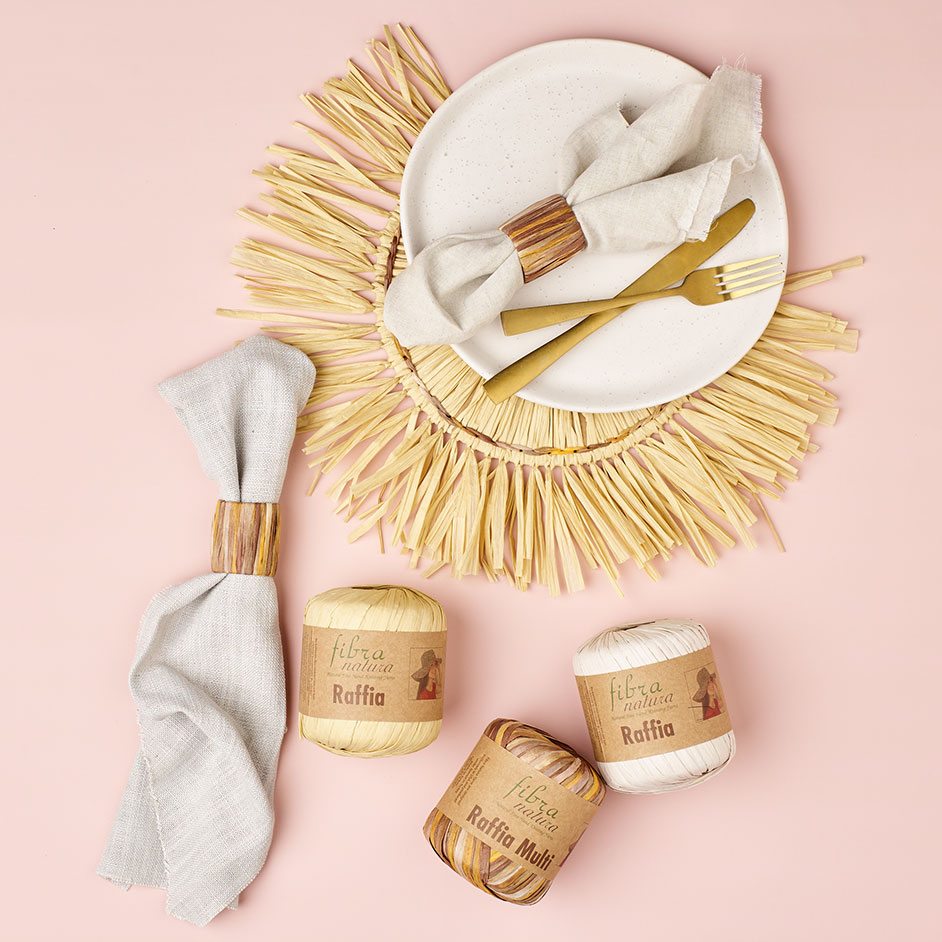
NATURAL RAFFIA PLACEMAT AND NAPKIN RING

Level: Easy
WHAT YOU'LL NEED
- 2 x FIBRA NATURA Raffia Natural (1 x Placemat)
- 1 x FIBRA NATURA Raffia Browns (6 x Napkin Rings plus extra for stitching of Placemat)
- Scissors
- Cardboard
- Cardboard roll
- A plate
- Pencil
- Awl
- Darning needle
INSTRUCTIONS
PLACEMAT
Step 1 - Start by placing your plate right side down onto the cardboard and trace around it using a pencil. Cut this shape out with scissors and repeat to create multiple placemat bases.
Step 2 - Using a ruler, find the centre point of your circle and punch a hole through the cardboard using the awl.
Step 3 - Use the ruler again to measure and mark 2cm spaces around the circumference of the circle roughly 1cm in from the edge. Once you have done this, use the awl again to carefully punch holes through the cardboard. Repeat on all other placemats.
Step 4 - Take the raffia ball and cut 2 pieces roughly 20cm long. Fold these in half and thread the folded end through one of the holes along the edge of the placemat. Then tuck the ends through the folded raffia and pull tight to create a knot around the edge of the cardboard. Cut the raffia depending on the length you want the tassel edge of your placemat to have. Repeat this process until all the holes around the outside are filled and your placemat has a lovely tassel edge.
Step 5 - Thread a long piece of raffia (a meter or 2) through the darning needle and push the needle through the centre hole of the placemat from the back. Pull the raffia up and through one of the holes along the edge where the tassels are, tie it back to the raffia on the back side. This will be hidden once the placemat is finished.
Step 6 - Continue sewing the raffia through the centre of the placemat and up to the edge. Go through the holes and then wrap it twice, spreading the raffia evenly between the holes to cover the cardboard underneath. Keep tying more raffia on as you work around the entire placemat until finished.
Step 7 - Lastly take a piece of browns raffia and again use the darning needle to thread it through the holes around the circumference of the placemat to create a running stitch and finish off your placemat neatly.
Step 8 - Repeat steps 1-7 for each placemat.
NAPKIN RING
Step 1 - Take the cardboard roll and cut it to the desired width you want you napkin ring to be. Ours was 5cm wide.
Step 2 - Take a long piece of raffia, roughly 1m long and loop it around the cardboard and tie a knot to secure. This knot will be hidden once finished.
Step 3 - Wrap the raffia neatly around the cardboard, tying more raffia on as needed until the entire piece is covered.
Step 4 - Repeat steps 1-4 to create multiple napkin rings.


