 | ||
| Your browser is not supported. | ||
|
Please browse our site using any of the following options:
| ||
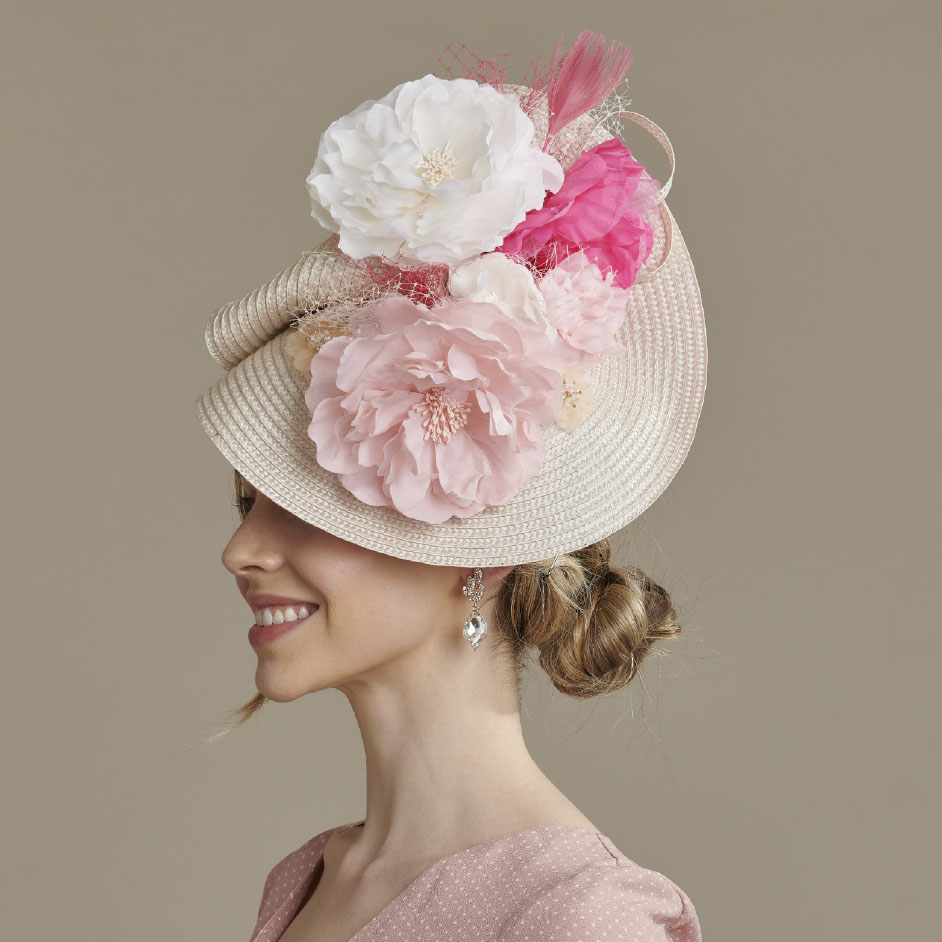
SHAPED FLORAL FASCINATOR

LEVEL: INTERMEDIATE
WHAT YOU'LL NEED:
- Maria George "Felted" saucer base on headband in natural
- Koo Round braid 38cm placemat from the Napery dept*
- White "Lampshade braid" dyed soft beige 45cm
- Assorted flowers - 3 small/3 large or your choice from the millinery dept or other source
- 3 Acrylic flowers
- Veiling - Fuchsia and natural (store bought) 40 cm and pale pink 25cm dyed
- Stripped dyed peacock feathers (optional) natural and Fuchsia
- Needle and colour matched strong thread
- 450 Clear quick drying glue
*The project used Oran Faux Jute placemat in natural, but you can use any similar placemat that is pliable. These come in packs of 2. I only used one, so you have a spare for another project.
INSTRUCTIONS
Step 1 - Measure the outer circumference of the base and cut a piece of lampshade braid 2.5 cms longer. In a small bowl measure 1/2 teaspoon of instant coffee, 1 teaspoon of salt (to set the colour) and added boiling water. I then dyed the braid in this mix to a soft beige to colour match the base. I also used the same mix to dye 40cm of ivory veiling to a soft beige colour. I set aside to dry.
Step 2 - I also dyed 25cm of ivory veiling to a soft pink in a mix of frozen berry juice and salt and boiling water. If you can only find veiling with spots these can be removed and the dots reused. They are pieces of wired "pipe cleaner" for those of us who know what a pipe is!. Simply unfold the ends and bingo no more spots. Alternatively if you like the spots leave them on.
Step 3 - Once the braid was dry I glued the ends underneath and then glued the braid to the base, making sure the join neatly butted together was at the back of the base. Of course you can always stitch in place. This braid gives a nice finish to the edge.
Step 4 - Next, take your placemat and locate the outer join. Unravel at lease one row. Go slowly as a continuous stitch is used to sew the placement together from the centre and it unravels very easily. My finished placemat size was 37cms. If however is too big for you. Simply unravel more rows of braid until you are happy with the size. Put aside the excess braid to make loops to add as a trim. I also used some of this under the base to cover the headband attachment. Resecure the end of the braid with a few back stitches and also glue the end back in place. Angle in to the edge of the mat
Step 5 - Cut a few single petals from the back of a larger flower for adornments and to cover stitches. Now make a fan shape out of your placemat. Pinch & twist the placemat in the centre and make a few soft folds until you are happy with the shape. It will sort of look wavey. Pin into place and stitch to secure where needed using double strand good strength thread. I like to focus on the front of the fan to come over the front of the base it will be stitched to. It may take several attempts till you are happy with the folds. Constantly check in the mirror as you go for fit and wearability. For placement angle over your right eye.
Step 6 - Arrange your assortment of flowers over this fluted piece fairly close together. I like to choose flowers without clips or pins but in this instance I used the pins to invisibly attach to the mat, by securing finely through 2-3 rows of braid. Make sure you can't see the clips either ... glue down a couple of the outer petals on the back of the flower. I glued the acrylic flowers onto the shape.
Step 7 - Use pieces of veiling roughly folded in half and secured by wrapping a few times with double cotton. Tie off and place different colours/pieces of veiling in the gaps. Stitch or glue to secure.
Step 8 - Cut the placemat braid into various lengths e.g. 22,24 and 28cm lengths and make 3 loops. Either glue or stitch ends together. Place onto your fan. Check in the mirror for the overall balance of the position of the flowers/loops and then either Stitch or glue onto your fan as desired. Add one stripped dyed and shaped ostrich feather to the top of the montage.
Step 9 - Make the reverse of the hat also look pretty by adding a few smaller flowers, veiling and a stripped dyed and shaped ostrich feather. Strip feathers by pulling the feather veins down and away from the central spine on either side. Shape the tops as required with fine scissors. I have gone for a soft oval shape. Use the clip or glue the flowers/veiling into place.
Go the extra mile and decorate the underneath of the piece with braid, pipe cleaner dots, cut petals etc to cover stitching or joins.


