 | ||
| Your browser is not supported. | ||
|
Please browse our site using any of the following options:
| ||
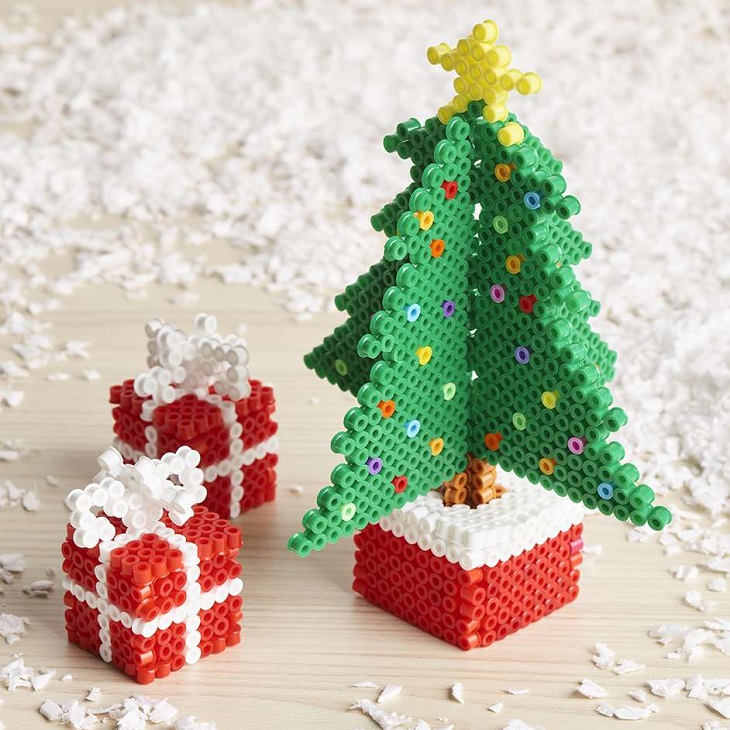
HAMA BEAD CHRISTMAS TREE & PRESENTS

Level: Easy
WHAT YOU'LL NEED
- Hama Large Square Pegboard
- Hama Beads
- Iron
- Baking paper
INSTRUCTIONS
TREES
Total Bead Colors Needed
- Magenta - 3
- Red - 108
- Cheddar - 7
- Hot Coral - 65
- Yellow - 23
- Prickly Pear - 40
- Pastel Green - 60
- Kiwi Lime - 103
- Light Green - 50
- Dark Green - 1061 - 2 bags
- Pastel Blue - 9
- Purple - 7
- Light Brown - 50
- Brown - 24
- White - 104
Step 1 - You will use the large square pegboard for your projects. If you're using a clear pegboard, slide the actual-size pattern underneath it. Place all the beads for the design using the template for the 3D Christmas Trees.
Step 2 - Ask an adult to fuse your designs. Place your pegboard on a flat, heat-safe surface. Set a household iron to the medium setting. Place ironing paper over the pegboard. In a circular motion, begin to iron the project. When ironed properly, the beads will still have open centers. DO NOT OVER-IRON as this will cause the beads to close and can make assembly of your project more challenging. Let the design cool.
Step 3 - Remove the paper and bead design from the pegboard. Flip the design over to expose the non-fused side. Repeat step two. Let cool completely. Once the design is cool, peel off the ironing paper. Your pegboards and ironing paper are reusable.
Note: Beads need heat for about 10-20 seconds per side to fuse evenly. Lift the paper occasionally to see how the beads are fusing. Additional heating time may be required.
Step 4 - Assembly - For the natural tree, turn the feet at right angles to the tree and slide onto them onto the tree's lower edge. For the decorated tree, first connect the five base pieces as shown here. Push the two side segments into the center slots of the tree. Gently insert the tree into the base as shown.
PRESENTS
Total Bead Colors Needed
- Red - 182
- White - 106
Step 1 - You will use the large square pegboard for your projects. Place all of your beads on the pegboard using the template for the 3D Present. Once you have finished placing all beads for the design on the pegboard, you will need to fuse it.
Step 2 - For young children, adult supervision is recommended for the fusing stage. Place your pegboard on a flat, heat-safe surface. Preheat a household iron to the medium or high setting. Cover the beads with baking paper and iron a slow circular motion for 10-20 seconds. When ironed properly, the beads will still have open centres. DO NOT OVER-IRON as this
will cause the beads to close and can make assembly of your project more challenging. Let the design cool for 1 minute.
Step 3 - Remove the paper and bead design from the pegboard gently. Repeat step 3 if the beads have not fully fused. For the remaining design, repeat step 2 & 3. Let cool completely before assembling. Pegboards and ironing paper are reusable.
Step 4 - Assembly - First connect the five base pieces for the box. For the lid, put together the bow first and then insert into the lid. Place lid on top of box and now you have a 3D Christmas present.
TECHNIQUES
Do not add water to your iron, the steam will ruin the beading during the fusing stage.
Beads need heat for about 10-20 seconds per side to fuse evenly. Lift the paper occasionally to see how the beads are fusing. Additional heating time may be required.


