 | ||
| Your browser is not supported. | ||
|
Please browse our site using any of the following options:
| ||
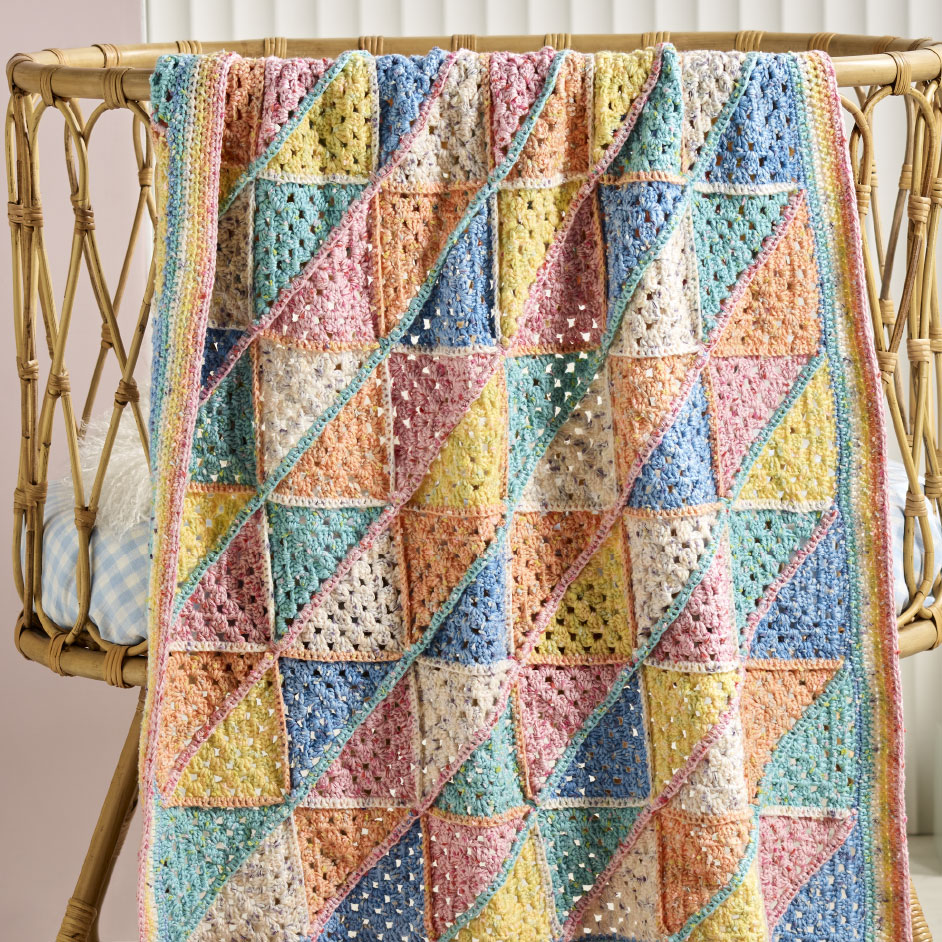
PEBBLES TRIANGLE BABY THROW

LEVEL: BEGINNER
What you'll need:
- 100g 2 Bella Baby' Pebbles Balls each x 5 colours, (Col1, Col2, Col3, Col4, Col5), 1 x colour, (Col 6)
- 4.00mm crochet hook
- Scissors
- Yarn needle
MEASUREMENTS
Finished Size: 90cm x 106cms approx
TENSION
Finished Granny Triangle 16cm x 8cms using a 4mm hook.
INSTRUCTIONS
Granny Square Half Pattern - Make 14 of each colour.
Foundation Ch: Make a sl knot and work 6ch.
Row 1(RS): 3tr in 6th ch from hook, 2ch, 3tr in same ch, 2ch, 1tr in same ch. Turn.
Row 2: 5ch, 3tr in 2 ch-sp, 1ch, (3tr, 2ch, 3tr) in next 2 ch-sp, 1ch, 3tr in next 2ch-sp, 2ch, 1tr in same ch-sp. Turn.
Row 3: 5ch, 3tr in 2 ch-sp, 1ch, 3tr in next 1ch-sp, 1ch (3tr, 2ch, 3tr) in next 2 ch-sp, (1ch, 3tr in next ch-sp)twice, 2ch, 1tr in same ch-sp as last. Turn.
Row 4: 5ch, 3tr in same ch-sp, (1ch, 3tr in next 1ch-sp)twice, 1ch (3tr, 2ch, 3tr) in next 2 ch-sp, (1ch, 3tr in next ch-sp)3 times, 2ch, 1tr in same ch-sp as last. Turn.
Row 5: 5ch, 3tr in same ch-sp, (1ch, 3tr in next 1ch-sp)3 times, 1ch (3tr, 2ch, 3tr) in next 2 ch-sp, (1ch, 3tr in next ch-sp)4 times, 2ch, 1tr in same ch-sp as last. Turn.
Assembly
Diagonal Rows
Notes: Working from right to left along the bottom, start from the bottom to the right side, then the left side to the right side and top of your layout to ensure the stitches lay the same way. (Arrows in Black)
Using Col 1 and Double Crochet stitch, join triangles to make Diagonal Rows, work a dc in each stitch from the top of each triangle, at the end of a triangle, join the next triangle along. (First Diagonal row will have 3 triangles)
Using Col 2, join next Diagonal Row of triangles in the same manner, there will be 5 triangles.
Continue in this manner alternating between Col 1 and Col 2 as the joining yarn. There will be 11 Diagonal Rows and 2 loose triangles for the corners.
Joining Rows
Using Col 4, Join the bottom right triangle to the first diagonal row using a Double Crochet stitch. Work 3dc in each large ch-sp, 1 dc in each centre chain and 2dc in the 2ch-sp at the top point of the triangles. (Arrow in Red)
Continue and join the next row together with the first section, in the same manner using Col 3.
Alternating the joining yarn, join all rows and the last triangle for the corner. Ensure you always work from the bottom or left side up, so all stitches lay the same way.
Edging
Rnd 1: With Col 6, draw up a lp in the bottom right-hand corner make 1 ch and work 3dc, 1dc each stitch, with 3dc worked in each corner of the throw. Sl st in the ch at the beginning of the round. Bind off.
Rnd 2: With Col 4, draw up a lp in the bottom right-hand corner make 2 ch and work 3htr, work 1htr each stitch around the throw, with 3htr worked in each corner of the throw. Sl st in the 2nd ch at the beginning of the round. Bind off.
Rnd 3: With Col 1, Repeat Rnd 2.
Rnd 4: With Col 5, Repeat Rnd 2.
Rnd 5: With Col 2, draw up a lp in the bottom right-hand corner, make 2 ch and work (1htr, 1ch, 2htr) in same corner stitch, work 1hdc each stitch in each stitch around the throw, with (2hdc, 1ch, 2hdc) worked in each corner of the throw. Sl st in the 2nd ch at the beginning of the round. Bind off.
Rnd 6: With Col 1, draw up a lp in the bottom right-hand corner 1ch-sp, make 2 ch and work (1htr, 1ch, 2htr) in same corner stitch, work 1hdc in each stitch around the throw, with (2hdc, 1ch, 2hdc) worked in each corner 1 ch-sp of the throw. Sl st in the 2nd ch at the beginning of the round. Bind off.
Finishing
Weave in all loose ends.


