 | ||
| Your browser is not supported. | ||
|
Please browse our site using any of the following options:
| ||
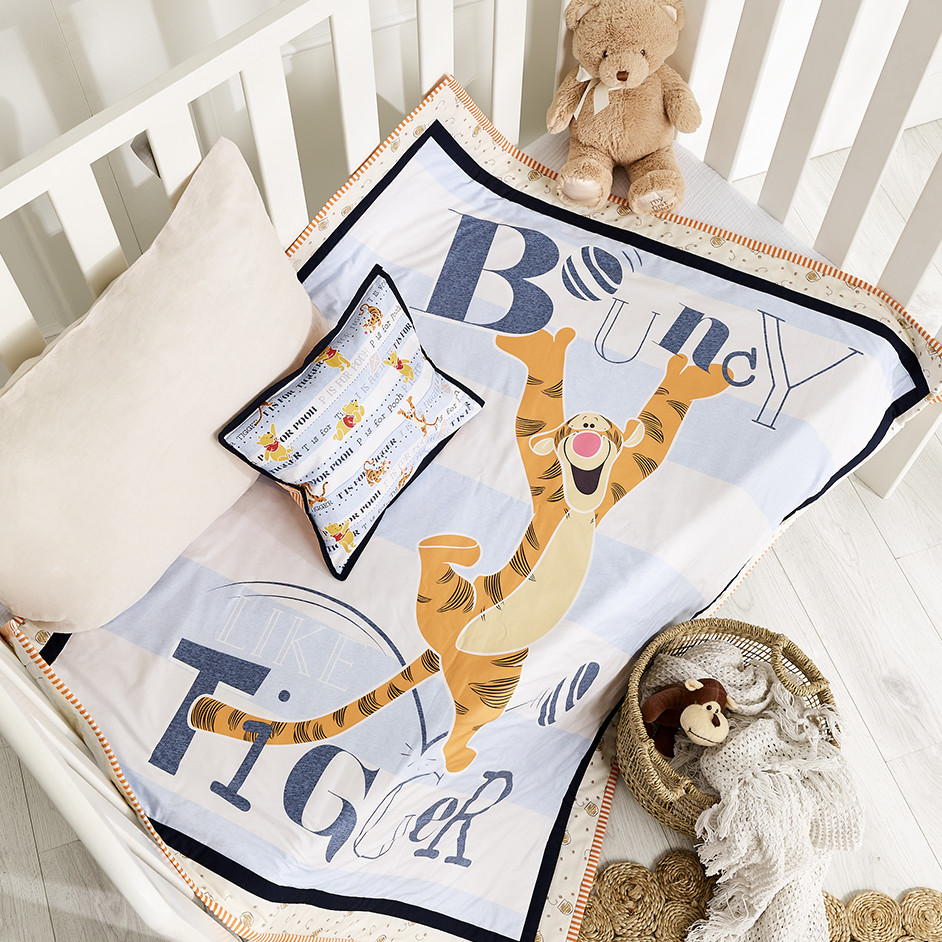
TIGGER COT QUILT & PILLOW

LEVEL: INTERMEDIATE
WHAT YOU'LL NEED:
- 1 x cot 'Winnie the Pooh Tigger' Panel
- Backing fabric
- Cotton wadding
- 4 contrast fabrics for pillowcase borders and binding
MEASUREMENTS
Finished Quilt Size - 110cm x 125cm
Finished Pillow Size - 35cm x 30cm
INSTRUCTIONS
Step 1 - Cut backing fabric and wadding 5" (12.7cm) wider and longer on each side than cot panel.
Step 2 - Lay backing on table, smooth wadding on top of backing and centre cot panel on top of wadding. Birch Quilt Basting Spray can be used to do this step but is optional.
Step 3 - Cut navy strips 1 1/2" (3.81cm) wide and pin along top and bottom of panel (all thicknesses) and sew using a 1/4" (0.635cm) seam allowance. Press strips open to extend panel. Pin navy strips to both sides of panel including over previous navy strips. Press strips open.
Step 4 - Cut 'Winnie The Pooh Hunny' strips 3 1/4" (8.255cm) wide and add these to the quilt in the same way as the navy strips. Press strips open.
Step 5 - Trim quilt to edge of 'Winnie The Pooh Hunny' borders.
Step 6 - Cut binding fabric into strips 3 1/4" (8.255cm) wide and iron in half lengthwise. Pin these long, folded strips, edge to edge along quilt top and bottom. Sew. Fold binding over to back of quilt so that folded edge sits past the stitching line. Pin. Either hand sew binding in place on the back of quilt or 'ditch stitch' from the front of the quilt making sure the binding is caught at the back.
Step 7 - Repeat Step 6 for binding the sides of the quilt, folding the ends of the binding over as you fold strip to the back. Finished!
Step 8 - Cut 2 pieces of contrasting fabric 30cm x 45cm for the pillowcase. Hem one of the short ends on each piece and fold over 8cm from the end, right sides showing. Press. This flap is to hold the pillow in later.
Step 9 - With wrong sides together and flaps folded in at the right hand edge, baste edges together leaving the 'flap' end open.
Step 10 - Cut navy binding 1 1/2" (3.81cm) wide and iron in half lengthwise. Pin this long, folded strip, edge to edge along basted sides of pillowcase. Sew. Fold binding over to back of pillowcase so that folded edge sits past the stitching line. Pin. Either hand sew binding in place on the back of pillowcase or 'ditch stitch' from the front making sure the binding is caught at the back. Alternatively, if your machine has a decorative stitch, you could use this to hold all fabric in place.


