 | ||
| Your browser is not supported. | ||
|
Please browse our site using any of the following options:
| ||
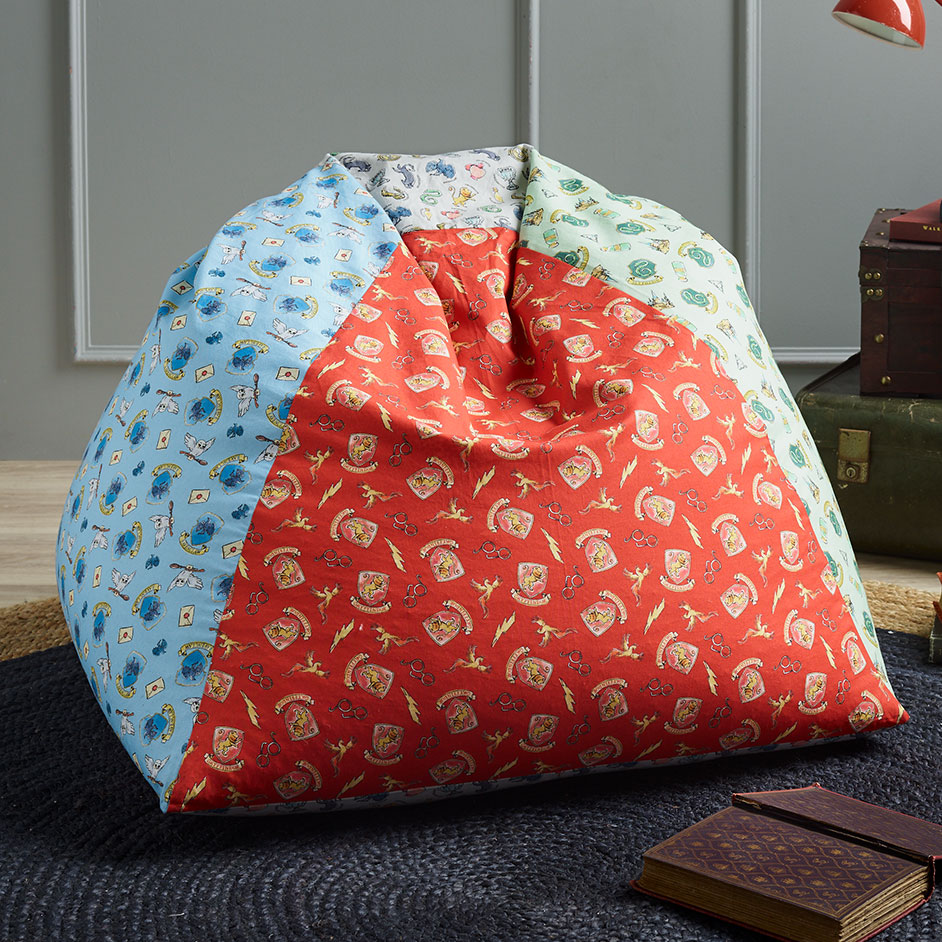
HARRY POTTER BEAN BAG

Level: Intermediate
WHAT YOU'LL NEED
- Fabrics are from 'Harry Potter Whimsical' range
- 90cm Fabric 1 - Slytherin, Green
- 90cm Fabric 2 - Gryfindor, Red
- 90cm Fabric 3 - Ravenclaw, Blue
- 90cm Fabric 4 - Hufflepuff, Ivory
- 2m Fabric 5 - House Charms, Grey
- 35cm Zipper
- Bean Bag Beanz
- Matching Gutermann 100% cotton thread
- Rotary cutter, mat & quilters rulers
- Pins, tape measure
- Scissors, seam ripper
- Quilters pencil or marker
- Hand needle
- Sewing machine with 1/4" foot, zipper foot
1/4" (1cm) seam allowance used throughout unless otherwise indicated.
Read all instructions carefully before commencing the project.
CUTTING DIAGRAM
A = 32" (82cm) is along the fold
B = 16" (41cm)
C = 5 1/2" (14cm)
Join C to B in a straight line.
Top - one 11 1/2" (29cm) square
Base - two 31 1/2" x 16 1/4" (80 x 41cm) rectangles
CUTTING
- Fold Fabric 1 in half lengthways, measure and mark A along the fold. Measure and mark B out from folded edge. Measure and mark C out from folded edge. Rule a line from the end of C to the end of B and cut out along the lines. Open out into a flat top triangle.
- Repeat for Fabrics 2, 3 and 4. These are the sides of the bean bag.
- Fold Fabric 5 in half lengthways and cut across the fabric at 31 1/2" (80cm). Cut into two 31 1/2" x 16 1/4" (80 x 42cm) rectangles.
- From Fabric 5 cut one 11 1/2" (29cm) square for the top.
INSTRUCTIONS
Step 1 - Arrange sides in desired colour order. With right side facing pin first two sides together and sew. Repeat for the remaining two sides. Press and open out.
Step 2 - Pin the two pieces together with right sides facing and sew. Press and set aside.
Step 3 - To insert zipper take the base rectangles and pin right sides together down long edge. Sew together using 1/2" (1cm) seam allowance. Press seam open.
Step 4 - With right side down, centre zipper right side down on top of the seam. Pin top edge of zipper in place then line up the centre of the zipper teeth along the centre of the open seam and pin, gradually make your way all the way down the zipper, continuing to check to be sure the zipper it is centered right along the seam.
Step 5 - Attach zipper foot to the machine and sew down one side of the zipper then back up the other side. Using seam ripper carefully unpick the seam that is covering the zipper.
Step 6 - With bag wrong side out pin one side of the zippered base square along one edge of the bag with right sides facing and sew together to the corner. Repeat to sew all four edges of the base square to bottom edges of bag.
Step 7 - Open zipper 5" (12cm). With bag wrong side out take top square and pin one side of the top square along one edge of the bag top with right sides facing and sew together to the corner. Repeat to sew all four edges of the top square to top edges of the bag.
Step 8 - Open zipper and turn bag right side out. Press well. Fill with beans approximately two-thirds full.


