 | ||
| Your browser is not supported. | ||
|
Please browse our site using any of the following options:
| ||
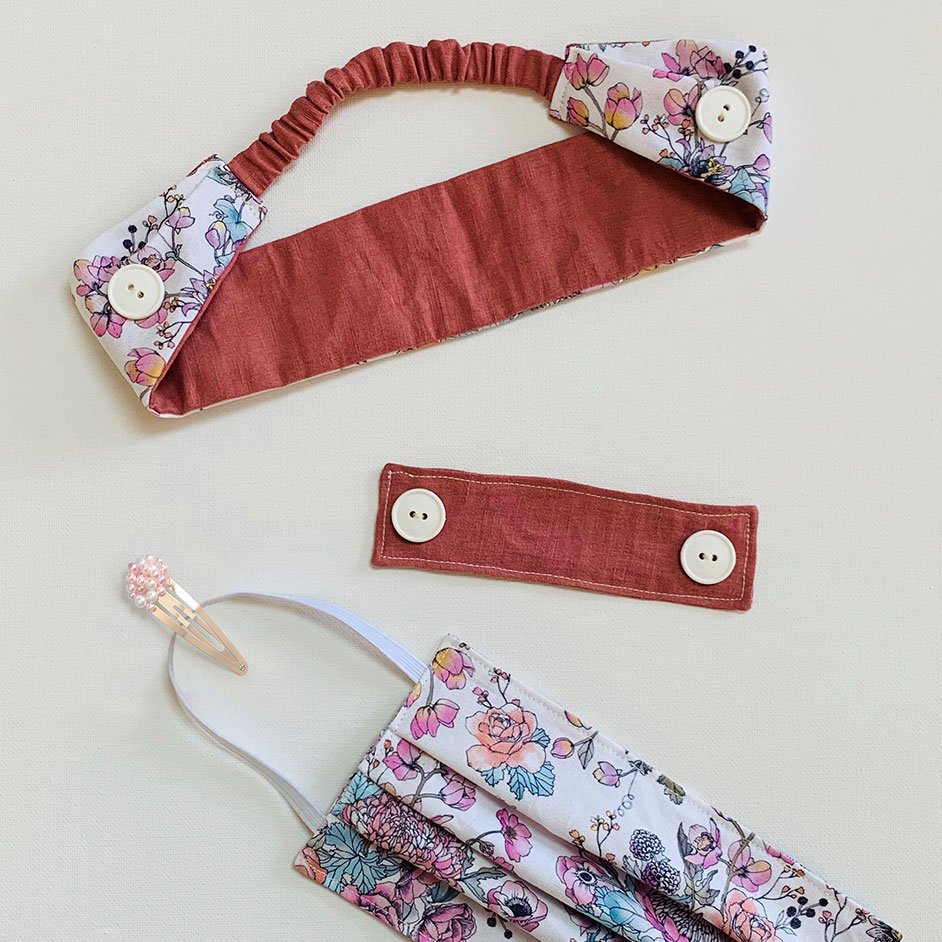
EAR SAVERS 3 WAYS

Level: Easy
WHAT YOU'LL NEED:
Headband with Buttons
- Cotton fabric
- 3/4" wide elastic
- Sewing machine and matching thread
- Scissors, ruler and iron
- Needle, thread, safety pin and pins
- 2 buttons
Ear Saver Tab
- Cotton fabric
- Sewing Machine and matching thread
- Scissors, ruler and iron
- 2 x buttons
- Needle and thread
Embellished Clips
- Glamour Hair Basics
- Assorted Beads
- Hot glue gun and glue sticks
INSTRUCTIONS
Headband with Buttons
Step 1 - Cut out 2 rectangles from your fabric, 1 measuring: 45cm x 12cm and 1 measuring: 22cm x 5cm. The larger piece will be the main part of the head band and the smaller piece will cover the elastic. If you want to make your head band reversible cut 2 x 45cm x 6cm pieces and 2 x 22cm x 2.5cm from 2 different fabrics.
Note - the instructions for reversible are the same you will just have seams instead of a fold.
Step 2 - Fold both rectangles in half length ways, with right sides facing in. Press along the folded edge.
Step 3 - Stitch the long edges together on both pieces with a 1cm seam allowance. On the smaller piece, trim back the seam allowance to 3mm to avoid bulk once the elastic is in.
Step 4 - Turn both pieces right side out and press flat. Then tuck the ends of the larger piece under 2cm and press in place.
Step 5 - Cut a piece of elastic 15cm long. Thread the elastic through the shorter piece with a safety pin. Put a pin in each end to secure the elastic in place and scrunch the fabric down evenly.
Step 6 - Tuck one end of the elastic into the end of the larger piece and pin in place. The larger piece will be wider so fold over the extra fabric to make a small pleat. Repeat on the other side and pin both ends in place. Ensure the elastic is sitting flat and not twisted. Stitch through all the layers of fabric and elastic to secure in place.
Step 7 - To finish sew 2 buttons on the headband roughly 4cm from where the elastic seam is.
EAR SAVER TAB
Step 1 - Cut 2 x rectangles measuring 6cm x 18cm out of your cotton fabric.
Step 2 - Place rectangles with right sides together and sew around the outside edge with a 1cm seam allowance. Leave a small gap roughly 4cm wide.
Step 3 - Turn the piece right side out through the gap and press flat. Use a pin to pull out the corners if needed.
Step 4 - Topstitch around the edge with a 3mm seam allowance, this will also close the gap left in Step 2.
Step 5 - To finish, use a needle and thread to sew a button on each end.
EMBELLISHED CLIPS
Step 1 - Lay out the hair clips and bunch them with the beads and gems you wish to use for your design.
Step 2 - Using the hot glue gun carefully glue a small amount onto the back of each bead or gem and stick it onto the hair clip. Wait for glue to dry before using in hair.
Step 3 - Repeat for a 2nd clip. Use clips to hold back elastic behind ears.The


