 | ||
| Your browser is not supported. | ||
|
Please browse our site using any of the following options:
| ||
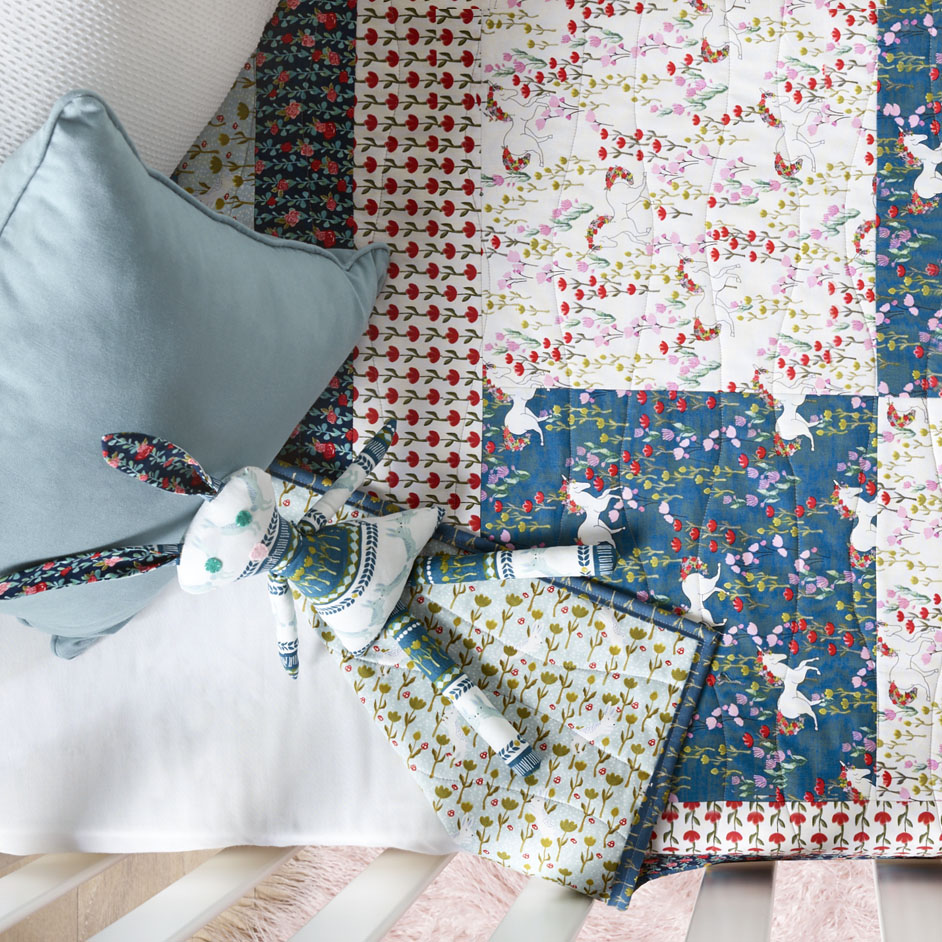
LITTLE STREET QUILT BUNNY

LEVEL: EASY
WHAT YOU'LL NEED
- Fabrics are from 'This Little Street' range:
- 40cm Fabric A - Unicorn Allover, teal
- 40cm Fabric B - Unicorn Allover, white
- 50cm Fabric C - Tulip, white/red
- 40cm Fabric D - Floral, navy
- 20cm Fabric E - Bunny Floral, green
- 40cm Fabric F - Tulip, teal
- 1.3m Fabric of choice for backing
- 1.3m x 1.1m Sew Easy cotton/bamboo batting
- Matching Gutermann 100% cotton thread
- Rotary cutter, mat & quilters rulers
- Quilting pins, tape measure
- Scissors, seam ripper
- Hand needle
- Long doll needle
- Sewing machine with 1/4" foot & walking foot For Bunny
- 70cm Fabric G - Fairisle Bunny, teal/white
- Scrap Fabric D for ears
- Cotton Woven Fusible Interfacing for ears
- Felt scraps
- 'Crafters Choice' Very Soft Stuffing
- Template plastic or cardboard
Note: All fabrics should be 100% cotton, washed & pressed. 1/4" seam allowance used throughout unless otherwise indicated.
Read all instructions carefully beforecommencing the quilt.
INSTRUCTIONS
CUTTING
All strips are cut across the width of fabric unless otherwise stated:
- From each of Fabrics A and B cut 1 x 12 1/2" strip - crosscut each strip into 2 x 12 1/2" squares, 4 x 12 1/2" squares in total.
- From Fabric C cut 4 x 4 1/2" strips for Border 1.
- From Fabric D cut 4 x 3 1/2" strips for Border 2.
- From Fabric E cut 2 x 3" strips for top and bottom borders.
- From Fabric F cut 5 x 2 1/2" strips for binding.
QUILT TOP
1. Refer to image to arrange the 4 x 12 1/2" squares into 2 rows. Stitch top row squares together then the bottom row squares together. Press seams in one direction alternating the direction in each row.
2. Sew the rows together matching seams. Press seams downwards.
3. Border 1 - Sew one 4 1/2" Fabric C border strip to each long side of the quilt top. Press seams towards border and trim off excess fabric. Sew remaining 4 1/2" Fabric C border strips to the top and bottom of the quilt top, press seams towards border and trim off excess fabric.
4. Border 2 - Sew one 3 1/2" Fabric D border strip to each long side of the quilt. Press seams towards border and trim off excess fabric. Sew remaining 3 1/2" Fabric D border strips to the top and bottom of the quilt, press seams towards border and trim off excess fabric.
5. Top & Bottom Border - Sew one 3" Fabric E border strip to the top and bottom of the quilt. Press seams towards border and trim off any excess fabric.
6. Layer the backing, batting and quilt top and baste together. Quilt as desired.
7. Join the 5 x 2 1/2" binding strips together on the bias to make one long strip. Press in half lengthwise and bind mitering corners. Attach a label or sign and date your quilt.
BUNNY
Cutting
8. Trace templates - body, ears, arms and legs onto template plastic or cardboard and cut out.
9. With Fabric G folded right sides together, use templates and to cut out - Body, Arms x 2 pair, Legs x 2 pair.
10. Ears - cut 2 rectangles 3" x 8" from Fabric G and cotton woven interfacing. Fuse interfacing to wrong side of fabric. With ear template on interfacing side trace around the edge and cut out. Using ear template and Fabric D cut out - Ears x 2.
To make
11. Sew sides of the body together starting at outer ear marking and finishing 3cm in from outer edge. This leaves top open to insert ears and bottom edge open for legs.
12. Place a Fabric G and a Fabric D ear together with right sides facing and sew around the edge leaving straight end open. Turn right side out and press. Fold bottom edges of each ear into the centre and baste.
13. Insert ears into head so top of ears are down in the neck and top straight ends are aligned with the top of the body. Pin. Sew across the top of the head through all layers securing ears in place. Turn right side out.
14. Sew together one pair of arms leaving top end open. Turn right side out and press. Repeat for remaining pair of arms and for each pair of legs. Stuff arms and legs leaving 1" at the top without stuffing.
15. Press in seam allowance of bottom edge. Insert top of legs into body and pin to the back of the body only. Sew across to attach to body back and close top of legs. Stuff body and sew bottom edge closed.
16. Turn top edge of arms in at top and stitch closed. To attach arms to each side of body use a doll needle and double thread to sew from one side to the other through the body of the bunny several times.
17. For the face - cut eyes and nose from felt and hand stitch to the face. Hand stitch mouth.


