 | ||
| Your browser is not supported. | ||
|
Please browse our site using any of the following options:
| ||
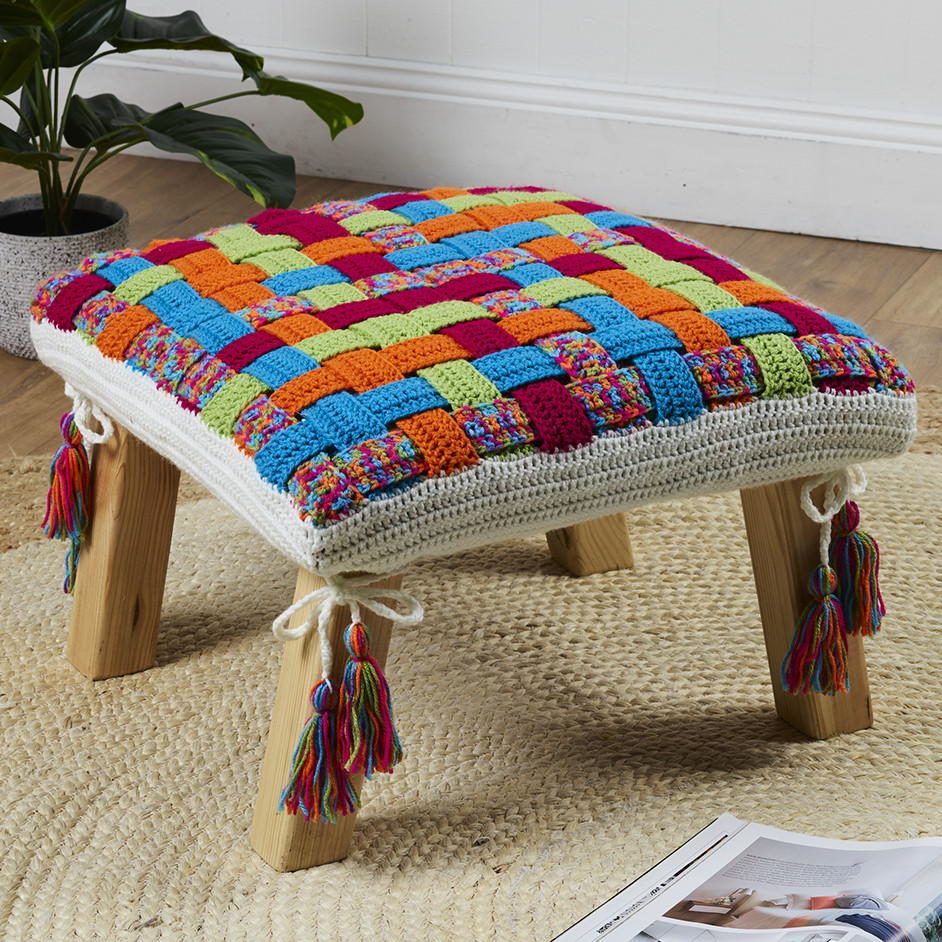
MARVEL CROCHET CHAIR TOPPER

LEVEL: INTERMEDIATE
WHAT YOU'LL NEED
- '4 Seasons' Marvel 8ply and Marvel 8ply Prints 100g balls: 1 x Main Colour (print) (M),1 x Contrast 1 (C1), 1 x Contrast 2 (C2), 1 x Contrast 3 (C3), 1 x Contrast 4 (C4), 1 x Contrast 5 (C5).
- 4mm crochet hook or size required to give correct tension
- Scissors, yarn needle, tape measure, stitch marker, sewing or safety pins
INSTRUCTIONS
MEASUREMENTS
- Woven Section: 43cm square (approx.)
- Edges: 5cm deep (approx.)
TENSION
18 sts x 10 rows to 10cm over treble fabric using 4mm hook.
Note - This project is made by crocheting the individual strips and then weaving them together. The ends of the strips are then anchored by crocheting the edges along the strip ends.
STRIPS
Using 4mm hook and M, make 79ch.
1st row - Miss 3ch, 1tr in next ch and each ch to end ...77 sts.
2nd row - 3ch (counts as 1tr throughout), 1tr in each st to end.
3rd row - Rep 2nd row until strip measures 4.3cm from beg. Fasten off.
Make a total of 6 strips in M and 4 strips each in C1, C2, C3 and C4 in same manner - 22 strips in all.
FIRST EDGE
Join C5 to end of one M strip and using 4mm hook, work 7dc evenly across end. Without breaking yarn, cont to work 7dc evenly across the ends of strips in the following order: C1, C2, C3, C4, M, C1, C2, C3, C4 and M, turn ...77 sts.
2nd row - 3ch, 1tr in each st across.
3rd - 7th rows - Rep 2nd row.
At end of 7th row, make 75ch. Place a stitch marker in last ch and set aside.
BEG TASSEL
Using M and piece of cardboard 10cm wide, make 30 wraps around cardboard. Cut along one edge to make a bundle of yarn about 20cm long.
Join To Tie - Remove stitch marker and reinsert hook into ch loop. Work a ch around centre of yarn bundle and pull tightly to secure.
8th row - Work 1dc in ch closest to tassel, then in each ch to end, 1dc in each tr of edge piece and then make 75ch. Make a second tassel (as before) and join to tie in the same way.
9th row - Work 1dc in ch closest to tassel and in each ch to end, sl st through top of first tr below dc row. Fasten off.
SECOND EDGE
Work as for first edge on opposite ends of strips, making sure the strips aren't twisted or crossed over. Put aside.
THIRD EDGE
Join rem 11 strips as for first edge. Weave the loose ends of the strips under and over the strips of the first piece. Pin the ends of each strip to the last strip of the first piece to keep the strips in order.


