 | ||
| Your browser is not supported. | ||
|
Please browse our site using any of the following options:
| ||
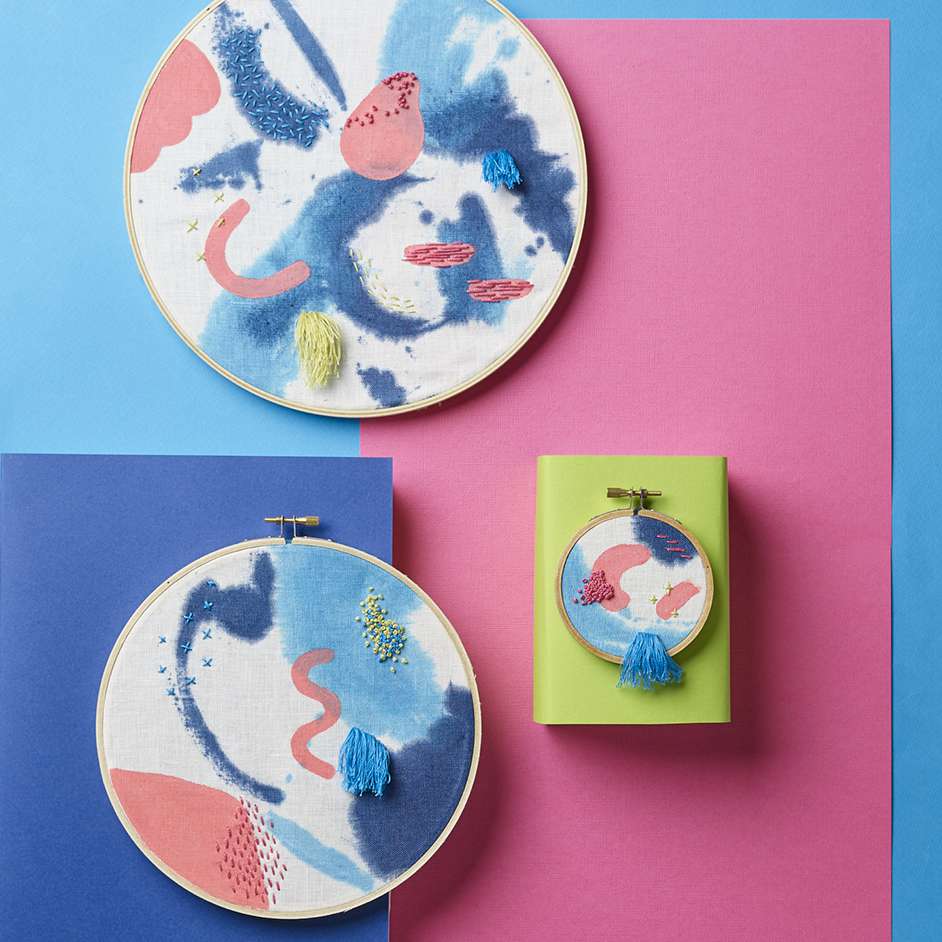
SPEEDBALL EMBROIDERY HOOP ART

Level: Intermediate
WHAT YOU'LL NEED
- 'Cricut' Air 2 machine
- 'Cricut' vinyl transfer tape
- 'Cricut' vinyl
- 3 x embroidery hoops in different sizes
- 'Tulip' Tie Dye Kit in Moody Blues
- Embroidery thread and sewing needle
- Plain linen fabric
- Scissors
- 'Speedball' screen printing frame
- 'Speedball' lino set
- 'Speedball' 9" red barron squeegee
- 'Speedball' Block Printing Ink Set
- Speedball' 4" rubber brayer
- Palette knife
- Cardboard
- Weeding tool - optional
- Masking tape
- Scissors
- Plate to mix paint
INSTRUCTIONS
TIE DYE
Step 1 - Lay your fabric flat across a surface with either cardboard of plastic underneath to protect your work surface.
Step 2 - Take your Tulip kit and use only the two blue dye colours. Fill the bottles with water according to the packaging to create dye.
Step 3 - Put the plastic gloves on that come in the Tulip kit. Then squirt the dye across the fabric in a free flowing motion, and use your fingers to blend and spread the dye across the fabric. This technique produces paint stroke effects of colour across the fabric. Allow fabric to dry fully before the next step.
Step 4 - Once dry, wash the fabric in a sink to remove any excess dye from the fabric. While fabric is drying you can work on your Cricut design for the screen print.
CREATE YOUR CRICUT DESIGN
Step 1 - Use the Cricut Design Space app to find a design you like or you can upload your own. Once you have chosen one, reposition the design so there is an inch of space around the design. This is to ensure you have space to apply masking tape later on. Do not select mirror, then send the design to print.
Step 2 - Place the vinyl onto the Cricut mat and into the machine to cut out your design.
Step 3 - Once the cut is complete, use the weeding or a tool with a sharp end such as a scalpel to weed your design the opposite way you would normally. You want to remove the areas that have been cut. So when you place it on your screen printing screen, the ink will transfer through the stencil.
Step 4 - To adhere the stencil to the screen, apply the transfer tape so it covers the whole design. Apply the tape to the vinyl side that does not have the backing paper. Use your squeegee to smooth out any bubbles or wrinkles.
Step 5 - Transfer your design to the screen by removing the backing paper and placing it in the centre of the frame. Make sure the vinyl stencil is still stuck to the transfer tape. Use the squeegee to smooth the vinyl a few times so it adheres to the screen. Carefully remove the transfer tape by peeling the tape back as flat as possible to prevent the vinyl sticking to the tape. Use masking tape to fill the gaps so the paint does not transfer through.
SCREEN PRINTING
Step 1 - Place a flat piece of thick cardboard under the fabric, big enough to cover the area you will be screen printing. This helps to create a flat surface and prevents the ink from bleeding through the fabric.
Step 2 - You can use the inks as is or create different colours by mixing the inks, we mixed the Red and White to create the Pink. Place the ink inside the well of the frame along the top using the palette knife. Apply enough pressure so that it drags the ink across the stencil and transfers onto the fabric. Too much pressure and ink will result in the ink going sides beyond the stencil. This will take some practice to get right.
Step 3 - If you are adding layers of colour, use a hair dryer to speed up the drying process. Just make sure to wash your tools in between with soap, so it's easier to remove the ink. It may take a few days for the ink to completely dry.
EMBROIDERY
Step 1 - Once the fabric is dry and ready to handle it is time to put together your hoops. Decide on which parts of the fabric are your favourite and cut out using scissors depending on the size embroidery hoop it will be displayed in. Tip - Ensure you cut the circle shape larger than embroider hoop as you need to have fabric to hold onto to pull tight.
Step 2 - Once all 3 hoops have been filled with fabric and pulled tight they are ready to be embroidered. Using 3 different coloured threads and assorted stitches add texture to finish off your designs. We used french knots, straight stitch and a simple loop method to create the fringe.
Step 3 - Once you have embroidered all your hoops they are ready to hang on display!


