 | ||
| Your browser is not supported. | ||
|
Please browse our site using any of the following options:
| ||
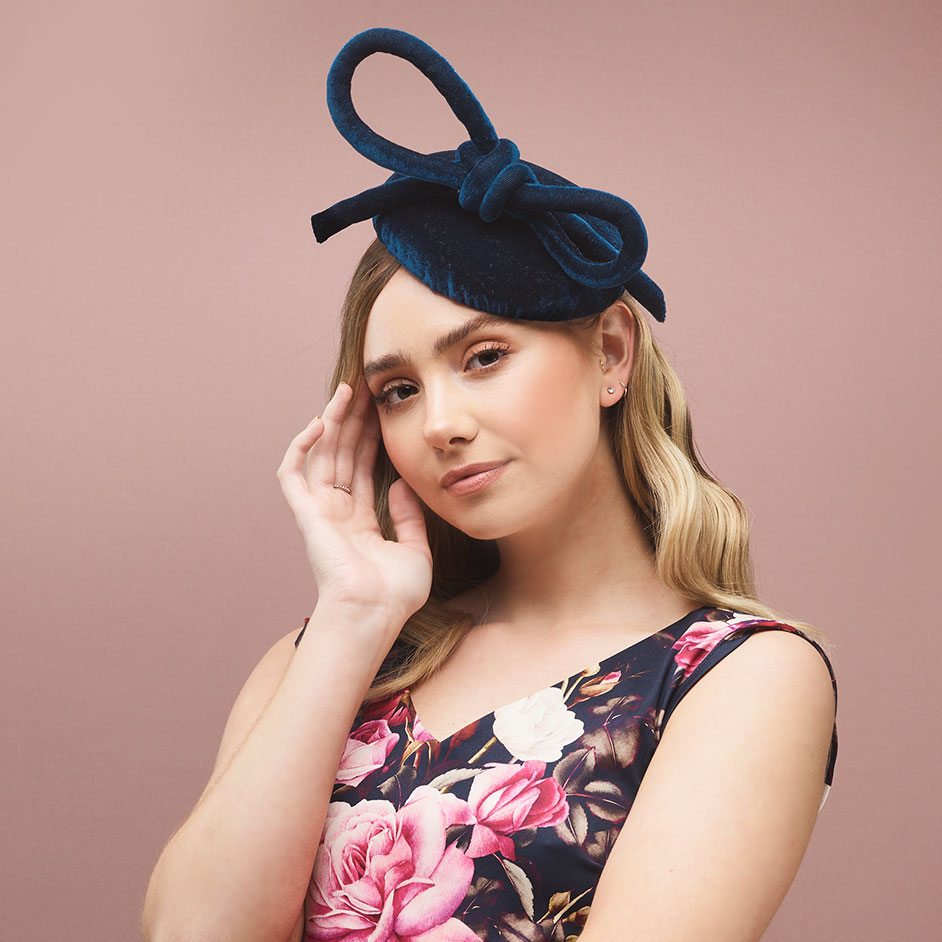
BLUE VELVET HEAD PIECE

LEVEL: EASY
WHAT YOU'LL NEED:
- Sinemay Pillbox Base Navy
- 1m of Teal Velvet
- 30cm of Wadding
- Hand Sewing Needle
- Sewing machine and matching thread
- Safety pin
- Hobby Fill
- Scissors
- Tape measure
- Pins
- Paper and pencil
INSTRUCTIONS
Step 1 - Lay the pillbox base onto a piece of paper and roughly trace the circle shape of the base onto the paper. Add a 5cm seam allowance to the circle to allow for the wadding and cut out.
Step 2 - Trace around your circle template onto the Velvet and wadding and cut out 1 pattern piece of each.
Step 3 - Lay the wadding on top of the pillbox base and using the needle and thread baste stitch the wadding in place around the circumference of the circle base. Cut any excess wadding off at the edge of the base.
Step 4 - Now lay the Velvet circle piece of the top of the wadding, pin in place to ensure the fabric is sitting nice and neat. Use the needle and thread to create a running stitch around the seam allowance of the Velvet roughly 4cm from the edge of the Velvet fabric. This will pull the fabric in nice and tight around the base of the fascinator. Once complete pull the thread to draw in the Velvet fabric in evenly around the base of the fascinator. Tie off the thread and cut away any excess Velvet seam allowance but be sure to leave at least 1cm close to the running stitch.
Step 5 - Carefully turn under the 1cm seam allowance of Velvet fabric and using the hand needle and thread stitch the fabric in place, securing it to the inside of the fascinator. Use a colour thread to match your Velvet to help hide the stitches, although this doesn't need to be overly neat as it is inside the fascinator and won't be visible from the outside. If its visible you can remove the running stitch thread from Step 4.
Step 6 - Now that the base is complete its time to work on the bow! Cut a long rectangle piece out of the Velvet, measuring roughly 1m by 7cm. Fold the rectangle in half (3.5cm) with right sides facing in and sew along the long edge with a 1cm seam allowance and across 1 of the ends.
Step 7 - Use a safety pin to turn the piece right side out. Use a pencil to stuff hobby fill into the fabric casing until it is full and firm. Once filled use the needle and thread to sew the open end shut.
Step 8 - You can now tie the piece into a bow shape - have a play to see what style bow you want to create. Position it onto the base and try on in a mirror to finalise your design. Once happy, pin the bow onto the base, and hand stitch in place. Remove pins once secure and your head piece is now ready to be worn!


