 | ||
| Your browser is not supported. | ||
|
Please browse our site using any of the following options:
| ||
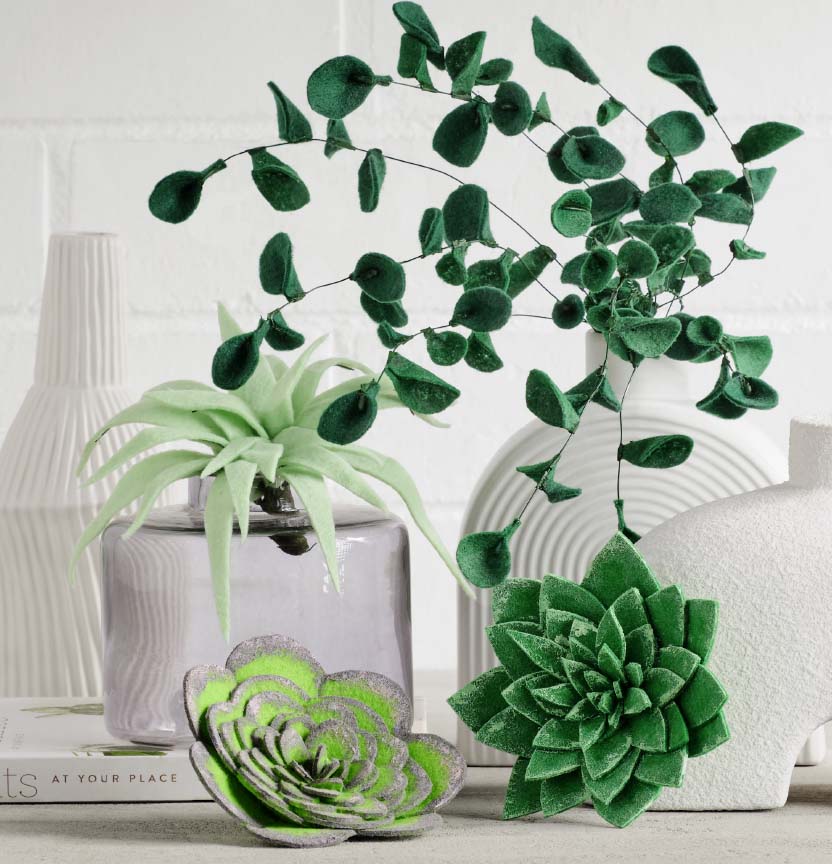
FELT INDOOR PLANT

Level: Easy
What you'll need:
Felt succulent
- Green felt in various colours
- Scissors
- Floristry wire & cutters
- Floristry tape (if necessary)
- Acrylic paint and brushes
- Hot glue gun & sticks
Eucalyptus succulent
- Dark green felt
- Scissors
- Floristry wire & cutters
- Floristry tape
- Hot glue gun & sticks
- Fabric glue (if necessary)
- Green paint (if necessary)
Instructions
Felt succulent
Step 1 - Depending on the size of the planter pots you are using, you may choose to make smaller or bigger succulents.
Dark green succulent
Step 1- Cut out a 'star' shape with 5 leave points, and make 5 copies, each 1cm smaller than the other.
Step 2 - Push the larger piece into the planter pot so that it is a 'cone' shape. Glue the pieces together with the largest on the bottom and the smallest on top.
Step 3 - To add some detail in the centre, cut out pointy leaf shapes in various sizes and glue them in the centre.
Step 4 - Using some light green acrylic pain, paint the borders to add some colour and realism.
Light green succulent
Step 1 - Use the same 'star' shape as the dark green succulent, but don't make the leaves pointy, keep them rounded.
Step 2 - Make 5 copies of this shape, with each one getting 1cm smaller again.
Step 3 - Push the larger piece into the planter pot so that it is 'cone' shape. Glue the pieces together with the largest on the bottom and the smallest on top.
Step 4 - To add some detail in the centre, cut out semi-circle shapes in various heights, sizes, and glue them in the centre.
Step 5 - Using some purple and pink acrylic paint, paint the borders to add some colour and realism.
Overhanging succulent
Step 1 - Cut out long triangular pieces in different lengths and widths.
Step 2 - Once you have your pieces cut, grab your floristry wire and cut these to the same lengths as your leaves, leaving 10-15cm at the base to leave room for bunching together. Then, hot glue the wire onto your leaves, ensuring the tips are glued on well.
Step 3 - Once all your leaves have their wires glued on, bunch them together with the wires facing outwards.
Step 4 - Twist the base wires together or use floristry tape if necessary.
Step 5 - Start bending the leaves down to create a flowing effect out the centre. You might find that bending the base wires outwards 90 degrees, will act as little feet to hold your plant up in its pot.
Eucalyptus succulent
Step 1 - Create the shape of your eucalyptus using the floristry wire. Bunch some together (around 5-6) and twist the wire at the base, leaving the top 3/4 untwisted.
Step 2 - Branch out the wires to look natural, and trim some where necessary to add different lengths. You can even twist two pieces together halfway up to create the effect of a splitting branch.
Step 3 - Using some floristry tape, apply where necessary to secure the branches together.
Step 4 - Once you have created the base with your floristry wire, you can now start creating the leaves to glue on.
Step 5 - Cut out some (we did about 30-40) leaf shapes out of the green felt.
Step 6 - Using your hot glue gun (or fabric glue), place a dot at the point of the leaf, and pinch together, to create a 3D leaf. Do this with all your leaves, apart from the few that will be glued to the ends of the wires, leave these ones unglued and flat. Using scissors, cut the tips of the leaves, so they are a straight line. This will make it easier to glue onto the wires.
Step 7 - Use the hot glue gun again and add a dot to the tip of a leaf without glue on it and pinch this leaf onto the end of one of the branches. Do this with the rest of those leaves.
Step 8 - With the leaves that have the glue on them, add a dot of glue to the base, and stick to your wire. Glue these in different positions and facing different ways to look more natural.
Step 9 - Once your glue has dried, remove any strings that are hanging over to make it clean.
Step 10 - This part is optional, but if your hot glue isn't drying clear, using some acrylic paint that matches the green of your plant, pain over the glue to hide it.
Step 11 - Let your plant dry and place it in a vase for decoration.


