 | ||
| Your browser is not supported. | ||
|
Please browse our site using any of the following options:
| ||
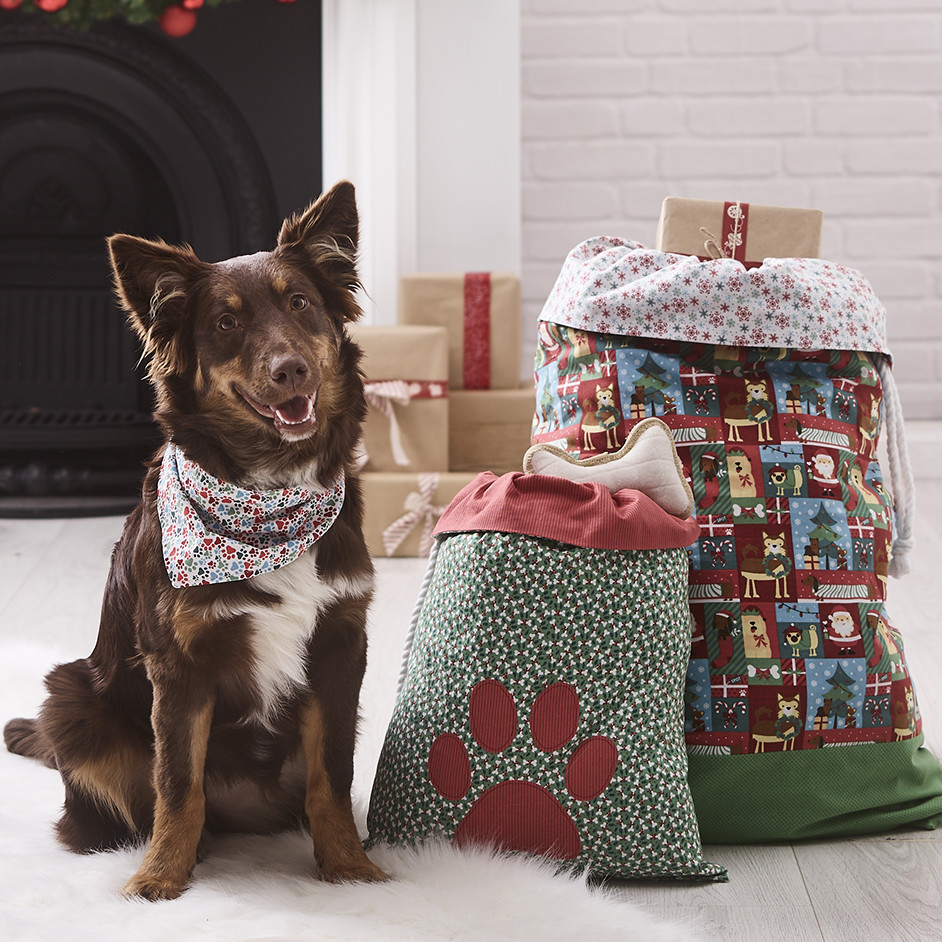
PET THEMED SANTA SACKS

LEVEL: EASY
WHAT YOU'LL NEED:
LARGE ADULT SACK
- 23cm of 112cm wide of printed cotton fabric (base) (Christmas Pet Collection)
- 78cm of 112cm wide of printed cotton fabric (body)
- 98cm of 112cm wide of printed cotton fabric (lining)
SMALL PET SACK
- 58cm high by 83cm wide of printed cotton fabric (body)
- 58cm high by 83cm wide of printed cotton fabric (lining)
- 20cm square of printed cotton fabric (applique)
- 20cm square of Vliesofix
- 1.3 - 1.5m of piping cord (per sack)
- Scissors, pins, safety pin, tape measure/ruler
- Sewing machine & matching thread
- Iron
Note - 1.5cm seam allowance is used unless specified
INSTRUCTIONS
LARGE ADULT SACK
Step 1 - Trim the selvedge side of all fabrics so they are all the same width across. With right sides facing, pin the base fabric to the bottom of the body fabric. Sew fabrics together, press seam down. With right sides facing, pin the top of the lining fabric to top of the body fabric, sew together, press seam open.
Step 2 - With right sides facing, fold fabrics across in half by bringing one of the long sides over to align with the other long side edge. Pin all outer edges, matching seams, top and base edges. Sew across the base end of the lining fabric
leaving a 15cm opening in the middle for turning out.
Sew the lining fabric side edges together and continue into the body fabric for 15cm. Leave a 3cm opening in seam then continue sewing fabrics together down the side and around the bottom of the base fabric. Clip corners and turn sack right way out through the opening in the base of the lining. Press seam allowance in the opening under on the base and top stitch opening closed. Push the lining inside the sack folding along the top seam of the lining and body, press sack flat.
Step 3 - To make the casing for the drawstring, measure down 15cm from the top edge of sack and mark this distance
around the whole width of the sack. Sew along this marking through both the body and lining fabric.
Sew another line of stitching 3cm down from this first line of stitching. The opening in the side seam should be at the side of this casing. With the help of a safety pin, thread piping cord through the opening in the side seam of the casing and around the bag back out the same opening. Knot the two ends together at desired length. Trim any excess piping cord.
SMALL PET SACK
Step 1 - Fuse the Vliesofix to the back of the 20cm square of fabric. Using the template provided, trace the paw print shape onto the paper side of the Vliesofix. Cut shapes out with sharp scissors. With right sides facing out, fold the outer body fabric of the santa sack in half aligning the long side edges.
Measure in 20cm from the fold side edge and 8cm up from base edge, mark with a pin. Peel off the paper backing from the paw print shapes and place the glue side down of the shapes onto the front of the fabric, using the pin as the middle base point of the paw print shape. Remove pin. Press with iron to fuse shapes to fabric. Open out fabric and top stitch or use a small tight zig zag stitch to further secure shapes to the fabric. With right sides facing, pin the top of the
lining fabric to top of the body fabric, sew together, press seam open.
Step 2 - With right sides facing, fold fabrics across in half by bringing one of the long sides over to align with the other long side edge. Pin all outer edges, matching seams, top and base edges. Sew across the base end of the lining fabric
leaving a 15cm opening in the middle for turning out.
Sew the lining fabric side edges together and continue into the body fabric for 10cm. Leave a 3cm opening in seam then continue sewing fabrics together down the side and around the bottom of the base. Clip corners and turn sack right way out through the opening in the base of the lining. Press seam allowance in the opening under on the base and top stitch opening closed. Push the lining inside the sack folding along the top seam of the lining and body, press sack flat.
Step 3 - To make the casing for the drawstring, measure down 10cm from the top edge of sack and mark this distance around the whole width of the sack. Sew along this marking through both the body and lining fabric. Sew another line of stitching 3cm down from this first line of stitching. The opening in the side seam should be at the side of this casing. With the help of a safety pin, thread piping cord through the opening in the side seam of the casing and around the bag back out the same opening. Knot the two ends together at desired length. Trim any excess piping cord.


