 | ||
| Your browser is not supported. | ||
|
Please browse our site using any of the following options:
| ||
EASTER BAKING

LEVEL: EASY
WHAT YOU'LL NEED:
- Easter cookie cutters (carrot, bunny face, egg)
- Fondant rolling pin
- Silicone mat if desired
- Toothpicks
- X-Acto knife
- Flower plunger stamps (small and mini)
- Small Oval fondant cutter
- Circle fondant cutter (medium and small)
- Disposable piping bag with small round nozzle
- Small flat paintbrush For the Chocolate:
- Chocolate mould
- Glass bowl or Pyrex jug
- Metal spoon for stirring
- Small flat paint brush
INSTRUCTIONS
CARROT COOKIE DECORATIONS
Step 1.Knead the green fondant in your hands to make more pliable and sprinkle a light dusting of corn starch on the hard surface or silicone mat to reduce sticking when rolling out.
Step 2.Roll out your fondant to 2mm thickness.
Step 3.Cut your green leaves by using the top of the carrot cutter and create a slight concave edge at the bottom using the side of the cutter.
Step 4.Adhere these to the cookies by painting a small amount of water to the backside of the fondant and press gently.
Step 5.Clean and dry your work surface and repeat preparing your orange fondant to 2mm thickness.
Step 6.Cut your carrot by using the cookie cutter and create a concave rounded edge at the top to fit nicely with your green leaves.
Step 7.Adhere these to the cookies by painting a small amount of water to the backside of the fondant and press gently.
Step 8.Bunch a few toothpicks together and gently press into the green fondant and pull out to create the "leafy" texture. You can do this all over the leaves or just in small sections.
Step 9.Using the back of your X-Acto knife, create small indentations along the sides of the carrot.
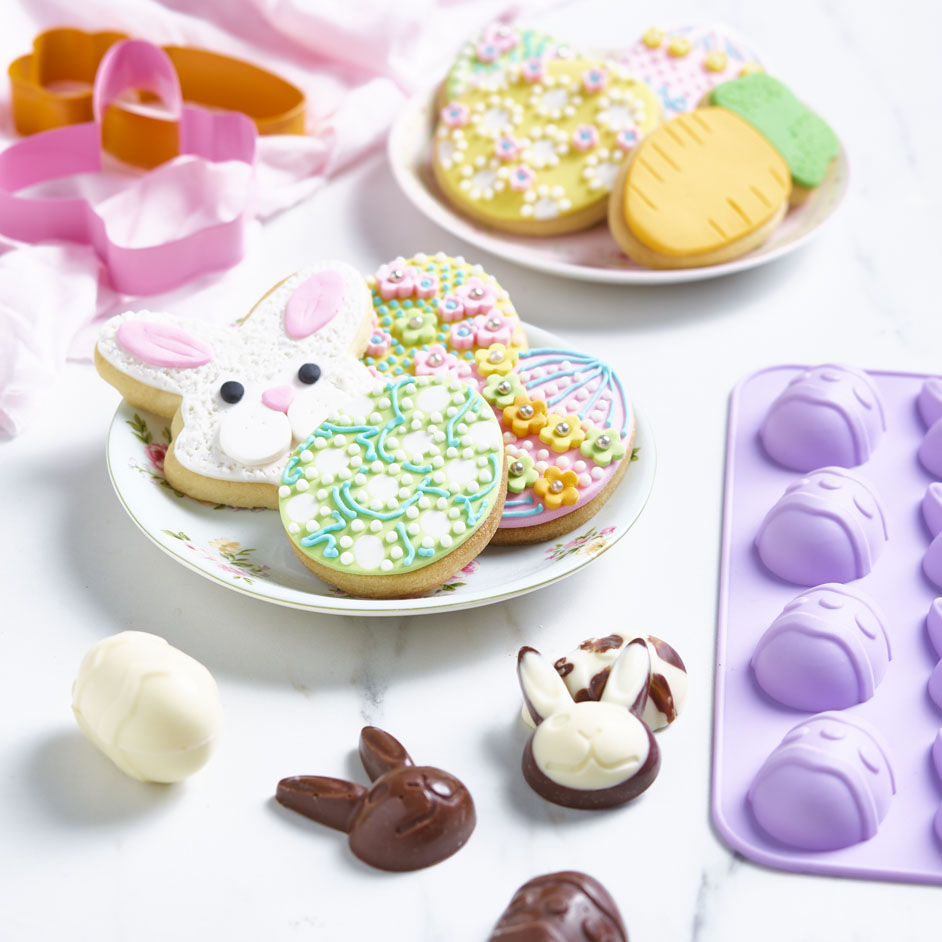
BUNNY FACE COOKIE
Step 1.Knead the white fondant in your hands to make more pliable and sprinkle a light dusting of corn starch on the hard surface or silicone mat to reduce sticking when rolling out.
Step 2.Roll out your fondant to 2mm thickness.
Step 3.Cut out your bunny faces and adhere to the cookies by painting a small amount of water to the backside of the fondant and press gently onto the cookie.
Step 4.Using your circle fondant cutter, cut out two circles for each face and adhere to cookies to create their cheeks.
Step 5.Clean and dry your work surface and repeat preparing your pink fondant to 2mm thickness.
Step 6.Using your small oval cutter, cut out two ovals for each cookie and adhere to the fondant with a small amount of water to create the inside of the ear. (If your oval cutter is too small you can roll them out a little bigger using your fondant rolling pin)
Step 7.Using a small amount of pink fondant, create the nose by shaping into a small triangle and adhering with a tiny bit of water in between the cheeks.
Step 8. Using a small amount of black fondant, roll into two small even rounds to create the bunny's eyes.
Step 9.Adhere these with a tiny amount of water and press gently onto the cookie.
Step 10.Bunch a few toothpicks together and gently press into your white fondant and pull out to create a furry texture all around the edges. You can also use one toothpick to imprint the inside of the ear and for the whiskers.
EASTER EGG COOKIE
Step 1.Knead your desired colour fondant in your hands to make more pliable and sprinkle a light dusting of corn starch on the hard surface or silicone mat to reduce sticking when rolling out.
Step 2.To create the spotted effect, roll your fondant out to 4mm thick and cut out your egg shape.
Step 3.Cut out small circles in the fondant shape and invert with an alternate colour.
Step 4.Roll this shape out again so that the two colours merge with each other.
Step 5.Cut out with the egg shape again and adhere to the cookie by painting a small amount of water to the backside of the fondant and press gently.
Step 6.You can also use small flower plunger cutters to decorate single coloured eggs, adhere these to the fondant with a small amount of water.
Step 7.Pipe the inside of the mini flowers with royal icing in desired colours.
Step 8.Dab a tiny amount of water to the inside of the larger flowers to adhere silver cachous pearls.
Step 9.Finish decorating with royal icing by piping small circles, lines or swirls in two different colours per cookie.
Step 10.Allow to dry overnight before packaging.
CHOCOLATE
Step 1.Ensure your chocolate moulds are clean and dry before using.
Step 2.Melt your chocolate in the microwave in 20 second bursts, stirring with a metal spoon to ensure the chocolate does not burn.
Step 3.Once melted, spoon into each mould almost to the top. If easier to handle you can transfer the chocolate to a piping bag and pipe the melted chocolate into the moulds.
Step 4.To make the "top deck" look pipe your dark chocolate half way and leave to set completely before the white chocolate is added on top.
Step 5.To create the marbled effect, use a flat paintbrush and paint swirls of dark chocolate inside the moulds. Then pour in the white chocolate.
Step 6.Once filled, tap the mould gently on the surface to remove any air bubbles and to level the tops.
Step 7.You can speed up the setting process by putting the chocolates in the fridge to set however remember to keep them all in a cool, dry place when removing them the silicone mould.


