 | ||
| Your browser is not supported. | ||
|
Please browse our site using any of the following options:
| ||
Create the ultimate party cake with baking queen Katherine Sabbath

Known for her colourful and quirky cake designs, Katherine Sabbath is one of Australia's most talented bakers. From starting out as a high school teacher to becoming a MasterChef Australia judge in 2018, Kat has taken the baking scene by storm with her eclectic recipes and unique style of baking.
As part of this year's annual Make, Bake, Decorate campaign, we've teamed up with Kat to bring you a party cake recipe that's sure to wow any guest!
Vanilla Sponge Cake
Ingredients
- 2/3 cup (160g) unsalted butter, softened
- 1 cup (220g) Caster Sugar
- 1 1/2 cups (240g) Self-Raising Flour
- 1 teaspoon vanilla extract
- 4 free-range eggs, lightly whisked
- 2 tablespoons hot water
Steps
- To make the sponge cake layers, preheat the oven to 160°C (320°F) fan forced. Lightly grease 5 x 15cm round Wilton Cake Layer Pan Set.
- Using an electric mixer, beat the butter & sugar until light, pale & creamy. Add 2 tablespoons of the flour, then gradually add the vanilla & eggs, beating well after each addition.
- Gently fold in the remaining flour & the hot water. Divide the mixture equally between the cake tins.
- Bake for 15 minutes or until the centre of each cake springs back when lightly pressed. Leave the cakes in the tins for 5 minutes before transferring to a wire rack to cool
Don't have time to make a cake from scratch? Use the Robert's Silky Buttercream.
Simple Buttercream

Simple Buttercream
Ingredients
- 200g (7 oz) unsalted butter, softened
- 6 cups (840g) icing (confectioners') sugar, sifted
- 1/2 cup (120 ml) milk
- 2 teaspoons vanilla extract
- Violet gel food colouring
Steps
- Using an electric mixer, beat the butter until very pale. Gradually add the icing sugar while beating. Add the milk & vanilla & beat until fluffy.
- Add drops of violet gel food colouring to the buttercream, beating thoroughly in between, until a desired shade is achieved. Cover & set aside until cake assembly.
Assembly & Decoration
Ingredients
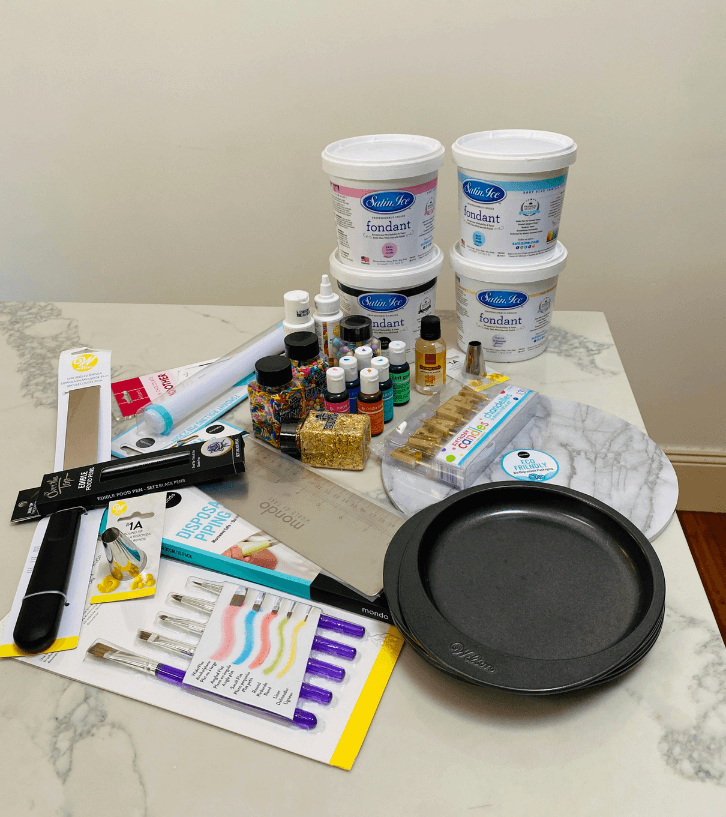
- 50g (13⁄4 oz) black fondant
- 50g (13⁄4 oz) pink fondant
- 50g (13⁄4 oz) light baby blue fondant
- 50 g (13⁄4 oz) peach fondant (I used white fondant & tinted with orange gel food colouring)
- Cornflour (cornstarch), for dusting
- Mondo Disposable Piping Bags
- 200g Dulce De Leche (store bought is fine)
- 200g of Roberts Bakers Jam
- Wilton Decorating Brush Set
- Wilton Piping Tip, Round 1A
- Mondo Fondant Rolling Pin (small)
- Mondo Cake Board (marble)
- OTT Bling Sequins
- OTT Bling Ball Mix
- OTT Bling Jimmies
- OTT Dual Tip Black Pens
- Wilton Icing Colour, White
- Edible Craft Icing Smoother
- Wilton Angled Spatula
- Wilton Dab-N-Hold Edible Adhesive
- Spotlight Gold Happy Birthday Candles

Steps
- Working on a cake turntable, secure the bottom layer of cake onto a cake board with a small dollop of buttercream and then gently twist in place. Use a piping bag lined with a round piping tip and fill with buttercream.
- Pipe a 1cm buttercream border around the top edge of the cake layer and finish with a buttercream spiral in the middle. Use a piping bag filled with dulce de Leche to fill in the remaining centre. Refrigerate for 10 minutes if needed (if buttercream appears soft and bulging). Gently place the next cake layer on top.
- Repeat this process (alternating between dulce de leche and raspberry jam filling) until you have used all the cake layers, leaving the final top layer uncovered.
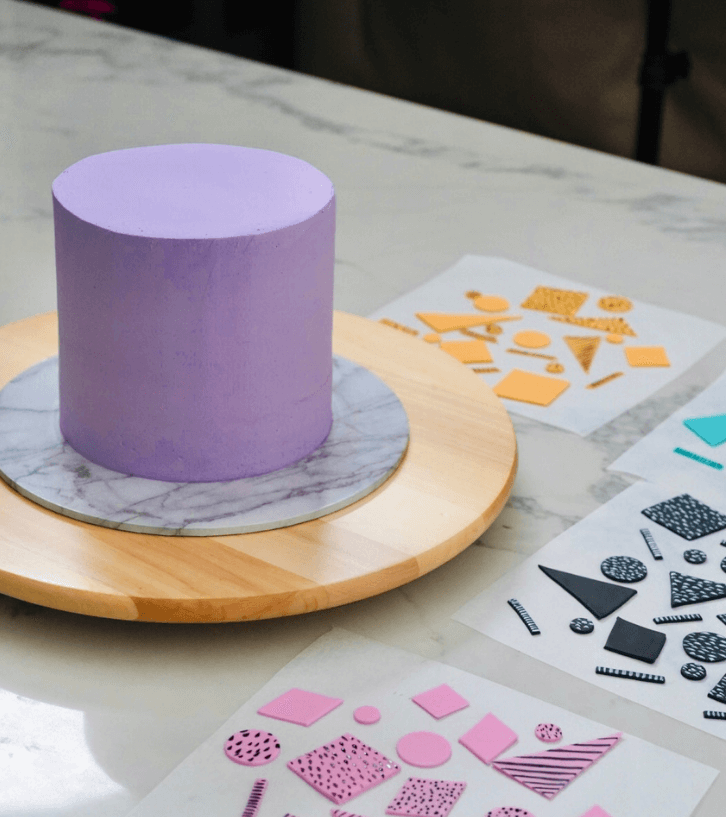
- Use an offset spatula to gently crumb-coat the cake with a thin layer of buttercream. Apply another thicker layer of buttercream to the cake and use a cake scraper to smooth the side. Finally, use an offset spatula to smooth the top of the cake by gently pulling inwards from the outer edge of the cake into the centre, cleaning the excess buttercream off the spatula with each scrape. Place the cake in the refrigerator until needed.
- To make decorations, roll out each fondant colour to around 2 mm (1/16 inch) thick (I use a dusting of cornflour to prevent any stickiness). Cut into shapes using a ruler and a small, sharp knife. For the circles, I used both ends of the piping tip (again, dust with cornflour to prevent stickiness).
- Allow the fondant shapes to dry slightly (this should take only about 20 minutes in dry conditions) and use edible paints and markers to decorate.
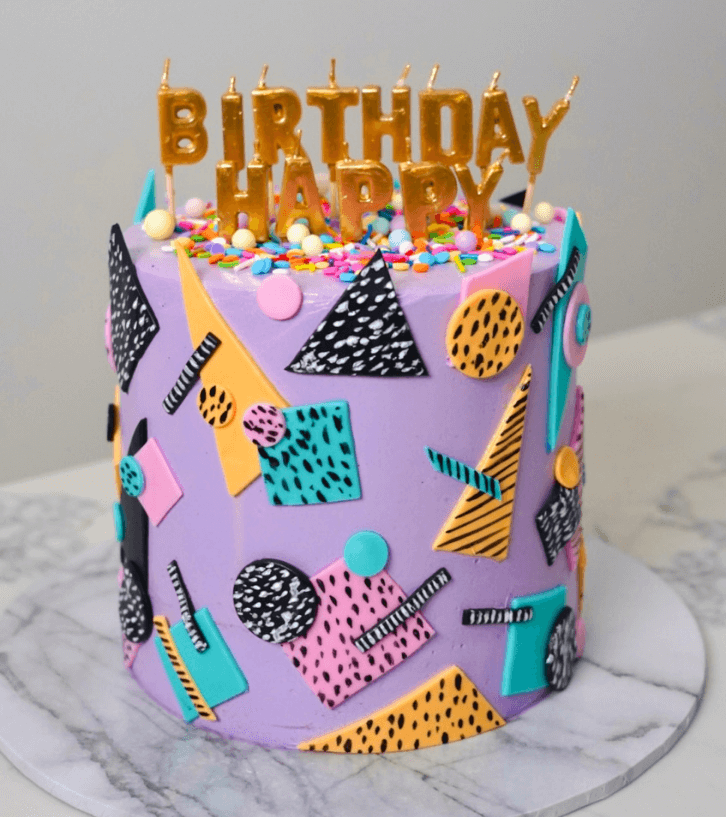
- To stick the fondant shapes onto the cake, use a very thin layer of edible glue and press them very gently into the cake (less is more when it comes to sugar glue and fondant). Feel free to use your own creativity with the design here, but I like to layer the shapes over one another to create a graphic 80s pattern.
- To finish, decorate the top of the cake with an assortment of sprinkles, and the Spotlight Happy Birthday celebration candles!

Storage
The cake can be refrigerated for up to 4 days. It is best served at room temperature.
Shopping List
You can get everything you need to make Kat's epic party cake at Spotlight. Add Kat's shopping list below to your cart or browse our extensive baking range.
- Satin Ice White Fondant (buttercream flavoured)
- Satin Ice Baby Pink Fondant (vanilla flavoured)
- Satin Ice Black Fondant (vanilla flavoured)
- Satin Ice Baby Blue Fondant (vanilla flavoured)
- Mondo Disposable Piping Bags
- Mondo Fondant Rolling Pin (small)
- Mondo Cake Board (marble)
- OTT Bling Sequins
- OTT Bling Jimmies
- OTT Dual Tip Black Pens


