 | ||
| Your browser is not supported. | ||
|
Please browse our site using any of the following options:
| ||
How to Upcycle a Lampshade

During Make It March at Spotlight, you'll learn how to create your very own arts and crafts projects from some of the biggest creative talent in Australia. Last week, Tonia Todman and Jimmy Rees stopped by to show you how to make paper poppies with some step-by-step instructions. As this week is all about sewing and fabrics, Tonia Todman has returned once again to show us how to upcycle old lampshades and turn them into something new and unique!
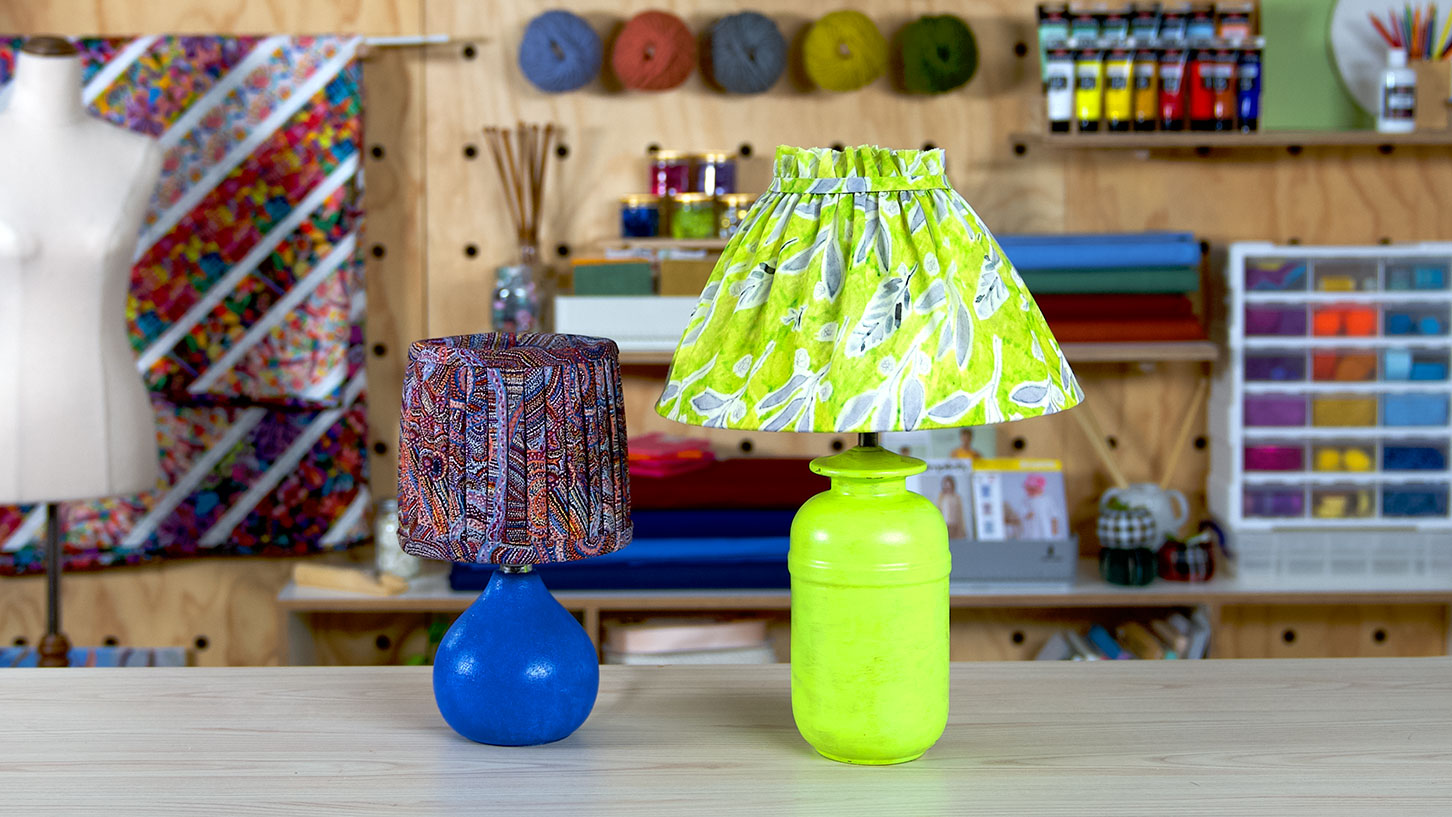
Gathered Lampshade
What You'll Need:
- Lampshade and base
- Lightweight fabric such as cotton or linen, enough to cover your chosen lampshade and create the bias strip (see how to calculate for your lampshade amounts below)
- Fabric scissors
- Sewing machine and matching thread
- Iron and ironing board
- Paint and brushes optional for base
- PVA glue and (optional) glue gun
Instructions:
Step 1 - To create your pattern piece, measure the circumference and height of your lampshade and write them down. You'll use these measurements to create a rectangle pattern piece. Times the circumference measurement by 2 to get the length of the rectangle and add 10cm to the height measurement to get the height and width of the rectangle pattern.
Step 2 - Rule out the pattern piece onto the fabric and cut out with fabric scissors.
Step 3 - Using the sewing machine, sew a row of gathering stitches along one long edge of the fabric, 3-4cms in from the cut edge.
Step 4 - Draw up the gathering by pulling on the bobbin thread (the underneath thread) and then use pins to secure the fabric onto the lampshade. Once secured, you can maneuver the gathered fabric into position so it is evenly spaced across the lampshade base. Once you're happy, use some watered down PVA glue to glue in place. Leave the pins in to help hold it in position while the glue dries.
Step 5 - While the glue is drying, it's time to work on the bias strip. To create the bias strip pattern, measure the top circumference of the lampshade and add 10cm to this length. This will be the length of the pattern piece and the height will be 5cm. Fold the piece in half and press with an iron, then fold the raw edges of the strip into the centre fold and press. Lastly, fold the piece in half again so the pressed folded edges meet equally in the middle and press. Your bias binding is now ready to sew.
Step 6 - Sew along the raw edges with a 3mm seam allowance to secure the binding in place. Next, wrap the bias strip around the top of the lampshade and overlap the ends. Glue in place.
Step 7 - Gently pull the fabric downwards to the bottom of the lampshade and trim off any excess fabric, leaving 1.5cm of fabric to turn under. Again use some watered down PVA glue to glue the inside lower edge of the lampshade and stick the fabric to it.
Optional: Create another pressed bias strip and glue it to the base edge of the lampshade to conceal the wire edge.
Pleated fabric lampshade
What You'll Need:
- Lampshade and base
- Lightweight fabric such as cotton or linen, enough to cover your chosen lampshade and create the bias strip (see how to calculate for your lampshade amounts below)
- Fabric scissors
- Sewing machine and matching thread
- Iron and ironing board
- Paint and brushes optional for base
Instructions:
Step 1 - For this lampshade you will need a strip of fabric 2 x the circumference of the lampshade plus 20cm, and the width is the depth of shade + 10cm.
Step 2 - Rule out the measurements onto your fabric and cut out with fabric scissors.
Step 3 - Lay the fabric flat on your ironing board and begin to pleat the fabric and press in place. Depending on the shape of your lampshade, your pleats may be slightly narrower at one end.
Step 4 - Once the fabric is pleated and pressed, pin it in place on the lampshade. Secure the top and bottom of the pleats with glue. Once dry, trim the fabric so it sits evenly with the edge of the lampshade.
Step 5 - Now it's time to create the bindings. For the upper and lower binding strips, cut out a piece of fabric 10cm wide x circumference of your lampshade + 10cm.
Fold the fabric piece in half lengthwise and press with an iron, then fold the raw edges of the strip into the centre fold and press. Lastly, fold the piece in half again so the pressed folded edges meet equally in the middle and press. Your bias binding is now ready to use.
Step 6 - Place the binding evenly over and around upper and lower edges on the lampshade and adjust to fit firmly. Pin ends together where they will overlap, stitch together and trim the excess. Repeat for the other binding piece, then place both bindings around the edges and adjust smoothly. These may be lightly glued to secure in place. Your lampshade is now complete!
Recreate your own version of an upcycled lampshade and upload it to Instagram with #makeitwithspotlight for your chance to win a $250 Spotlight voucher!


